Internationalization
Perform the following procedures to apply internationalization features to your Portal.
Add a new language
-
Access the Portal Admin Console and log in using the credentials provided.
-
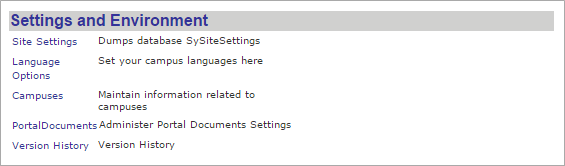
In the Settings and Environment tab, select Language Options.
-
You will be redirected to the Language.aspx page.
-
Enter the New Language and Language Code and select Add.

-
Verify that the newly added language is activated for the Portal.
Activate or deactivate a language
-
Access the Portal Admin Console and log in using the credentials provided.
-
On the Settings and Environment tab, select Language Options.
-
You will be redirected to the Language.aspx page.
-
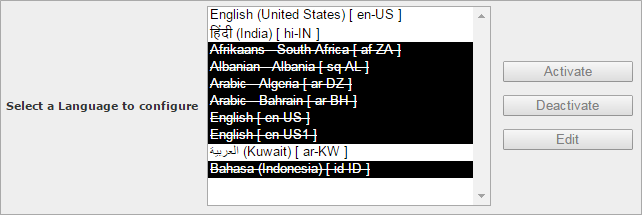
Select a language from the list of inserted languages.
-
Select Activate to activate a language or select Deactivate to deactivate a language. Once deactivated, the language will be removed from the language drop-down in the Portal. End-users will have to reload the page in the Portal to see the changes.
Change the text of labels and titles
These changes need to be carried out in all the language resource files.
-
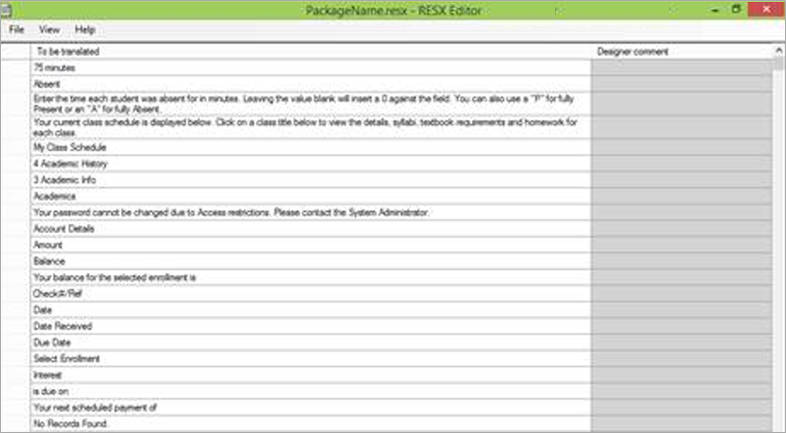
Using a text editor such as WordPad or Notepad™, open the following file:
App_GlobalResources\PackageName.resx.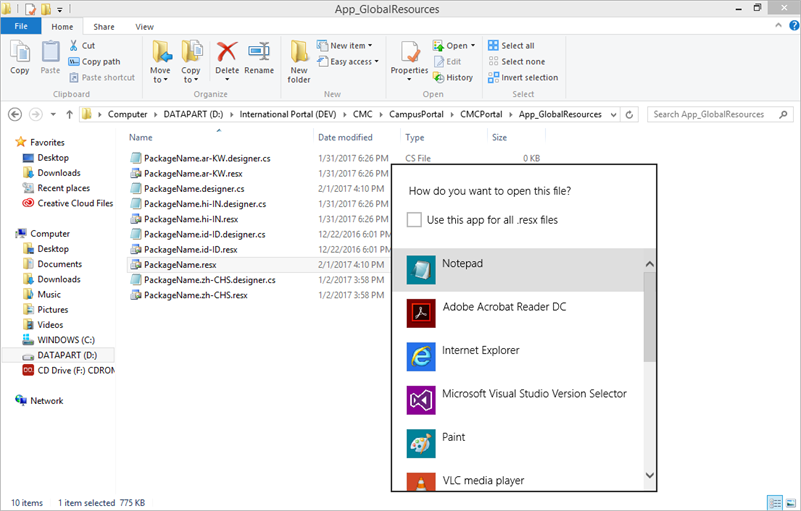
-
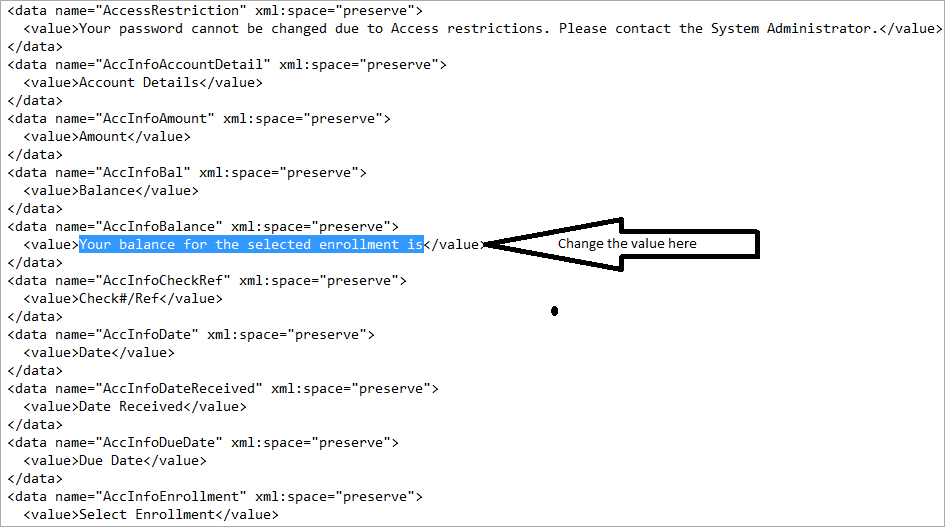
Change the labels and titles by editing the text within the <value>... </value> tags.
You can open the packageName.Resx file in any open-source resource file editor and convert the values in a particular language. Save the file as per the naming convention <PackageName.Languagecode.resx>.
Add/Change Configurable Values from the Portal Admin Console in the Resource File
These changes will apply only to the resource files for languages other than English. For English, the configurable values will always be retrieved from the Config Tool Settings.
When a student or staff member visits the application, based on the default language, the respective resource file is loaded into the application using Resource Manager, and all labels are bound.
-
Log in to the Portal Admin Console and navigate to Site Settings.
-
Locate UseResourceFileForDBValues and set the value to true or false.
If UseResourceFileForDBValues is set to true, the page title, description, portal messages, page-wise messages, and security questions configured in the Portal Admin Console are retrieved from the resource files.
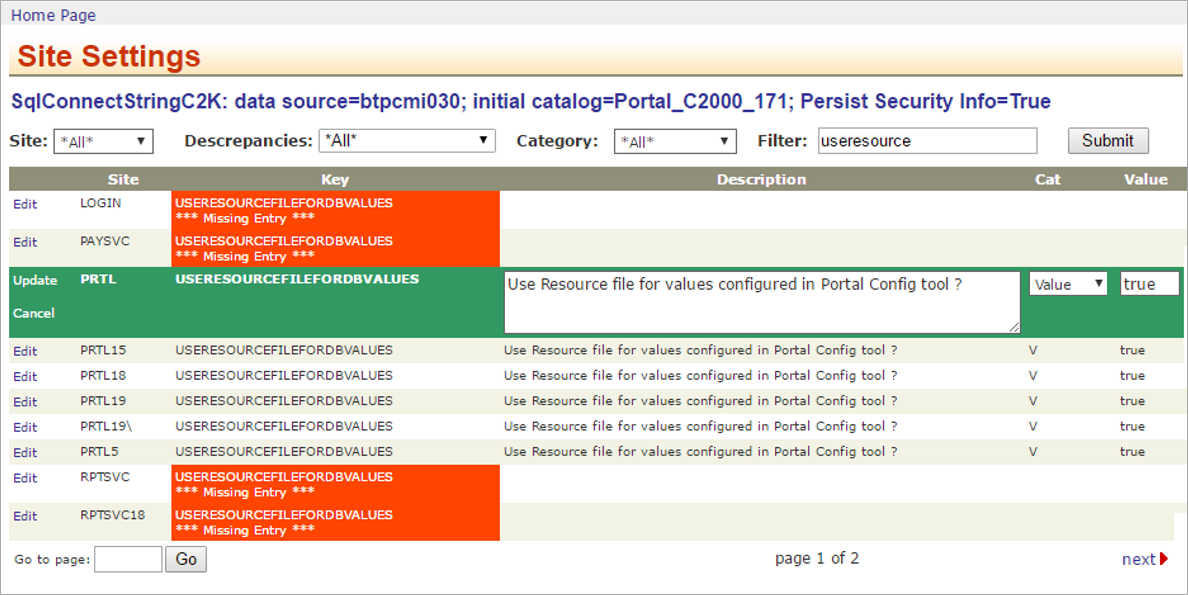
The following are the conventions of various configurable items in the resource file when UseResourceFileForDBValues is set to true.
-
Title and descriptions:
To add/retrieve title and descriptions from the resource file, the convention is “Title_PageTitle_CampusID_wpPageID” and “Description_PageTitle_CampusID_wpPageID”.
The PageTitle, CampusId, and wpPageID can be retrieved from the wpCampusPage table in the Portal database.
Example
“Title_AccountInformation_1_9” and “Description_AccountInformation_1_9”
-
Portal messages:
To add/retrieve portal messages from the resource file, the convention is “MessageName_CampusId”.
Example
“Login_Error_1”
-
Page-wise messages:
To add/retrieve page wise messages from the resource file, the convention is “MessageKey_CampusId_PageID”.
Example
“FacultyDesc_1_1”
-
Security questions:
To add/retrieve Security questions from the resource file, the convention is “SecurityQuestion_Role_SecurityQuestionId”.
Example
“SecurityQuestion_APPL_12”
For the list of configurable values from the Portal Admin Console along with the conventions described above, see Config Tool Messages in the Resource File.
System-defined Locales
Anthology Student 25.2 0 introduces the following system-defined locales:
- English (United States)
- Spanish (Latin America)
- French (Canada)
Anthology Inc. maintains the translations for the system-defined locales.
For example, let's say we have a system-defined culture of Spanish (ES). The default resx file for this culture will be PackageName.es-ES.resx as per the naming convention to be used.
System Behavior
When a modified file is uploaded in the Portal Resource File for a certified culture, the user can delete the modified file and observe that this culture is still in the system, with Delete and Replace options showing blank.
Backend Logic
-
If a user modifies this culture, the uploaded file name would be PRTL-900066.es-ES.resx per the multi-tenancy of the environment.
The system maintains both resx files, the system-defined one and the modified uploaded one.
-
The system-defined locales are visible at the first installation of the Portal with the translated .resx files
-
At the time of upgrade:
-
These files will receive the changes/modifications.
-
If any of these locales have modified resx files, the modified files should not get written off (Cloud upgrade team's responsibility)
-
Modifications in the Portal Resource File Screen
-
The user can download all the system-defined files using the Download System Default Resource File button.
-
When a user selects the button, a pop-up prompts the user to choose the right resx file to download.
External Link Translation
Anthology Student 25.2 0 introduces the ability to translate External Pages Page Title, URL Title, and Description to any language through the resource files.
Prerequisite
To translate the external pages link, follow the below procedure:
-
Log in to the Portal Configuration Tool and go to Menu Groups > External Links.
-
Configure the below items available on the page:
-
Link Title
-
Description
-
Target URL Name
-
Launch as Pop-up must be set to Yes.
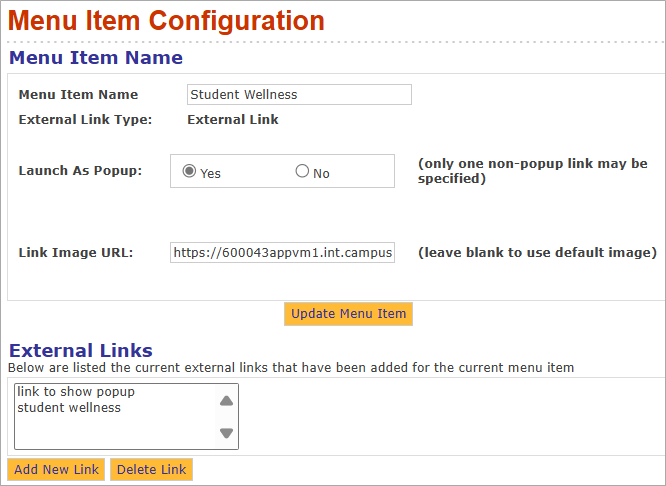
The Link Title and Description are available for translation.
Steps to Translate External Links from the Portal Admin Console in the Resource File
The changes in the resource file must be done by the customer or Professional Services team.
The Title and Description added for each of the External Links in the custom Menu Items must be exposed to the resource (.resx) file.
Inside the resource file, the convention for translation is:
-
Title_WpMenuLinksCulture.WpMenuLinksID_ReplaceTheIDHere
-
Description_WpMenuLinksCulture.WpMenuLinksID_ReplaceTheIDHere
-
URLTitle_WpMenuLinksCulture.WpMenuLinksID_ReplaceIDHere
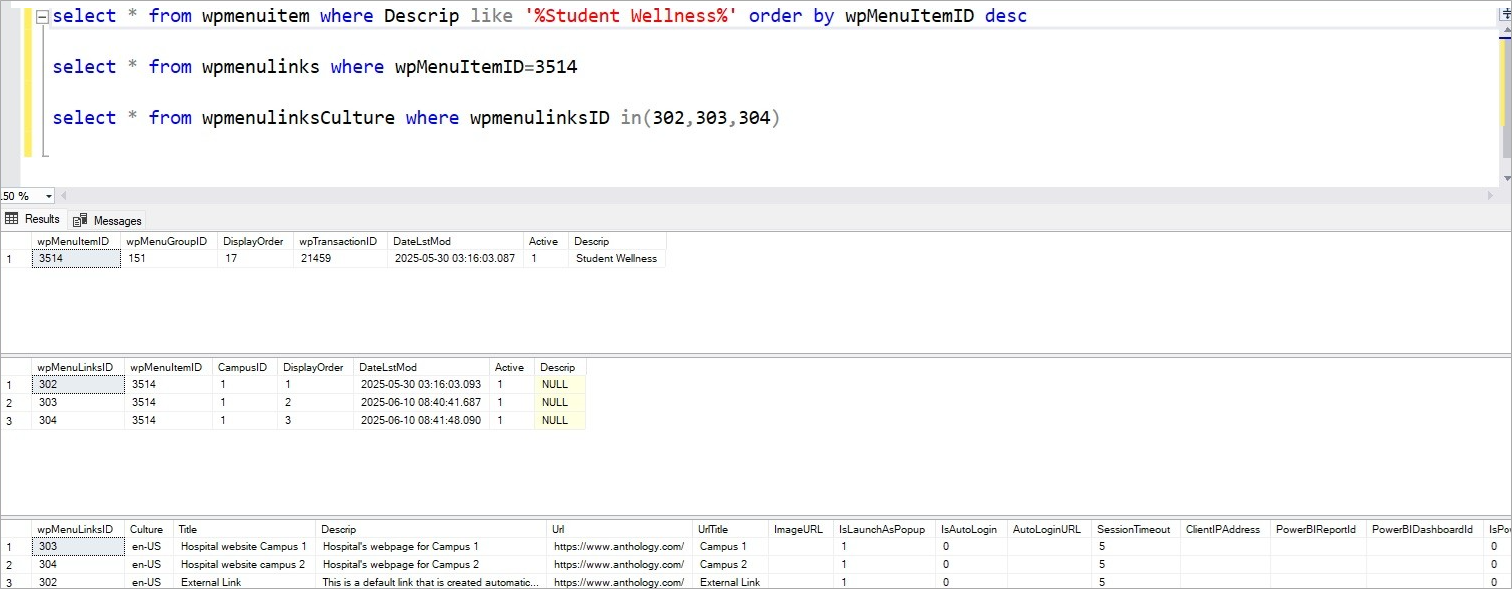
Finding the Page ID for Translations of External Page Title, Description, and Target URL Name
-
In the Portal database, query the table wpMenuItem.
-
Look for the External Link entity (match the Description column) that you want to translate and copy the wpMenuItemID.
-
Query the wpmenulinks table for the wpMenuItemID copied in the previous step.
This will give you the wpMenuLinksID for the section in your External Page.
-
Query the wpmenulinksCulture table with the wpmenulinksId found in the previous query.
-
Add the external link keys and value translation in the desired files.
The name of the menu must be specified without spaces, e.g. "StudentWellness".
<data name="StudentWellness" xml:space="preserve">
<value>Student Wellness</value>
</data>
Steps to Translate External Link Sub Link Title
Add the following in the resource file:
Title_WpMenuLinksCulture.WpMenuLinksID_ReplaceTheIDHere
Example : <data name="Title_WpMenuLinksCulture.WpMenuLinksID_1810" xml:space="preserve">
<value>Student Wellness Homepage</value>
</data>
Steps to Translate External Link Sub Link Description
Add the following in the resource file:
Description_WpMenuLinksCulture.WpMenuLinksID_ReplaceTheIDHere
<data name="Description_WpMenuLinksCulture.WpMenuLinksID_1810" xml:space="preserve">
<value>Student Wellness assists students with hardships to promote student well-being and maintain the integrity of BYU-Pathway worldwide</value>
</data>
Steps to Translate External Link Sub Link Url Title
Add the following in resource file:
URLTitle_WpMenuLinksCulture.WpMenuLinksID_ReplaceIDHere
<data name="URLTitle_WpMenuLinksCulture.WpMenuLinksID_1810" xml:space="preserve ">
<value>Learn More</value>
</data>
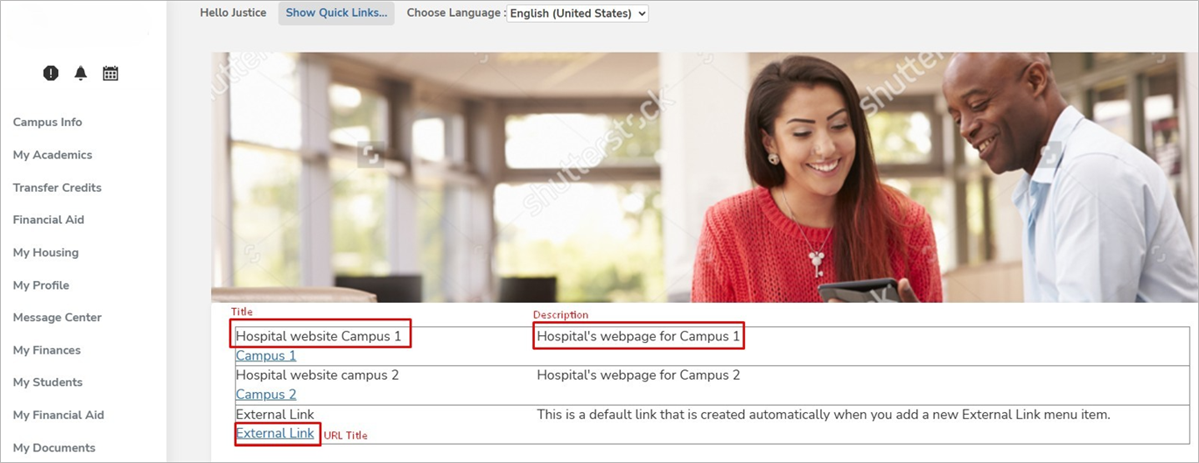
Once changes are made to the resource file, log in to Student Portal, and select the language. The Title and Description are now available in the selected language.