Self Service Branding for Azure Hosted Environments
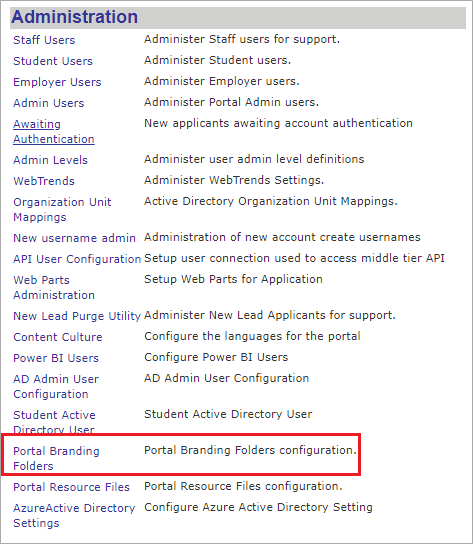
With Anthology Student 22.0 and later, you can manage the branding on your own by using Portal Admin Console (Admin Console > Administration > Portal Branding Folders).
With the self-service branding being hosted on Azure environments, you can:
-
Configure the Branding Folder at URL/Site or Campus Level
-
Download the default out-of-the-box branding folder available at the global /default branding folder
-
Download or upload the customized Branding Folders at URL/Site or Campus Level
-
Modify the branding files/images.css using the upload or delete file option
To manage the branding for Azure Portal environments:
-
Log in to the Portal Admin Console and go to Admin Console > Administration > Portal Branding Folders.
-
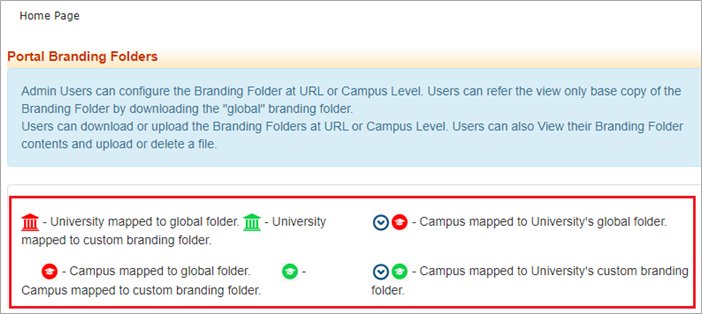
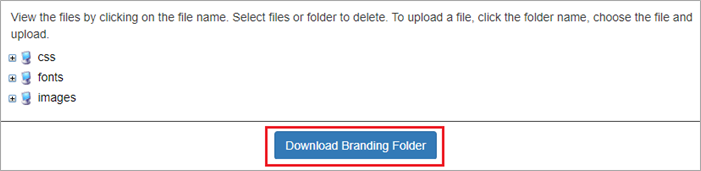
The Portal Branding Folders Home page is displayed with various icons that depend on the action performed.
-
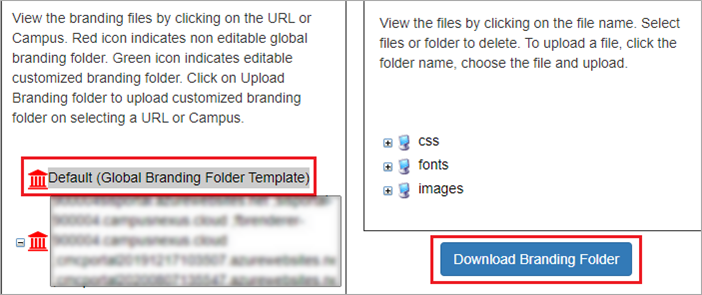
You can use the default branding folder to download out-of-the-box branding files provided by Portal.
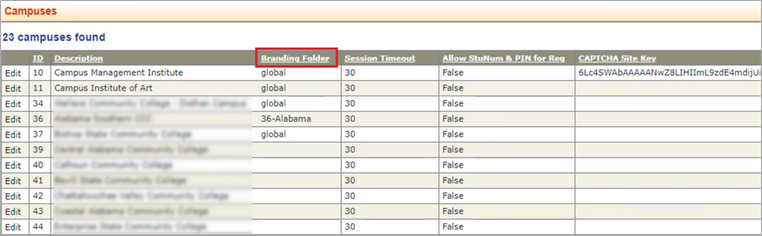
Before you start uploading the branding folders to campuses, you must have:
-
Visited Admin Console > Settings and Environment > Campuses
-
Updated all campuses branding folders with pre-existing customized branding folder name or global
-
-
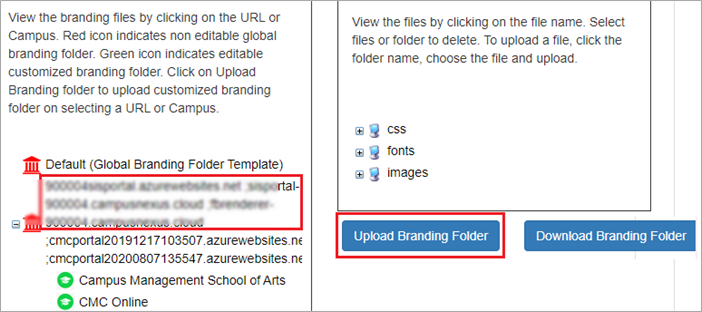
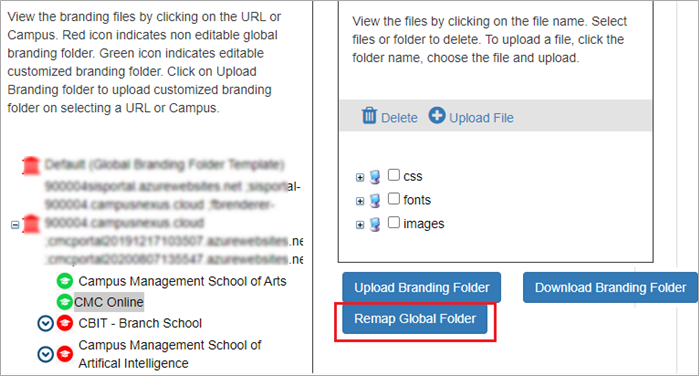
If you want to download a pre-existing customized folder from URL/Campus level, select the Download Branding Folder button.
URL/Site and Campus tag is red
 when no customized file is uploaded.
URL/Site and Campus tag is green
 when a customized file is uploaded.
Procedure to Upload Branding Folders at URL or Campus Level
You can upload customized branding folder against a selected URL/Site or Campus.
-
On the Portal Branding Folders Home page, select the URL/Site or Campus.
-
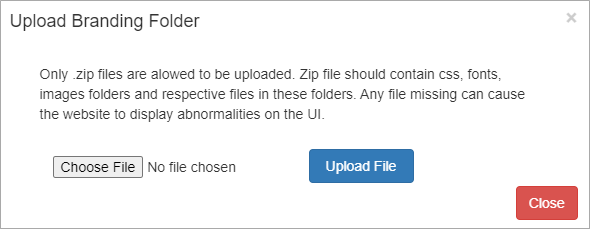
Select the Upload Branding Folder button. The Upload Branding Folder dialog box is displayed.
-
Select the required file and upload. Once the file is uploaded, the URL/Site tag changes from red to green.
You must have cleared the cache to view the branding changes.
You can upload only zip folders. While Files above 4 MB can be uploaded, you cannot upload folders that exceed the size 4 MB. You can select only one folder at a time to select a file.
Procedure to Delete and Upload Files
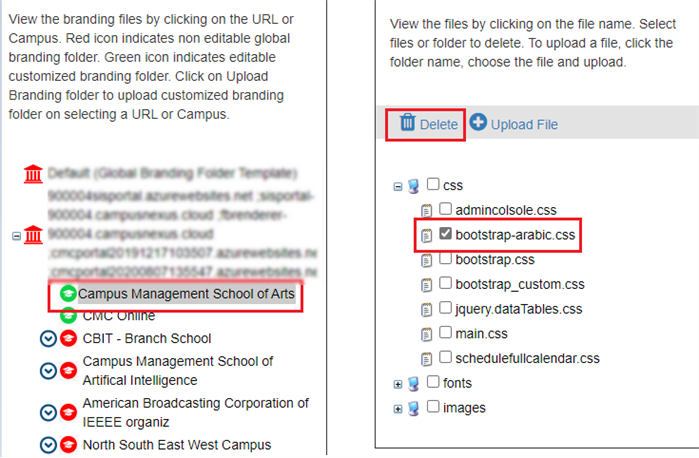
You can use the Delete button to delete files from a customized branding folder only.
-
Select the green icon
for the selected campus. -
Select the file you want to delete.
-
Select the Delete button. A confirmation dialog is displayed.
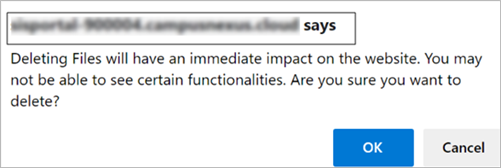
-
Select OK. The file is deleted.
-
If you want to upload any additional css or image file, select the Upload File button.
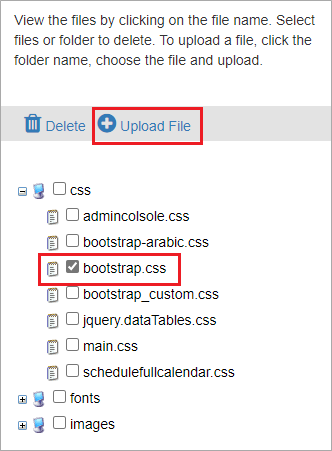
You can use the Upload File button only when a folder (css, fonts, or images) is selected.
Remap to Default Branding Provided by Portal
If you want to apply the default branding provided by Portal for a campus that has customized branding, you can use the Remap Global Folder option for a campus highlighted as green or red  . This turns the tags back to red and the global branding files are applied at the campus level.
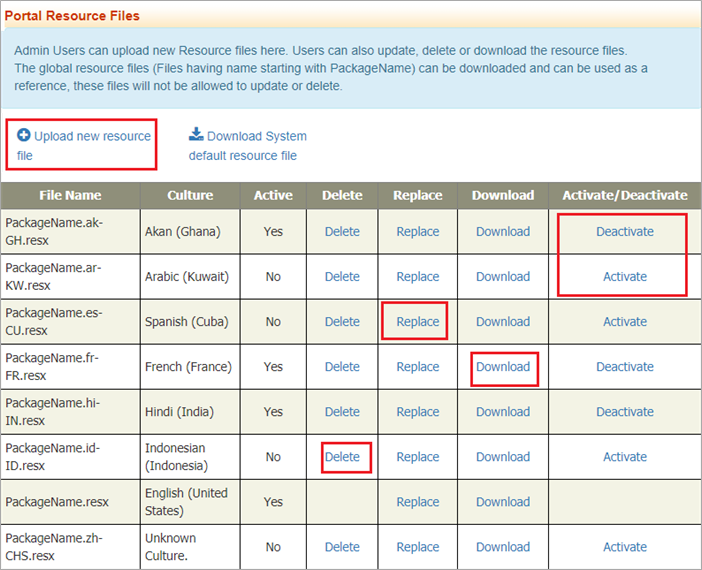
Manage Resource Files
You can manage your Resource Files on the Azure environment by using Portal Admin Console ( Admin Console > Administration > Portal Resource Files.).
-
Log in to the Portal Admin Console and go to Admin Console > Administration > Portal Resource Files.

-
The Portal Resource Files Home page is displayed.
You can use this page to:
-
Upload a new resource file
-
Activate or deactivate a particular culture available as language option on Portal
-
Replace an existing resource file with a customized file
-
Download the PackageName.resx, along with all the other resource files
-
Delete any resource file, except PackageName.resx
-