Financial Aid Offer
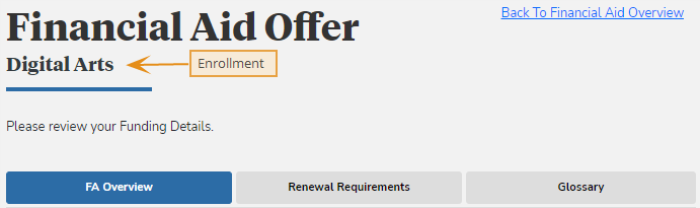
The Financial Aid Offer page is displayed when you have one enrollment and select the Financial Aid Overview menu item or when you have multiple enrollments and then select the View Financial Aid Offer button for a specific enrollment. The FA Overview tab is highlighted. You can return to the Financial Aid Overview page by selecting the Back to Financial Aid Overview link at the top of the page or selecting the Financial Aid Overview menu item.
You can select the Renewal Requirements tab at the top of the page to review the institution's requirements for renewing the different types of financial aid (grants, loans, etc.) in your next year of study.

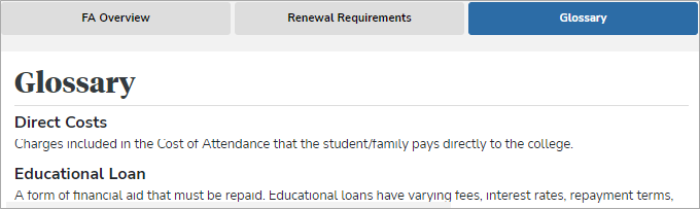
Select the Glossary tab at the top of the page to view the glossary of financial aid terms configured by the institution as part of your financial aid offer.
Select an Academic Year
First, you need to select an academic year. This selection determines the data that will be displayed on the page.
The academic year is defined by its start date and end date. By default, the drop-down displays the academic year associated with the current date and lists additional academic years in descending order.
You can then determine the status of the financial aid for the selected year. The status value indicates whether your financial aid for the selected academic year is Packaged - Ready for Approval, Fully Packaged, Not Packaged, etc.
-
If financial aid funds are available to you for the selected academic year, the page will display additional sections with details about the cost of attendance and the financial aid offers. You can then accept or decline specific funds or all funds. The sections that are displayed will depend on the information you provided in your application (FAFSA) and the financial aid offered and packaged by your institution.
-
If there are no funds available or packaged for the selected academic year, the following message is displayed: "There is no Financial Aid Offer available yet for the selected Academic Year. Please contact your Institution if you have any questions or need to inform us of a change in your status."
Select a Housing Option
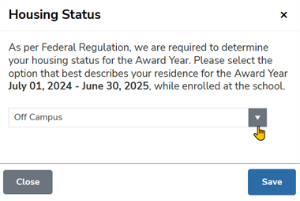
If you are enrolled in multiple program versions and have not selected a housing option, the Financial Aid Offer page displays the Housing Status pop-up. Select one of the following options: On Campus, Off Campus, or With Parents. The pop-up is not displayed if you have already selected an option.
The housing status field is pre-populated if your housing status is already available from a prior award year. This also applies when you select a program version of a future award year. If you change and save the housing status, the updated value will be populated for the academic years in the applicable award year.
After you have selected and saved an option, the Financial Aid Offer displays the housing status for the academic year.

When you have already updated the housing status via the housing status pop-up or the housing status was retrieved from a previously selected housing status value, the page displays an information icon next to the housing status value with a tooltip. If you want to change your housing status, you need to contact your financial aid advisor.

Need Help?
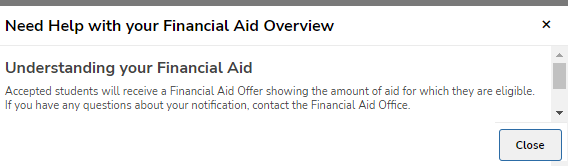
Select the Need Help? button if you want to learn more about the financial aid process. Scroll down to view the help information provided by your institution. Select the Close button to hide the help content.
Review the Page Sections
The Financial Aid Offer page displays the following sections as configured by the institution:
The Summary section displays your final Estimated Remaining Cost after Grants & Scholarships, Loans, and Other Funding have been subtracted from the institution's Estimated Direct Costs. Indirect Costs to the institution (e.g., food & housing, transportation) and Federal Work-Study are not considered while calculating the Estimated Remaining Costs.
The Estimated Remaining Costs are:
-
Recalculated and updated when costs, fund statuses, or fund amounts are changed by the institution
-
Recalculated and updated when you accept or decline funding options
-
Recalculated and updated when you reduce a loan amount on this page and have not submitted it
-
Reset to the actual/previous values when you refresh the page and the new calculation was not saved
When you select the Submit Funds button at the bottom of the page to submit your financial aid selections, the values are saved to the database and sent to the institution for further processing.

The Cost of Attendance (Estimated) section lists the costs for your program of study for the selected academic year. These costs include direct costs to the institution (for example, tuition, application fees, books & supplies) as well as indirect costs (for example, food & housing, transportation, and personal expenses). The Estimated Annual Cost of Attendance Direct + Indirect Costs box indicates the total of all expenses that you need to cover for your program of study.

This section displays the Accept All Funds and Decline All Funds buttons if your institution has configured the page to show these options. When the buttons are displayed, you can accept or decline all funds in a single action rather than accepting or declining each fund listed on the Financial Aid Offer page.

Upon selecting Accept All Funds or Decline All Funds, you will have an opportunity to review your funding information. The funding information is displayed in the "Submit Funds" pop-up at the top of the page and includes a grid with the following details:
-
Funding Description
-
Fund Status (Accepted Amounts and Declined Amounts)
-
New loan amount if you opted to decrease the offered amount
The grid will not list details of funds that you previously accepted or declined.
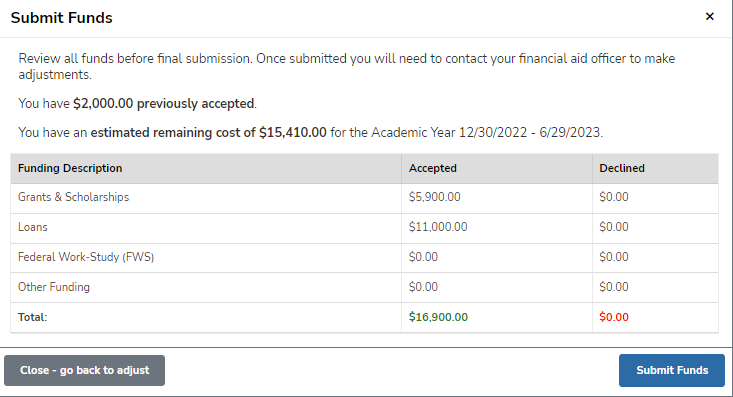
To proceed with the final submission, select the Submit Funds button. To return to the Financial Aid Offer page, select the Cancel - go back to adjust button.
When you select Submit Funds, the following message appears: 
Once you've submitted the funds:
-
The Accept and Decline buttons will no longer be displayed for the individual funds on the page
-
The fund statuses will be updated to Accepted or Declined depending on whether you selected Accept All Funds or Decline All Funds.
-
For declined funds, the Net Amount, Fee Amount, and Gross Amount/Total Amount will be updated to zero (0).
Select  or
or  to expand or collapse all the disbursement details for the fund sections below. You can also expand or collapse the disbursements within the fund sections individually.
This section is displayed only if this type of financial aid is offered and packaged by your institution.
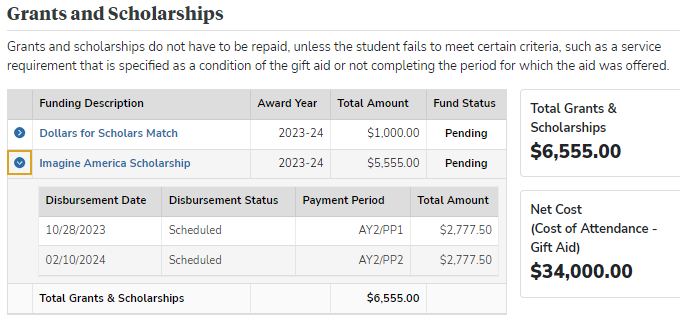
The Grants & Scholarships section lists individual funds that are included in the Gift Aid package and displays the total amount of Gift Aid. The funds are applied to the period listed in the Award Year column. You can Accept or Decline each fund separately or all funds.
Select the expand icon (![]() ) to review the disbursement details, which indicate the Disbursement Date, Disbursement Status, Term (for term-based academic calendars) or Payment Period (for non-term-based academic calendars), and the Total Amount for each Term/Payment Period. If the grant or scholarship is canceled/declined, the disbursement schedule is not displayed.
) to review the disbursement details, which indicate the Disbursement Date, Disbursement Status, Term (for term-based academic calendars) or Payment Period (for non-term-based academic calendars), and the Total Amount for each Term/Payment Period. If the grant or scholarship is canceled/declined, the disbursement schedule is not displayed.
The Disbursement Status can be Scheduled, Paid, or Return to Fund Source.
-
Scheduled indicates that the disbursement is pending to be paid to the student on the indicated Disbursement Date.
-
Paid indicates that the disbursement was paid to the student on the indicated Disbursement Date.
-
Refund to Fund Source indicates that the disbursement was refunded to the fund source on the indicated Disbursement Date.
When a fund is distributed over multiple Academic Years, an icon (![]() ) with the following tooltip is displayed: “This Fund Source has multiple disbursements spanning other Academic Years.” The disbursement details for the fund will show only the disbursements for the Academic Year you selected at the top of the page. When you select Accept and select Submit Funds, the
) with the following tooltip is displayed: “This Fund Source has multiple disbursements spanning other Academic Years.” The disbursement details for the fund will show only the disbursements for the Academic Year you selected at the top of the page. When you select Accept and select Submit Funds, the ![]() icon also appears in the Submit Funds pop-up, and the full amount for the selected Academic Year is shown.
icon also appears in the Submit Funds pop-up, and the full amount for the selected Academic Year is shown.
The Net Cost (Cost of Attendance - Gift Aid) tile indicates the amount you owe for your program of study after subtracting the grants and scholarships.
The Loans & Work-Study section lists various types of Federal Direct Loans available to students and parents, as well as Federal Work-Study programs.
This section is displayed only if this type of financial aid is offered and packaged by your institution.
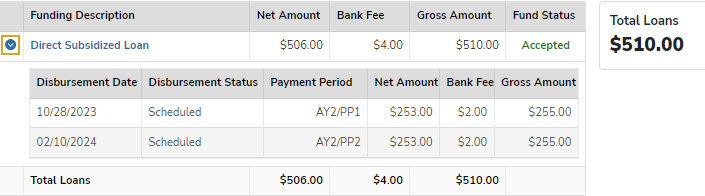
The Loans section lists subsidized and unsubsidized Federal Direct Loans and Institutional Loans for students. You can Accept or Decline each loan separately or all loans.
Before you accept or decline a loan, you can reduce the value in the Gross Amount field. After you have edited the Gross Amount, select outside of the grid to view the recalculated bank fees and total loan values, as shown in the animation below.

You cannot set the Gross Amount value to $ 0.00 or increase the value over the maximum amount that you are eligible for based on your FAFSA details. See the validation example in the image below.

To reset the original loan amount values in your financial aid offer, refresh the page in your browser using the refresh button  or a keyboard shortcut such as F5 or Ctrl + R. Once you select the Submit Funds button at the bottom of the page, the values are saved to the database and sent to the institution for further processing.
Select the expand icon (![]() ) to review the disbursement details, which indicate the Disbursement Date, Disbursement Status, Term (for term-based academic calendars) or Payment Period (for non-term-based academic calendars), Net Amount, Bank Fee, and the Gross Amount for each Term/Payment Period. If the loan is canceled/declined, the amounts are set to zero (0), and the disbursement schedule is not displayed.
) to review the disbursement details, which indicate the Disbursement Date, Disbursement Status, Term (for term-based academic calendars) or Payment Period (for non-term-based academic calendars), Net Amount, Bank Fee, and the Gross Amount for each Term/Payment Period. If the loan is canceled/declined, the amounts are set to zero (0), and the disbursement schedule is not displayed.
The Disbursement Status can be Scheduled, Paid, or Return to Fund Source.
-
Scheduled indicates that the disbursement is pending to be paid to the student on the indicated Disbursement Date.
-
Paid indicates that the disbursement was paid to the student on the indicated Disbursement Date.
-
Refund to Fund Source indicates that the disbursement was refunded to the fund source on the indicated Disbursement Date.
This section is displayed only if this type of financial aid is offered and packaged by your institution.
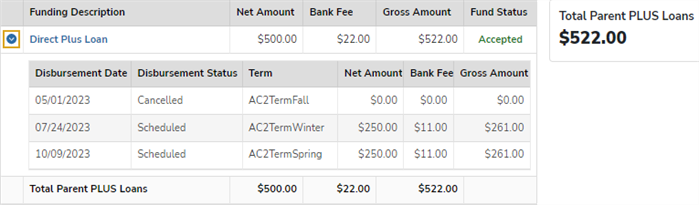
The Parent PLUS Loans section lists Federal Loans that are available to parents of dependent undergraduate students. You can Accept or Decline each loan separately.
Before you accept or decline a loan, you can reduce the value in the Gross Amount field. After you have edited the Gross Amount, select outside of the grid to view the recalculated bank fees and total loan values.
You cannot set the Gross Amount value to 0. You cannot increase the value over the maximum amount that you are eligible for based on your FAFSA details.
To reset the original (actual/previous) Gross Amount values, refresh the page before you select Accept, Decline, or Submit Funds.
Select the expand icon (![]() ) to review the disbursement details, which indicate the Disbursement Date, Disbursement Status, Term (for term-based academic calendars) or Payment Period (for non-term-based academic calendars), Net Amount, Bank Fee, and the Gross Amount for each Term/Payment Period. If the loan is canceled/declined, the amounts are set to zero (0), and the disbursement schedule is not displayed.
) to review the disbursement details, which indicate the Disbursement Date, Disbursement Status, Term (for term-based academic calendars) or Payment Period (for non-term-based academic calendars), Net Amount, Bank Fee, and the Gross Amount for each Term/Payment Period. If the loan is canceled/declined, the amounts are set to zero (0), and the disbursement schedule is not displayed.
The Disbursement Status can be Scheduled, Paid, or Return to Fund Source.
-
Scheduled indicates that the disbursement is pending to be paid to the student on the indicated Disbursement Date.
-
Paid indicates that the disbursement was paid to the student on the indicated Disbursement Date.
-
Refund to Fund Source indicates that the disbursement was refunded to the fund source on the indicated Disbursement Date.
Once you select Accept or Decline for a specific loan or select the Submit Funds button at the bottom of the page, the values are saved to the database and sent to the institution for further processing.
This section is displayed only if this type of financial aid is offered and packaged by your institution.
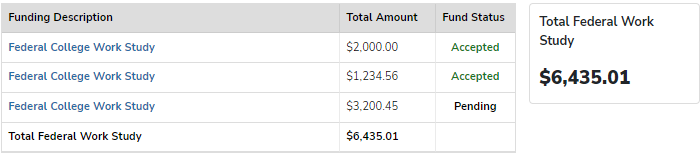
The Federal Work-Study program provides part-time employment to students attending institutions of higher education. You can Accept or Decline the Federal Work-Study funding.
This section is displayed only if this type of financial aid is offered and packaged by your institution.
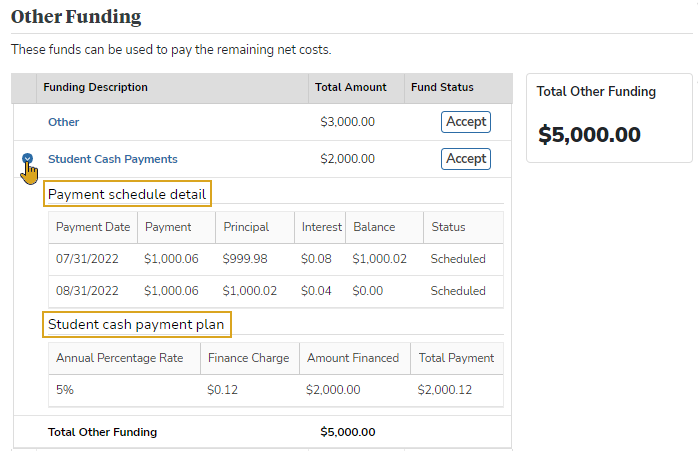
The Other Funding section lists financial aid that can be used to pay the remaining costs. You can Accept or Decline each fund.
For funds of type student payment or cash, you can expand (![]() ) or collapse (
) or collapse (![]() ) each line item to view the Payment schedule detail and the Student cash payment plan.
) each line item to view the Payment schedule detail and the Student cash payment plan.
The Payment schedule detail (if configured) displays the following columns:
- Payment Date
- Payment
- Principal
- Interest
- Balance
- Status
The Student cash payment plan (if configured) displays the following columns:
- Annual Percentage Rate
- Finance Charge
- Amount Financed
- Total Payment
If any financial aid-related documents are missing from your record, the page will display a message with a link to the Document Center page, where you can review the submitted documents and upload any missing documents.

If there are financial aid holds on your record, the page will display a message with a link to the My Message Center page with details about the holds and alerts.

Accept, Decline, and Submit Fund Selections
Review your financial aid offer for the academic year and take the following 3 steps:
Step 1: Accept or decline the offered funds.
When the Accept and Decline buttons are displayed, you can accept or decline a fund. At this stage, the fund status at the institution is Estimated.
Select the  button to accept a fund. The Accept button turns green to indicate that you selected it.
Select the  button to decline a fund. The Decline button turns red to indicate that you selected it.
Before you accept or decline a loan, you can reduce the value in the Gross Amount field. After you have edited the Gross Amount, select outside of the grid to view the recalculated bank fees and total loan values as shown in the animation below.
Step 2: Submit your fund selections.
After you have accepted or declined the funds, select the  button to submit all your fund selections to the institution for further processing.
Upon selecting Submit Funds, you will have an opportunity to review your funding information. The funding information is displayed in the "Submit Funds" pop-up at the top of the page and includes a grid with the following details:
-
Funding Description
-
Fund Status (Accepted Amounts and Declined Amounts)
-
New loan amount if you opted to decrease the offered amount
The grid will not list details of funds that you previously accepted or declined.
When a fund is distributed over multiple Academic Years, an icon (![]() ) indicating overlapping funds is displayed.
) indicating overlapping funds is displayed.
To proceed with the final submission, select the Submit Funds button. To return to the Financial Aid Offer page, select the Cancel - go back to adjust button.
When you select Submit Funds, the following message appears:
Once you've submitted the funds
-
The Accept and Decline buttons will no longer be displayed for the individual funds on the page
-
The fund statuses will be updated to Accepted or Declined depending on whether you selected Accept All Funds or Decline All Funds.
-
For declined funds, the Net Amount, Fee Amount, and Gross Amount/Total Amount will be updated to zero (0).
Step 3: Review the fund statuses.
Once you select the Submit Funds button, the Accept and Decline buttons are no longer displayed, and the fund statuses are updated.
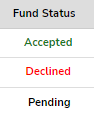
Accepted indicates that you accepted the fund, and the institution has set the status to Approved.
Declined indicates that you declined the fund, and the institution has set the status to Canceled. The amounts of the declined funds are zeroed out.
Pending indicates that you accepted the fund, and a financial aid advisor at the institution needs to approve it. Once the approval is granted, the status is set to Accepted.
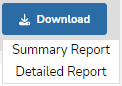
Download a Report
Select the Download button at the top of the page to view and print a Summary Report or Detailed Report of your financial aid offer. The reports include the information that is displayed on the Financial Aid Offer page.
The report headers contain the following information:
- Title: Financial Aid Overview.
- Name of the School
- School Logo
- Student Name
- Student Number
- Campus
- Program of Study
- Academic Year
- Printed Date
The Detailed Report includes the Disbursement Schedule information for grants, scholarships, and loans. The Summary Report does not include the disbursement details.
If there are no awards packaged for the selected Academic Year, the Download button is not displayed.
If you navigate away...
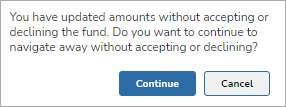
The Financial Aid Offer page displays the following messages if you navigate to a different Portal page, to the Summary Report or Detailed Report, to the Renewal Requirements tab or Glossary tab, or select a different Academic Year:
-
After you've edited a fund amount but did not select Accept/Decline for the fund and did not select the Submit Funds button:
-
If you select Continue, your changes will be lost, and you will be moved to the chosen page or tab.
-
If you select Cancel, you will stay on the Financial Aid Offer page.
-
-
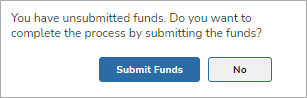
After you've edited a fund amount and selected Accept/Decline for the fund but did not select the Submit Funds button:
-
If you select Submit Funds, you are redirected to the Submit Funds Confirmation pop-up.
-
If you select No, you will be moved to the chosen tab or page, your Accept/Decline selections are deselected, and the edited fund amount reverts to the original value.
-