Degree Pathways
The Degree Pathway tool provides a personalized planning experience for active or enrolled students. It enables students to map and visualize a plan that shows how they can progress from the beginning to the end of their programs, course by course, term by term. The Degree Pathways option is used to engage and involve students and gives advisors the ability to help plan using student-focused choices.
If the selected student is:
-
A Prospect or an Applicant / Duplicate Applicant, an error message is displayed as "Degree Pathway is not available as there is no enrollment"
-
A Graduate or Withdrawn from School, an error message is displayed as "Degree Pathway is not available for this role"
Your advisor must verify if the Degree Pathway is enabled for the specified Program of Study.
You can access Degree Pathways in the Student Portal.
-
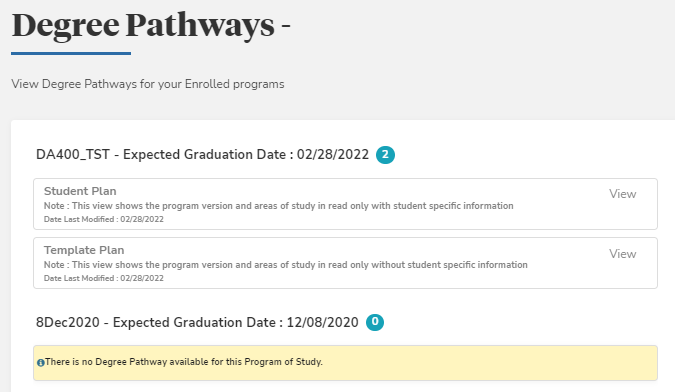
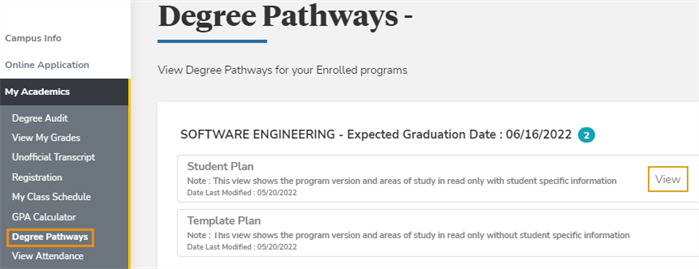
Navigate to My Academics > Degree Pathways. The Degree Pathways page is displayed.
-
Select the enrolled program for which you want to view the degree pathways. If a Degree Pathway is available for the Program of Study, it will be displayed.
The number in the circle beside each Program of Study indicates the number of degree pathways available for that program. 0 indicates that there is no Degree Pathway available for that Program of Study.
View Degree Pathway Templates for an Enrollment
You can use the Degree Pathway page to create a template that contains a guided pathway within your institution for an enrollment. Any templates that you configure are copied when you copy the enrollment.
You can have different courses and course orders for each catalog. You can create the suggested pathway for the catalog by placing the various courses in a specific order based on the catalog.
The pathway template also contains placeholders for student electives, allowing all terms in the enrollment to be created and populated with credits before the course name is known. If an elective pool is configured with several credits or hours, the template displays a message if you exceed the value. However, you can save and continue with the pathway template.
-
Navigate to My Academics > Degree Pathways. The Degree Pathways page is displayed.
-
Select the enrolled program for which you want to view the degree pathways. The Student Plan, Template Plan, and other Degree Pathway plans are displayed.
You can view the course details of the degree pathway under any of the plans.
-
Select the plan for which you want to view the course details.
-
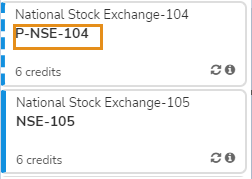
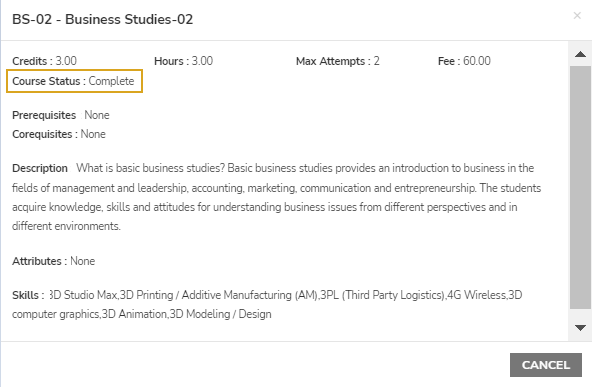
Select the course code. The course details are displayed.
-
The details displayed depend on the status of the plan. If the course is in:
-
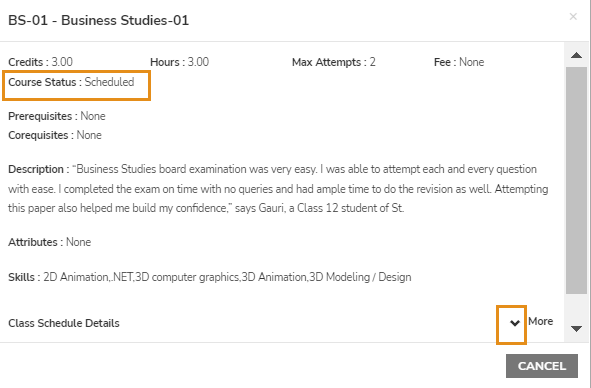
Completed Status: The dialog displays details such as Course Code, Course Name, Credits, Hours, Max Attempts, Fee, Course Status, Requisite Details, Description, Attributes, and Skills.
-
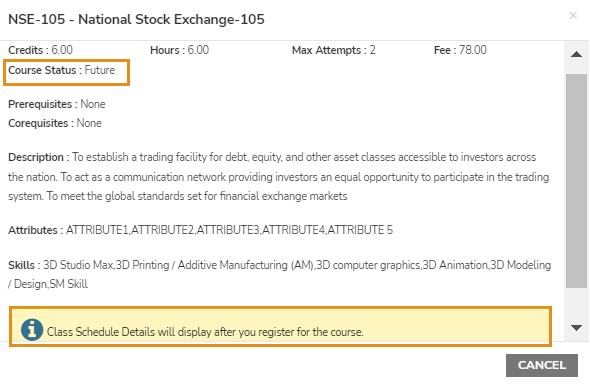
Future Status: An additional message is displayed at the end. Class Schedule Details will be displayed after you register for the course. Select the Cancel button to close the pop-up.
-
Registered/Scheduled Status: Tthe Class Schedule Details field is displayed and can be expanded or collapsed.
-
You can view the course code/published course code as configured by your institution.
-
Student Plan
To view the Student Plan, select the View button. The Student Plan page is displayed.
-
Review the information for the enrolled program.
Select the
 icon to view details about:
-
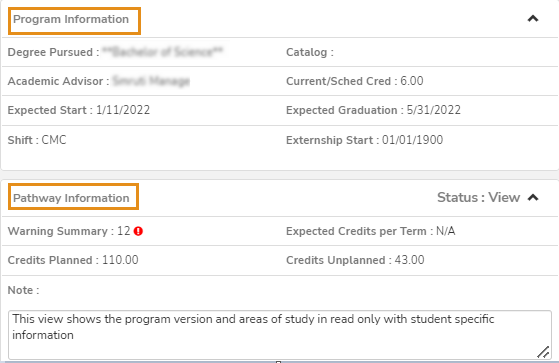
Program Information
-
Pathway Information
-
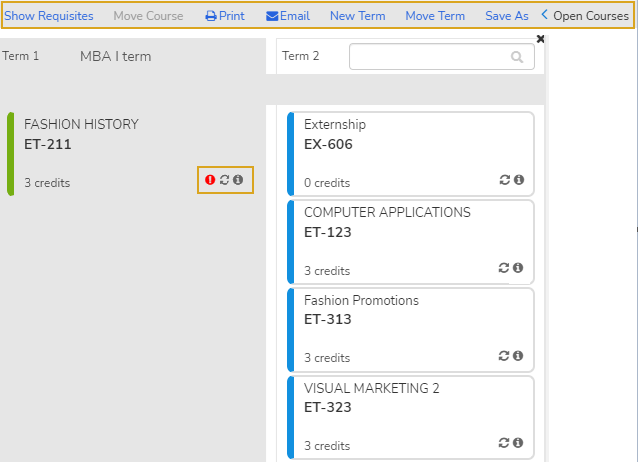
Select the Show Requisites button to display the Requisites (Pre & Corequisite) arrows. This button toggles to Hide Requisites.
-
Select the Print button to print the degree pathway plan. (You must ensure that print orientation is set to landscape mode and the print scale set to 100% to print a degree pathway plan correctly.)
-
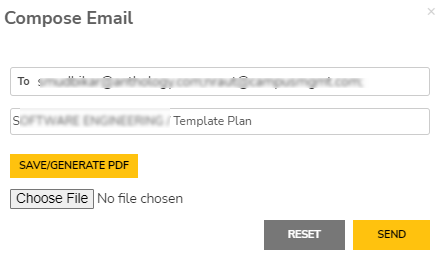
Select Email. The Compose Email dialog is displayed. You can download the degree pathway plan, attach it, and send it to the specified email address.
-
Select New Term to add a term to the desired location.
-
Select Move Term to change the position of a term.
-
Select Save As to save the plan to a new draft plan.
-
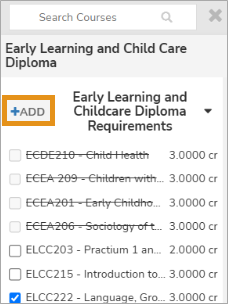
Select Open Courses to expand the list of courses.
-
-
Select the course or elective course from the course list and select the Add button to add a course to the term.
-
Select the
 icon to display the course prerequisites and corequisites.
 -
Select the
 icon to display information about the number of attempts, retakes, and repeats.
 -
Select the
 icon to display information about the missing courses on the course list.
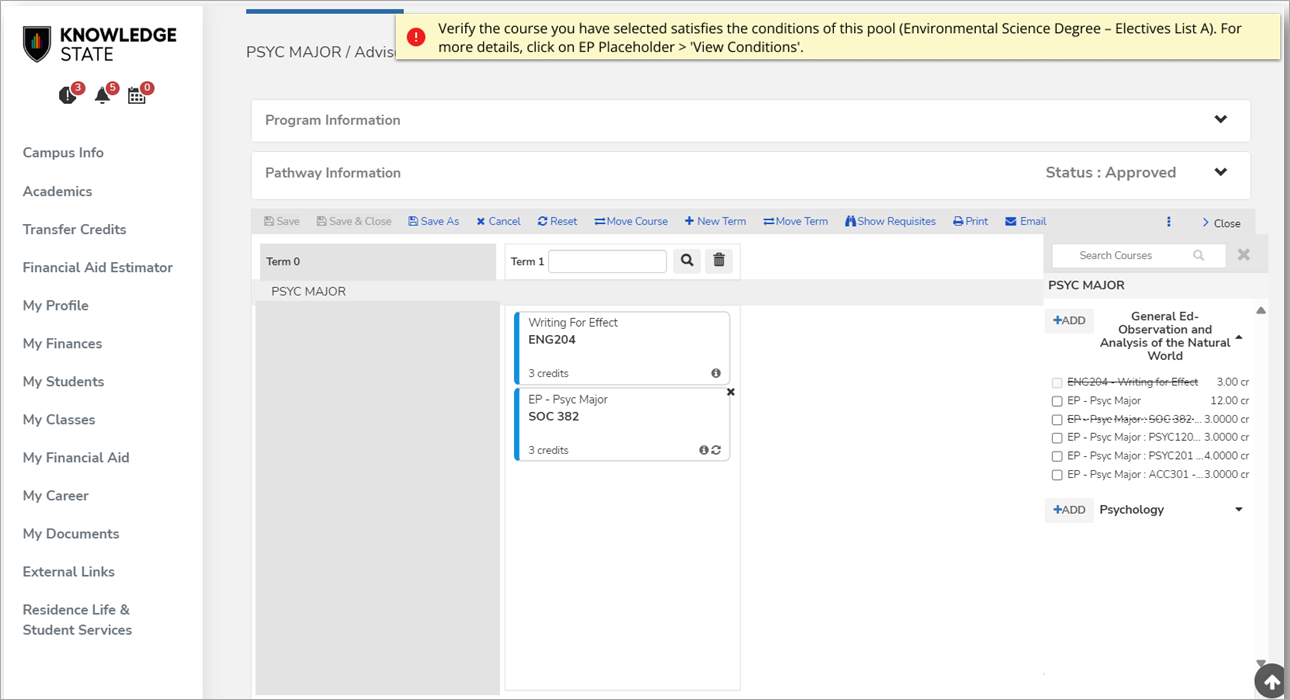
You can view pool conditions associated with Elective Pools. This option allows you to review the student's elective requirements with and/or logic indicated and their fulfillment status. The elective pool condition is Fulfilled if the requirements of the conditions are fulfilled.
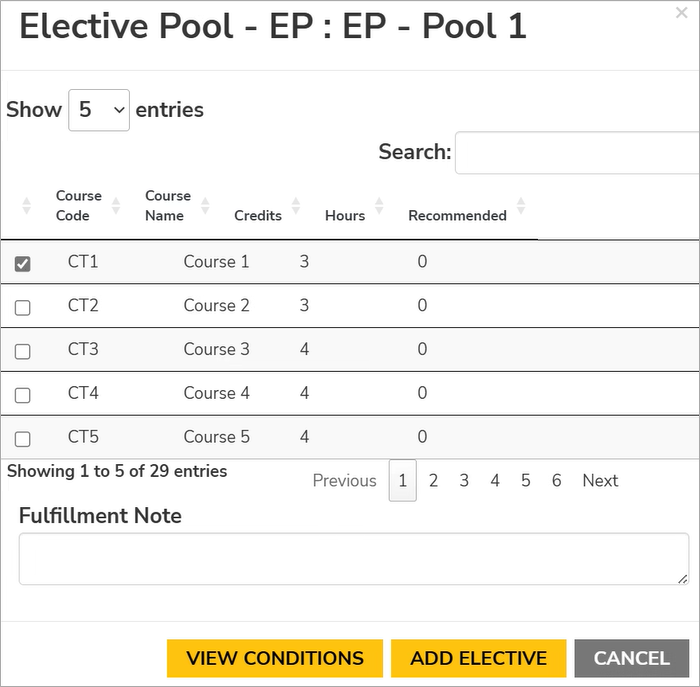
If you try to add a new course that does not satisfy the conditions of the pool, a warning message is displayed.
-
-
To display the arrows that connect the courses, select the Show Requisites button. The solid line indicates prerequisites while the dotted line indicates the corequisites.
The following example shows the arrows for correctly placed in a Student Plan:
- Prerequisites
- Corequisites
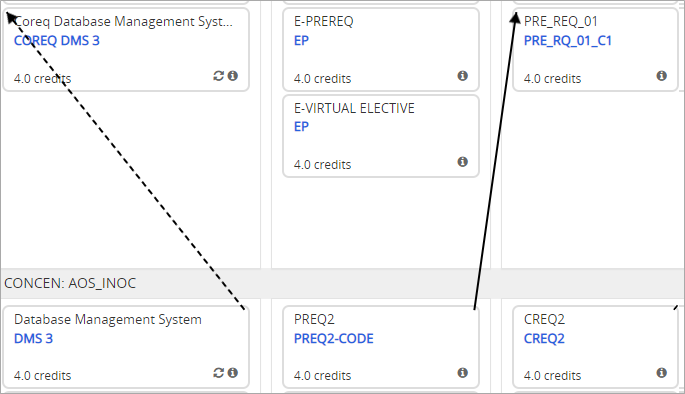
The color coding indicates the status of the courses, i.e., future course, registered, completed, or unfulfilled.

Template Plan
To view the Template Plan, select the View button. The Template Plan page is displayed.

-
Review the information for the enrollment.
-
Select the Show Requisites button to display the Requisites (Pre & Corequisite) arrows. This button toggles to Hide Requisites.
-
Select Print button to print the degree plan. (You must ensure that print orientation is set to landscape mode and the print scale set to 100% to print a degree pathway template correctly.)
-
Select Email. The Compose Email dialog is displayed. You can download the degree pathway plan, attach it, and send it to the specified email address.
-
Select Open Courses to expand the list of courses.
-
Select the
icon to display the course prerequisites and corequisites. -
Select the
icon to display information about the number of attempts, retakes, and repeats.
-
-
To display the arrows that connect the courses:
Select the Show Requisites button. The solid line indicates prerequisites while the dotted line indicates the corequisites.
The following example shows the arrows for correctly placed in a template plan:
- Prerequisites
- Corequisites