Add/Edit Events
A staff member can add and edit events in the Campus Calendar.
-
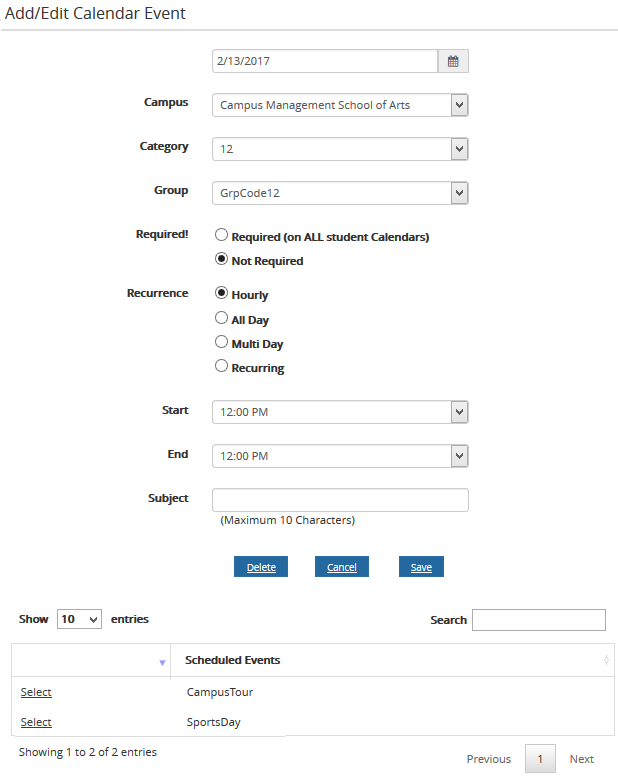
Navigate to Campus Calendar > Add/Edit Event. The Add/Edit Calendar Event page is displayed.
-
Select
 and select the date of the event. By default, the current date is displayed.
 -
Specify the following details for the Campus Calendar event:
- Select the campus where the event is applicable in the Campus list.
- Select the event category in the Category list.
- Select the group of the event category in the Group list.
- Select the Required option if you want to display the event on all student calendars (default: Not Required).
- Select a Recurrence option.
- Select the start and end time of the event in the Start and End drop-down lists.
- Type the description of the event in the Subject field.
-
Select Save. The event is added to the Campus Calendar.
-
To view, edit, or delete a Scheduled Event, select a Select link in the grid at the bottom of the page. The Add/Edit Calendar Event page for the event is displayed.
Use the Show _entries drop-down list to set the number of rows displayed in the grid. Use the Search option to locate specific items within the grid.
Select the Scheduled Event column header to sort the data.
When you scroll down, an arrow icon appears next to the scroll bar. Select
 to return to the top of the page.