Create New Account
If the Portal for your campus is configured accordingly, you can create a user account for the Applicant Portal. To create an account, you must have a valid email address.
-
Type the Portal URL provided by the institution in the address bar of your browser. The Portal home page is displayed.
-
Click the Login button and select the Applicant Portal Homepage link. The Login page is displayed.

-
Click the Create a New Account link. The New Account Creation page is displayed.
Note: The Create a New Account link is configured by the Portal administrator. The link can be enabled or disabled (hidden).
-
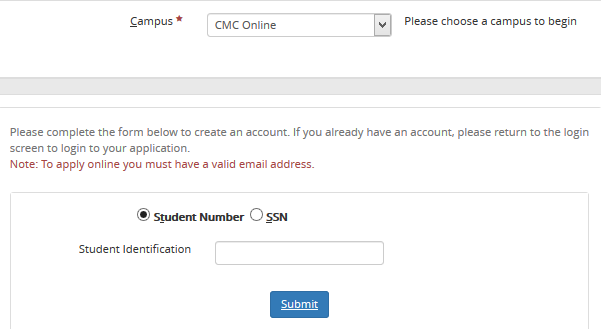
Select the Campus for which you want to create an account.
-
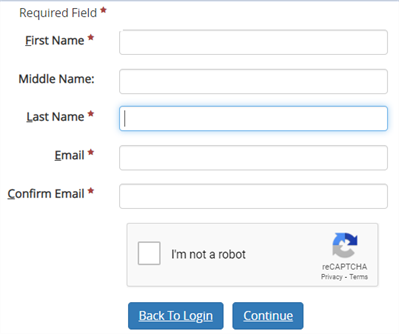
Enter your account information. Items marked with an asterisk are required.
-
Select the I'm not a robot check box. The CAPTCHA is displayed.
-
Solve the CAPTCHA.

-
Click the Continue button. Step 1 of the Online Application form will be displayed.
-
Create a password and answer the security questions if applicable.
-
Click Create Account.
-
If you are already a student at the selected campus, enter your Student Number or SSN so that your account can be associated with your existing student information.
-
Click Submit.
-
Click the link in the email and log on to Applicant Portal with the password sent to you in the email.
If Portal is deployed in a cloud environment with Azure Active Directory (AAD), use the steps on the following website to access the self-service password reset: