My Documents
The My Documents submenu enables you to access the Document Center. The Document Center is a centralized location where
Institutions can perform the following tasks:
-
Define document statuses that identify the document as due online.
-
Define the document status that is used when a student document is uploaded from Student Portal.
-
Select a Contact Manager activity and target associated with document submissions.
-
Define a document path to be used when students upload files.
-
Define the maximum file size for uploaded files. The default setting for maximum file size is 10 MB.
-
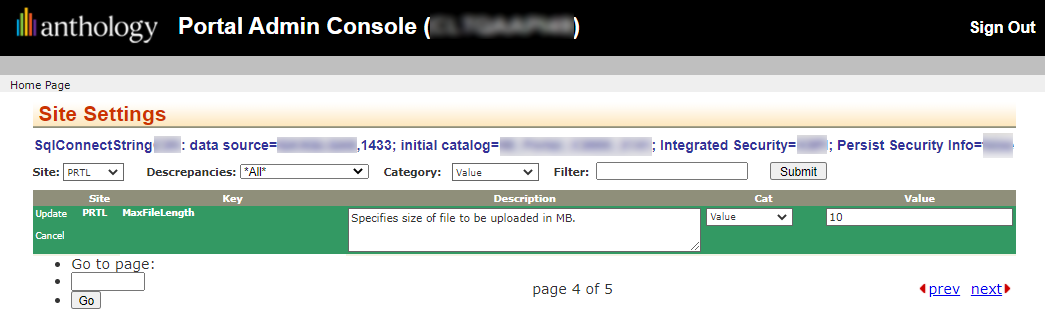
In the Portal Admin Console under Settings and Environment, select Site Settings.
-
Select your site and locate the MaxFileLength key.
-
Click the Edit button and specify the maximum file size in MB, and click Update.

-
Upload and View Documents
-
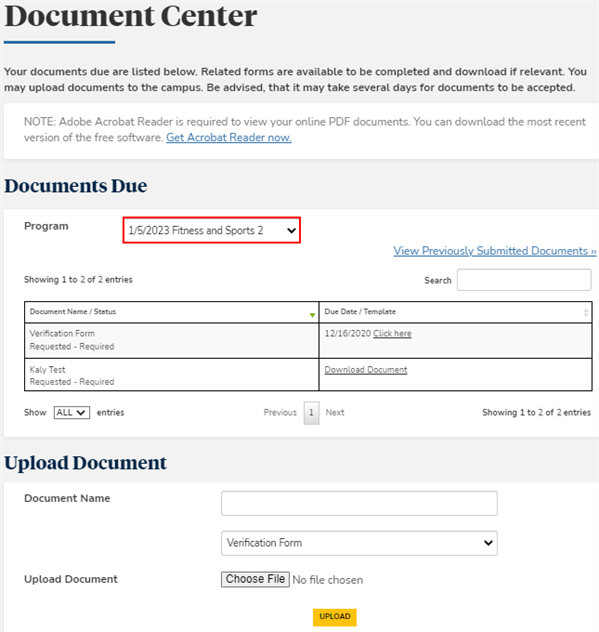
Navigate to My Documents > Document Center. The Document Center page is displayed.
-
In the Program field, select your enrollment to view and filter documents by enrollment.
-
If needed, use the Search field to search documents using a full or partial keyword or date.
-
In the Document Name field, specify the name of a document you want to upload.
-
In the drop-down list under the Document Name field, select the Document Type.
-
Click the Choose File button and navigate to the document in your local folders.
-
Click Upload. The document is uploaded to the Portal.
If you receive a message indicating the configuration is incomplete for an external document provider, contact your System Administrator and provide them with the details in the message. Your attachment was not uploaded to Portal.
-
Click View Previously Submitted Documents. The grid will list your submitted documents and the dates on which they were received.
Use the Show _entries drop-down list to set the number of rows displayed in the grid. Use the Search option to locate specific items within the grid.
-
Click Back to My Documents. The Document Center page is displayed.
View Attached Documents
When you click on the icon or file name to view an attached document, the result depends on the type and format of document and the configuration at your institution. It will either:
-
Be downloaded so that you can open it from your downloads folder
-
Displayed in a new tab in your browser