My Documents
The My Documents submenu enables you to access the Document Center. The Document Center is a centralized location where
Upload and View Documents
-
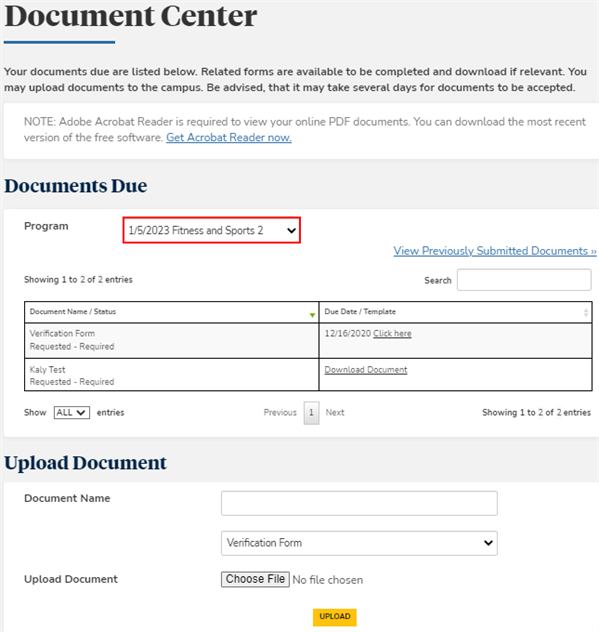
Navigate to My Documents > Document Center. The Document Center page is displayed.
-
In the Program field, select your enrollment to view and filter documents by enrollment.
-
If needed, use the Search field to search documents using a full or partial keyword or date.
-
In the Document Name field, specify the name of a document you want to upload.
-
In the drop-down list under the Document Name field, select the Document Type.
-
Click the Choose File button and navigate to the document in your local folders.
-
Click Upload. The document is uploaded to the Portal.
-
Click View Previously Submitted Documents. The grid will list your submitted documents and the dates on which they were received.
Use the Show _entries drop-down list to set the number of rows displayed in the grid. Use the Search option to locate specific items within the grid.
-
Click Back to My Documents. The Document Center page is displayed.