Registration
Begin registration and scheduling courses by selecting the Registration page and entering the required information.
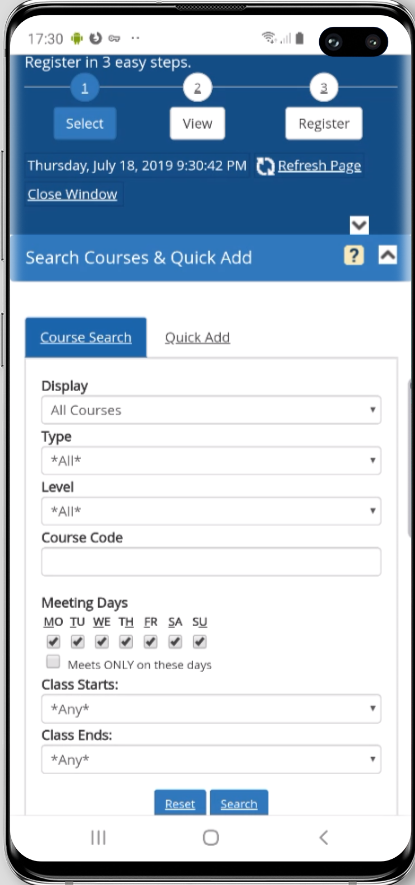
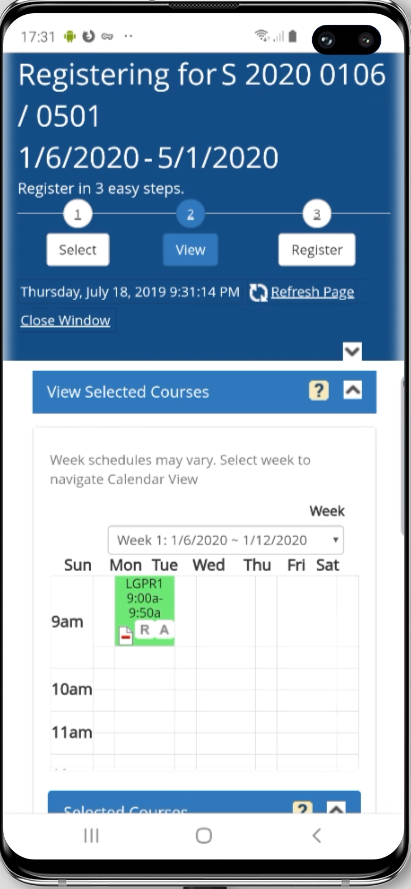
The layout and spacing of the Portal Registration pages has been adjusted to ensure proper display on mobile devices. The images below show Registration Step 1, 2, and 3 on an Android device.

Responsive design has been applied to the Portal Registration pages to ensure proper display on mobile devices (phones and tablets). The responsive design includes:
-
All Registration pages (Steps 1,2,3) fit screens of mobile devices supporting Android and iOS operating systems.
-
The grids on the Registration pages support horizontal and vertical scrolling allowing the user to view the details.
-
All click events work as expected.
-
All hover events have been converted to onClick events.
-
All popup messages are displayed correctly and can be closed by the user.
Register for Courses
-
Navigate to My Academics > Registration.
-
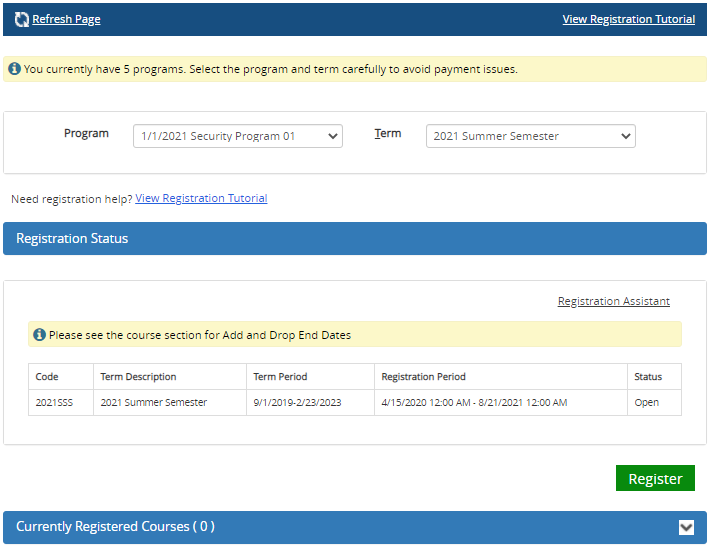
Select a Program. The current program is displayed by default.
-
If you are enrolled in one program only, the program is already selected.
-
If you are enrolled in multiple programs, a message is displayed indicating the number of programs you are enrolled in. Select the program for which you want to register classes.
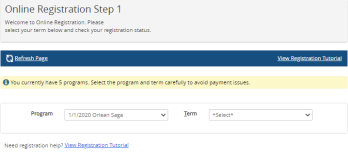
To view this help topic about the registration page, select the View Registration Tutorial link.
-
-
Select a Term. If only one term exists, the term is already selected.
The enrollment and term selection determine your registration status. You cannot proceed to Step 1 of the Registration until you select a valid enrollment and term.
-
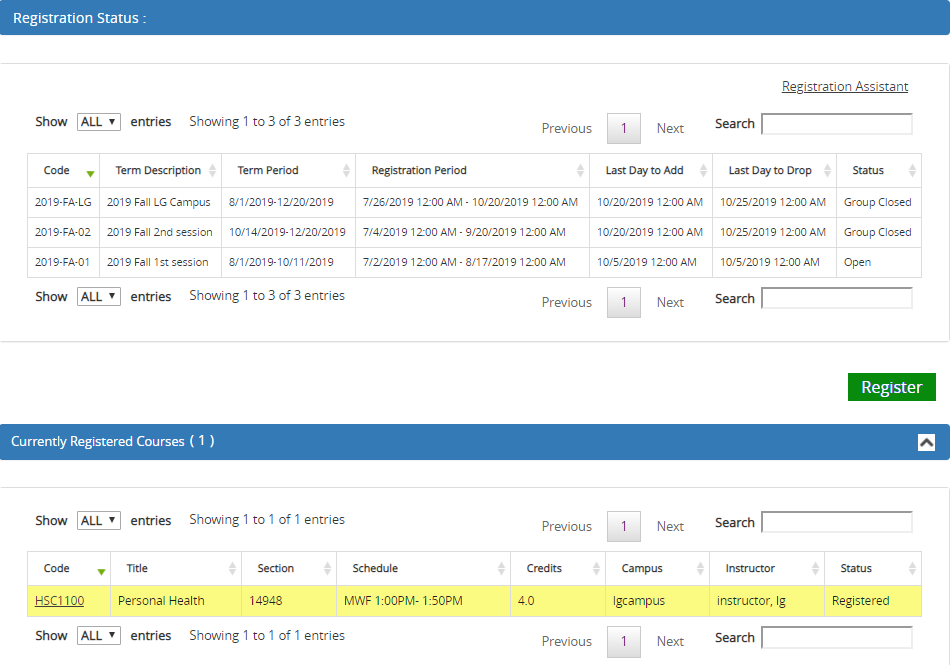
The Registration Status for the courses in the selected term and enrollment is displayed. It may include the following columns (depending on the Anthology Student configuration):
- Code
- Term Description
- Term Period
- Registration Period
- Last Day to Add
- Last Day to Drop
- Status (check if Status = Open)
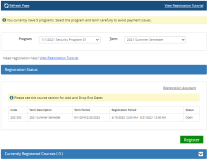
In Portal
Select Pre-Register to proceed to Registration Step 1 where you can select and save courses for future registration. Courses saved during pre-registration will be available for registration when the term registration period opens, and you log in for the actual registration.
-
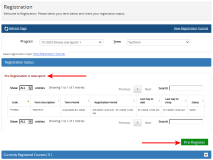
Optionally, select
 to expand the Registered Courses section. This section displays details of your previously registered courses along with their current status. Verify the information displayed in the grid columns:
- Code
- Title
- Section
- Schedule
- Credits
- Campus
- Instructor
- Status
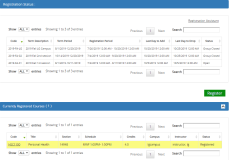
Important Information About Registration Locks
If the Status column in the Registered Courses section displays 'Schedule Change Lock' for a Parent term or a Standard term, you cannot proceed to Step 1 of the Registration. If there is a status of 'Schedule Change Lock' for a Child term when term relationship is ON, a message about the lock is displayed and you cannot add or remove any courses in Step 1 of the Registration.
-
If the Registration Status for your courses is "Open", select Register to proceed to Step 1 - Select Courses.

A new browser window will appear. If it does not, check that your browser does not have pop-up windows blocked. — OR —
Select Registration Assistant to view a list of suggested courses in the upcoming term. For more details, see Registration Assistant.