Create a User Account
If the Portal for your campus is configured accordingly, you can create a user account for the Student Portal.
-
Type the Portal URL provided by the institution in the address bar of your browser. The Portal home page is displayed.
-
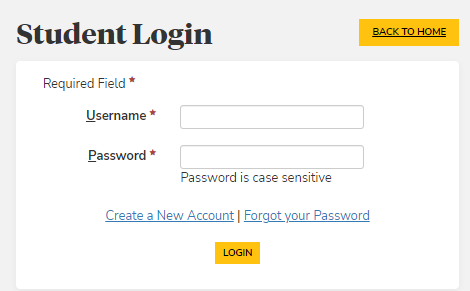
Click the Login button and select the Student Portal Homepage link. The Login page is displayed.
-
Click the Create a New Account link. The New Account Creation page is displayed.
Note: The Create a New Account link is configured by the Portal administrator. The link can be enabled or disabled (hidden).
To configure the Create a New Account link:
-
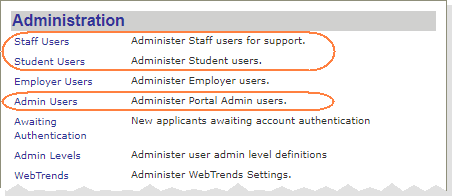
As a Portal administrator, access the Portal Configuration tool.
-
Expand the appropriate Campus Portal URL. The URL Configuration page is displayed.
-
Navigate to URL Configuration New Account Provisioning section.
-
If you want the Create a New Account link to be:
- enabled, select Enable (default)
- disabled, select Disable
-
Reset IIS and verify that the change took effect.
-
-
Type your details in the displayed page to create a new account. Items marked with an asterisk are required.
Select Social Security Number (SSN), Social Insurance Number (SIN), or Student ID, and enter the information in the format shown.
The SSN, SIN, or Student Number will be used if a Portal account is created for an existing student at the institution.
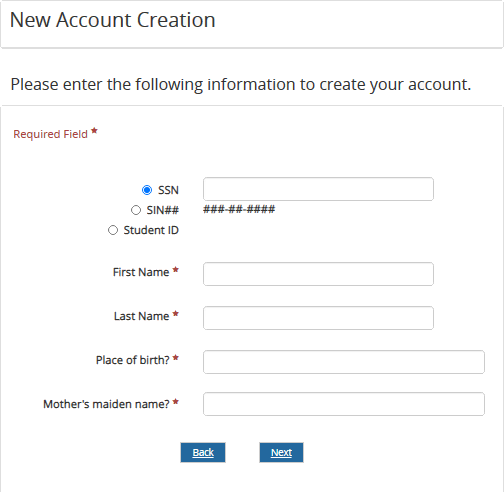
Depending on your institution, you may be required to answer one or more security questions. The answers to the questions will be used to authenticate you if you should forget your password.
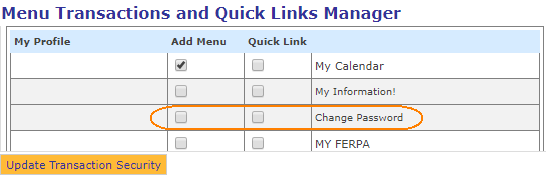
In version 19.0.3 and later, the password change functionality is fully supported in Portals deployed with Active Directory (AD). When a user's AD password expires, the Change Password screen displays a message that is configured in the Portal Configuration tool under Portal messages, for example: "The password has expired. Please reset your password." The user is prompted to enter the current password, new password, and confirm the new password. The password is validated based on the AD password policy. If the AD validation is successful, a confirmation message is displayed (also configured in the Portal Configuration tool). The user is presented with a message and a link to go back to the login screen.
If Portal is deployed in a cloud environment with Azure Active Directory (AAD), use the steps on the following website to access the self-service password reset:
Notes for the Portal Administrator:
If Portal is deployed in a cloud environment with AAD, in the Portal Configuration tool, ensure that the Change Password option is not enabled in the Security Roles associated with the campus.
For more information about the Azure AD self service password reset, refer to the following website:
https://docs.microsoft.com/en-us/azure/active-directory/active-directory-passwords-getting-started
When Portal is integrated with AAD, administrators cannot edit the information of Portal users in the Portal Admin Console.