Deploy Flow-based Integration
Prepare Flow Connections
Create CDS (Current Environment) Connection
-
Go to https://make.powerapps.com and select the org for which you need to create the connection.
-
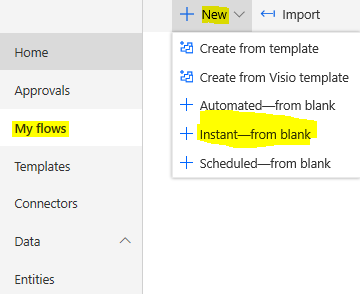
Select My flows in the right pane and click New to create a new flow.

Note: The system should have a dedicated application user created for the integration purpose.
-
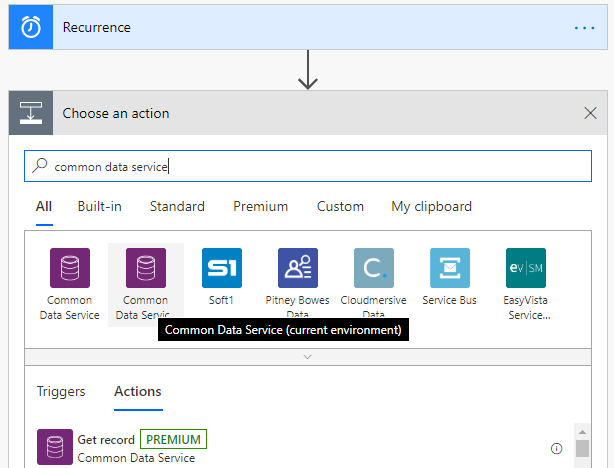
Select Schedule trigger and add a new step to any CDS (current environment) action.
Note: Ensure you are using Common Data Service (current environment). It is usually the second icon. Confirm by hovering on the icon and checking the tooltip as shown below.
-
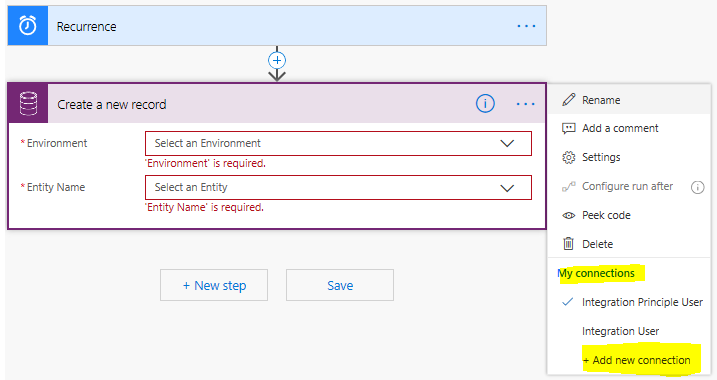
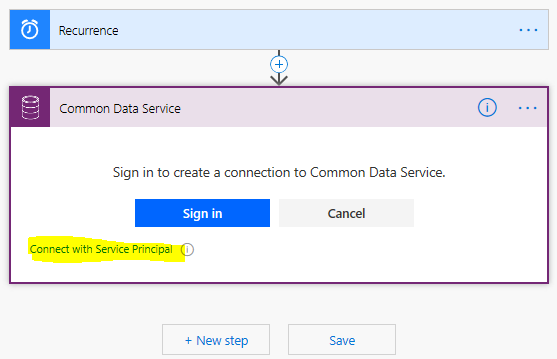
Click the ellipsis button (...) in the top right corner of the action step.
-
Click the Add new connection menu item.
-
Choose the Connect with Service Principal link in the action step.
-
-
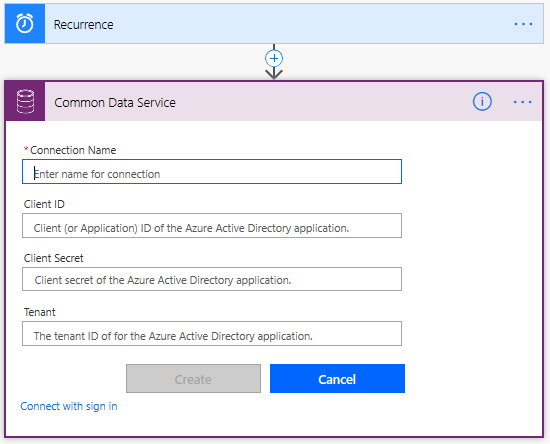
Provide necessary details and click Create.
Note: You can ignore the flow created. It does not need to be saved since the connection is created in the org by the steps above.
-
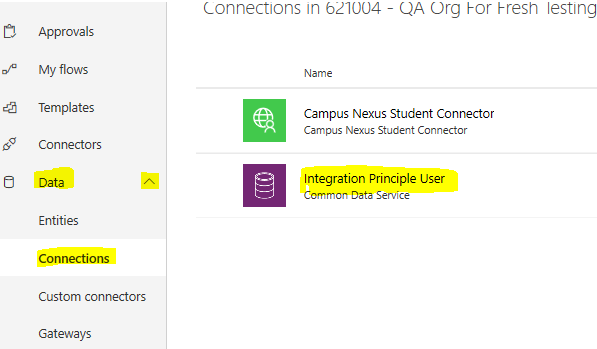
After you have created the connection, navigate to Data > Connection in the right pane and select the newly created connection.
-
In the URL of the browser window, look for the connectionName query param, for example https://us.flow.microsoft.com/manage/environments/fc6b3f3a-b423-4685-bafa-fe22fafe38bb/connections?apiName=shared_commondataservice&connectionName=shared-commondataser-1c9c75f6-9fa2-4da5-8190-4f7d7f88ce00
The connection name will be used in the pipeline variables.
Only Connection owners can Turn On the MS flows.
Create Anthology Student Custom Connector
-
Go to https://make.powerapps.com and select the org for which you need to create the Custom Connector.
-
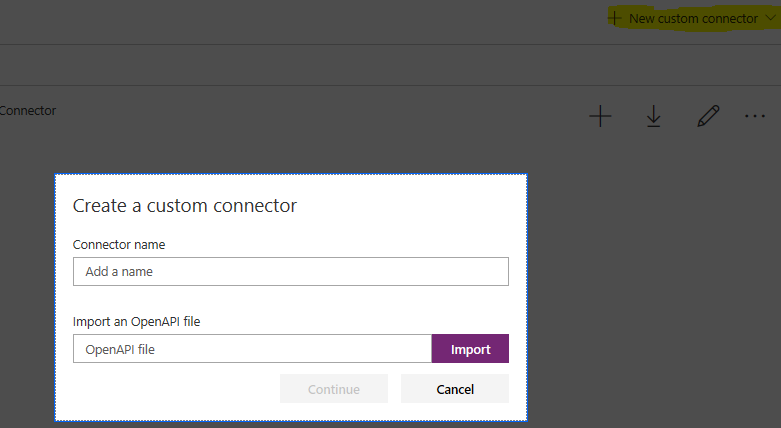
Select Data > Custom connectors in the right pane and click New custom Connector > Import an OpenAPI file.
-
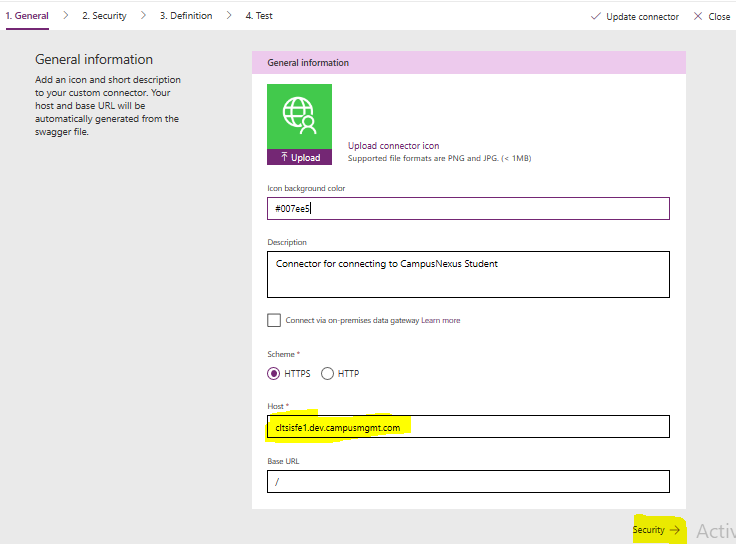
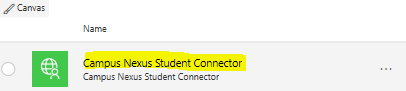
Specify the Connector Name as Campus Nexus Student Connector.
-
In the "Import an OpenAPI file" field, select the following file from ADO: $\Engage\Dynamics365Solutions\CampusManagementStudentConnector\CampusNexus-Student-Connector.swagger.json
-
Update the URL to the Anthology Student URL.
-
Proceed to further tabs and click Create Connector.
-
On the “Test” tab, click New Connection, provide the API key in the modal pop-up, and create the connection.
Create Anthology Student Custom Connector Connection
-
Go to https://make.powerapps.com and select the org for which you need to create the Custom Connector’s Connection.
-
Navigate to Data > Connections.
-
Open the Connector Connection.
-
The Connector Param Name and Connection Name will be available in the URL. These values which will be used in the pipeline variables.
https://make.powerapps.com/environments/fc6b3f3a-b423-4685-bafa-fe22fafe38bb/connections/shared_campus.20nexus.20student.20connector.5f2540c06b-01532217567572bb/4918ef15625b4dca9a51d952f7022be3/details#
Where:
= Connection Param Name
= Connection Name for the Custom Connector
Export Enabled Flows
While doing upgrades, the upgraded flows will be set to a disabled state to allow you to identify which flows need to be enabled. You will need to export the flows in the system along with their status.
-
Log in to the Dynamics org.
-
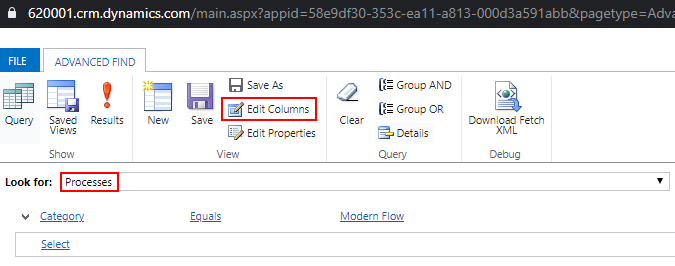
Open the Advanced Find Dialog.
-
Create a query on the Processes entity. Add a query condition for Category equals ‘Modern Flow'.
-
Ensure that the Status column is selected by clicking the Edit Columns button.
-
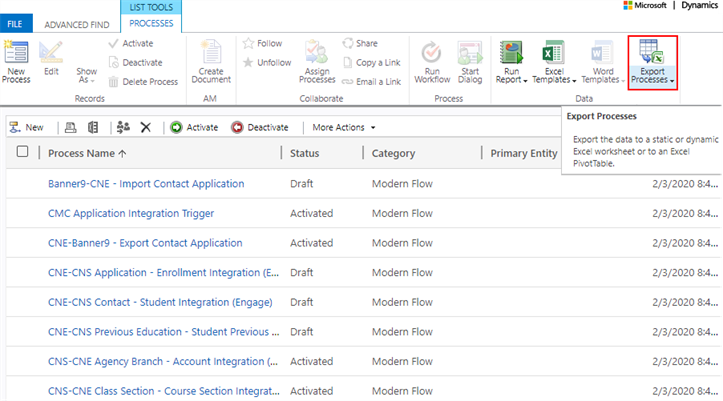
Click the Results button.
-
Click Export Processes to export the data.
-
Use the resulting Excel sheet as a reference to identify which flows need to be re-enabled for upgrades.
Update Pipeline Variables and Run the Release Pipeline
-
Update the pipeline variables using the:
-
Connections you have created above
-
Azure Function Server URL
-
-
Execute the release pipeline.
Run Default Data for Anthology Student Integration
The default data includes the Option Set mappings that are defined in the Integration Mappings entity. These mappings can later be modified per client implementation requirements.
The default data is available in the following ADO folder:
$\Dynamics 365 Solutions\CampusManagementDefaultData\CampusManagementStudentIntegration
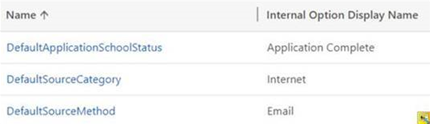
Update Default Integration Mapping Records
In Integration Mappings, update the following values: ![]()
| Name | Value |
|---|---|
| DefaultApplicationSchoolStatus | Application Complete |
| DefaultSourceCategory | Internet |
| DefaultSourceMethod records |
Configure Integration Settings in the Configuration Record
Update the following values in the flows:
-
Integration Client ID
-
Integration Client Secret
-
Integration Audience URL
-
Integration Default User
-
Service Principal User (used by the Selective Update step in the flows)
Notes:
-
Integration Default User and Service Principal User value will be the Application User created for the integration purpose.
-
The Integration Audience URL should not end with “/”.
Example: https://621002.crm.dynamics.com and not: https://621002.crm.dynamics.com/
Configure the CNS-CNE Integration URL
-
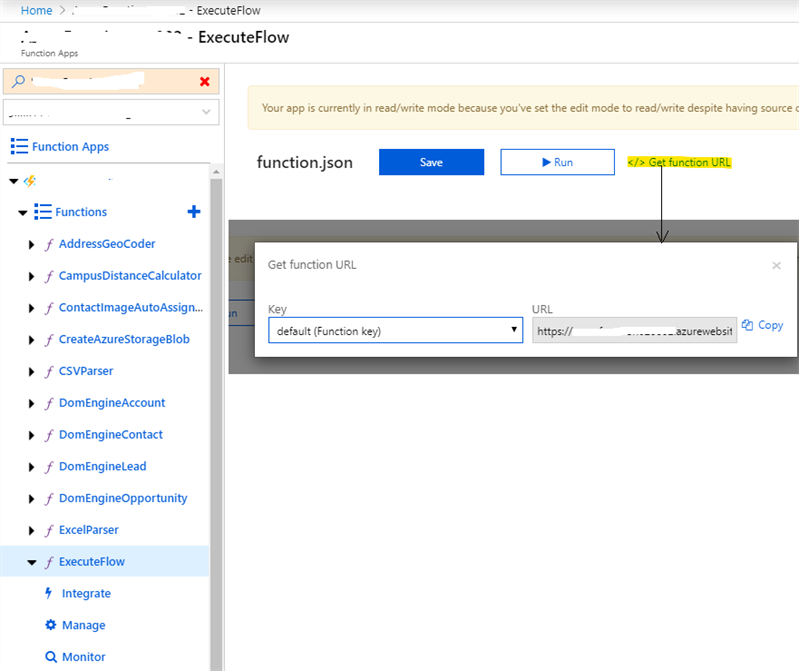
Navigate to the Azure Functions associated with the Dynamics Org.
-
Select the ExecuteFlow function.
NoteBy default, caching is enabled for the ExecuteFlow Azure function, to cache the flow URL for a limited time to:
-
Reduce the number of calls to Dynamics and mitigate the limits with both Dynamics as well as Azure functions, and
-
Allow a reasonable wait time for scenarios when the flow URL needs to be changed.
Additionally, the following two variables are available to enable or disable the cache settings and configure the cache expiration time:
-
ExecuteFlowCacheEnabled - Setting this variable as True, enables caching the flow URL until the cache expiration time configured in the ExecuteFlowCacheTimer variable. By default, it is set to True. When this variable is False, caching is disabled for the ExecuteFlow Azure function.
-
ExecuteFlowCacheTimer - The time to cache the flow URL in minutes. By default, it is set to 5. It is recommended to configure this value to be below 10 minutes.
If the ExecuteFlowCacheEnabled and the ExecuteFlowCacheTimer variables are not present in the Configuration Settings of the Function App on the Azure portal, the default caching mechanism with the cache expiration time of 5 minutes is enabled for the ExecuteFlow Azure function.
-
-
In the right pane, click Get Function URL, copy the function URL, and save it in a text editor.
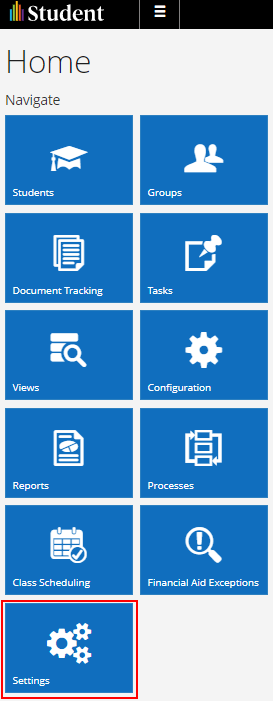
-
Log in to the Anthology Student Web App and click the Settings tile.
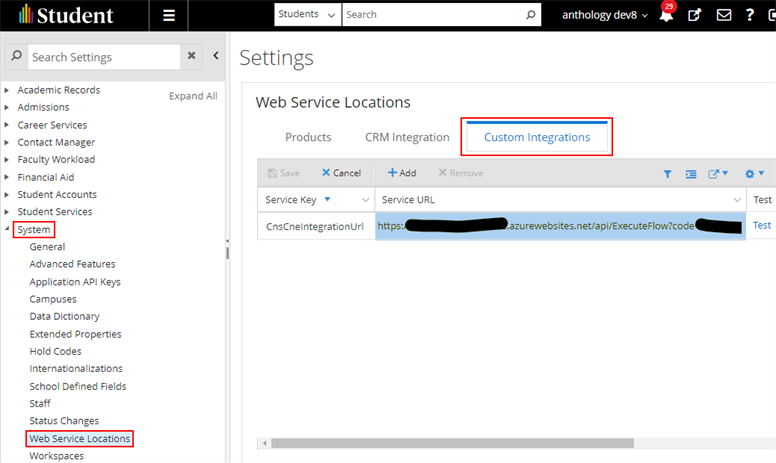
-
Select System > Web Service Locations in the left menu.
-
On the Custom Integrations tab, search the Service Key column for the name CnsCneIntegrationUrl.
-
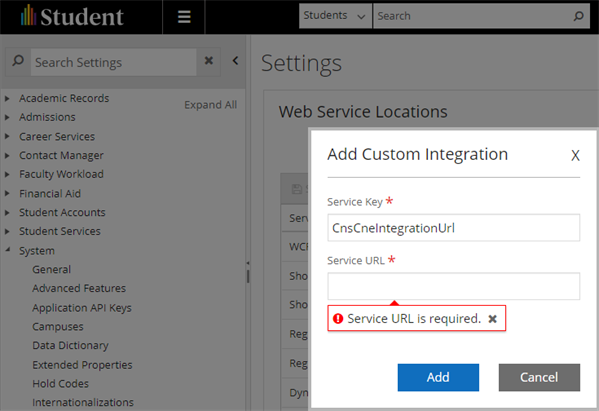
If the key is not present, click +Add in the grid toolbar.
-
In the Service Key field, specify CnsCneIntegrationUrl.
-
In the Service URL field, specify the function URL which has been copied in step 3 of Configure the CNS-CNE Integration URL
-
-
If the key is already present, modify the URL by editing it within the grid.
-
Click Save after modifying the URL.
|
|
Upgrade Considerations: Ensure that the earlier Service Keys starting with "CnsCne" are removed. Only the key CnsCneIntegrationUrl should be present. |
Install Anthology Student Workflows
Install Workflows in Anthology Student using Workflow Composer.
The Workflows are available in ADO in the following location:
$\Engage\Dynamics 365 Solutions\CampusManagementStudentWorkflow
Enable Power Automate Flows
For new installations, refer to the Power AutomateDetail Excel file to identify which flows need to be enabled.
For upgrades, use the flows list exported in Export Enabled Flows to enable the flows which had been enabled previously.
For any new flows as part of the upgrade, refer to the Power AutomateDetail Excel file to identify which of the new flows need to be enabled.