About Web Forms
For fields in the CampusNexus CRM Main database to be automatically updated when a Contact fills out a Web Form, a simple segment of code that generates an e-mail must be added to the Web Form from which you want to capture the desired information.
Anthology Inc. provides sample Web Forms that demonstrate how to integrate Web Forms with CampusNexus CRM. The code for a Sample Web Form is developed for Microsoft Internet Information Server (IIS), using Active Server Pages (ASPs). The code uses the AspEmail Component to send data from the Web Form as e-mail to CampusNexus CRM. This can be substituted with any other component that offers the Send Mail feature.
Implement the Sample Web Form on a page frequented by your Contacts to save the data collected through the Web Form into CampusNexus CRM.
The Webform Sync Service, which runs on the CampusNexus CRM Database is used to process Web Form e-mail messages on the Database component.
Sample Web Forms for all CampusNexus CRM Objects and other required information are available in the \Samples\Web\WebForm folder.
In addition to using code snippets to create and deploy Web Forms, you can use Template HTML pages to customize Normal Web Forms, and Mailer Web Forms by using the Web Form Generator, WebFormGenerator.asp.
You can customize the HTML pages to suit the business needs of your organization. Further, Normal, and Mailer Web Forms are processed using a generic ASP processor (WebFormGenerator.asp) that is designed to distinguish between each type of Web Form.
To process Normal Web Forms, and Mailer Web Forms, modify code only in the WebFormGenerator.asp file.
You can work with Normal or Mailer type of Template Web Forms from the \Samples\Web\WebForm folder. However, you can also work with Mailer Web Forms (MailerForm.html) available in the \Samples\Web\MailerForm folder.
Web Forms in the \Samples\Web\WebForm and \Samples\Web\MailerForm folders are processed by .asp files available in the same path.
For details on how you can use the Web Form Generator, see the Business Administrator Help.
About Web Form Integration
Web Form integration enables you to create or update the following Objects in CampusNexus CRM:
-
Interaction (an e-mail request from a Contact.)
-
Contact (a person sending a request to CampusNexus CRM.)
-
Account (a company with which your organization has business relations, usually relevant to Business to Business scenarios.)
-
Opportunity (an Opportunity is a lead that has turned into a prospect.)
-
Order (an Order is received from a Contact.)
-
Target (a Target is a Contact who is part of a Campaign.)
-
Custom Objects (a custom Object is an Object created by the Business Administrator User.)
You can also implement Web Forms so that the Can be called for this Campaign Target system Property, and other user-defined Target Properties are automatically updated when a visitor or Contact submits a form on your organization's website. However, you cannot implement Web Forms to create Targets, and update other Target system Properties.
Web Form integration enables you to categorize Objects in CampusNexus CRM. Each of these Objects has its own set of Properties or fields that store data specific to the Object. You will often create or update the Contact Object, containing fields such as First Name, Last Name, and Address.
Your Web Form’s code to generate an e-mail will be executed on the Post command and does not interfere with your current processes, such as automatically updating your Contact database with the data the Contact enters, regardless of which Mail Send Component you use. The code you create will generate an e-mail with the following information:
-
The To field should contain the address of the Alias which is configured in CampusNexus CRM, and to which e-mail will be sent such as, customerservice@yourcompany.com.
-
The From field should contain the e-mail address of the Contact filling out the form. If the form does not require the Contact to fill in the e-mail address, retrieve the address from the Contact database.
-
The Subject line should contain a Magic String concatenated with one of the following:
A hard-coded subject string such as Member Registration Web Form.
— OR —
The content entered by the Contact in the Subject field
— OR —
The value selected by the Contact from a list.
The body of the e-mail contains the values the Contact entered in the Web Form passed in Special Tags, which CampusNexus CRM recognizes.
Note: By default, the Magic String is ‘CDXDFGVCJVCHGFJHNB30’. If this value has been changed, contact your administrator for the new Magic String.
When CampusNexus CRM receives the e-mail you generated from the Web Form, it automatically scans the subject line. If it locates the Magic String, it creates an Interaction or any of the other Objects, as appropriate, and displays the event, “Web Form message received…” in the Interaction history.
After identifying the e-mail received from a Web Form, CampusNexus CRM searches the body of the e-mail for special tags, retrieves the values passed to those tags, and updates the Main database. Values to be automatically updated in CampusNexus CRM should be sent as Special Tags in the body of the mail. Given below is an example of an Interaction created from data retrieved from a Web Form.
Special Tag Examples
The Object Name, Tab Name, Group Name, Property Name, and Category Name values will be given to you by the CampusNexus CRM Administrator. These Properties must be created in CampusNexus CRM for Web Form integration to work.
Note: Web Form integration will not work unless the name of each parameter matches the respective name in CampusNexus CRM. These names are not case sensitive, but the spellings must match.
myArray(0)="<WebForm>"
myArray(1)="<Object><ObjectID>-1</ObjectID><LANG>English</LANG><DLID>1033</DLID><SQLLANGID>0</SQLLANGID><Object.Name>Account</Object.Name>"
myArray(2)="<EventList/><PropList>"
myArray(3)="<Tab><Tab.Name>Properties</Tab.Name>"
myArray(4)="<Group><Group.Name></Group.Name>"
myArray(5)="<Property><Property.Name>AccountName</Property.Name><Value><![CDATA["&name&"]]></Value></Property>"
myArray(6)="<Property><Property.Name>ParentAccount</Property.Name><Value><![CDATA["&parent&"]]></Value></Property>"
myArray(7)="<Property><Property.Name>AccountManager</Property.Name><Value>"&manager&"</Value></Property>"
myArray(8)="<Property><Property.Name>Notes</Property.Name><Value><![CDATA["¬es&"]]></Value></Property>"
myArray(9)="<Property><Property.Name>Type</Property.Name><Value>"&acctype&"</Value></Property>"
myArray(10)="</Group>"
myArray(11)="<Group><Group.Name>Address</Group.Name>"
myArray(12)="<Property><Property.Name>Company</Property.Name><Value><![CDATA["&company&"]]></Value></Property>"
myArray(13)="<Property><Property.Name>Phone-1</Property.Name><Value>"&phone1&"</Value></Property>"
myArray(14)="<Property><Property.Name>e-mailID</Property.Name><Value>"&email&"</Value></Property>"
myArray(15)="<Property><Property.Name>Address-Street</Property.Name><Value><![CDATA["&street&"]]></Value></Property>"
myArray(16)="<Property><Property.Name>Address-City</Property.Name><Value><![CDATA["&city&"]]></Value></Property>"
myArray(17)="<Property><Property.Name>Address-State</Property.Name><Value><![CDATA["&state&"]]></Value></Property>"
myArray(18)="<Property><Property.Name>Address-Country</Property.Name><Value><![CDATA["&country&"]]></Value></Property>"
myArray(19)="<Property><Property.Name>Address-Pin</Property.Name><Value>"&zipcode&"</Value></Property>"
myArray(20)="</Group>"
myArray(21)="</Tab></PropList></Object></WebForm>"
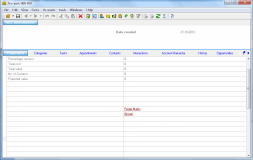
The Object Type, Tab, Group, Property, and Property Value fields indicated in the figure demonstrate the corresponding XML tag values mentioned in the example. Follow the same method of field definition for the Interaction, Contact, Opportunity, Order Objects, and custom Objects, and to update the Can be called for this Campaign system Property.
Where:
-
Account is an Object type in CampusNexus CRM.
-
Properties is the Tab name for the Account Object.
-
There is no Group name associated with the first set of Properties such as Account Name, Account Manager, and so on.
-
Account Name is the Property name in the Properties tab, with no Group associated. This Property name on the Web Form must match the Property name in the Main database.
myArray(0)="<WebForm>"
myArray(1)="<Object><ObjectID>-1</ObjectID><LANG>English</LANG><DLID>1033</DLID><SQLLANGID>0</SQLLANGID><Object.Name>Contact</Object.Name>"
myArray(2)="<EventList/><PropList>"
myArray(3)="<Tab><Tab.Name>Properties</Tab.Name>"
myArray(4)="<Group><Group.Name></Group.Name>"
myArray(5)="<Property><Property.Name>Name</Property.Name><Value>"&name&"</Value></Property>"
myArray(6)="<Property><Property.Name>E-mail</Property.Name><Value>"&email&"</Value></Property>"
myArray(7)="<Property><Property.Name>Phone</Property.Name><Value>"&phone&"</Value></Property>"
myArray(8)="</Group>"
myArray(9)="<Group><Group.Name>Full Name</Group.Name>"
myArray(10)="<Property><Property.Name>FirstName</Property.Name><Value>"&fname&"</Value></Property>"
myArray(11)="<Property><Property.Name>LastName</Property.Name><Value>"&lname&"</Value></Property>"
myArray(12)="</Group>"
myArray(13)="<Group><Group.Name>Address</Group.Name>"
myArray(14)="<Property><Property.Name>Street</Property.Name><Value><![CDATA["&street&"]]></Value></Property>"
myArray(15)="<Property><Property.Name>City</Property.Name><Value><![CDATA["&city&"]]></Value></Property>"
myArray(16)="<Property><Property.Name>State</Property.Name><Value><![CDATA["&state&"]]></Value></Property>"
myArray(17)="<Property><Property.Name>Country</Property.Name><Value><![CDATA["&country&"]]></Value></Property>"
myArray(18)="<Property><Property.Name>Zip</Property.Name><Value>"&zipcode&"</Value></Property>"
myArray(19)="</Group>"
myArray(20)="</Tab></PropList></Object></WebForm>"
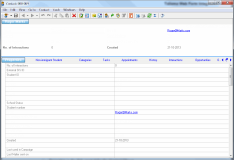
The Object Type, Tab, and Property Value fields indicated in the figure demonstrate the corresponding XML tag values in the example. Follow the same method of field definition for the Interaction, Account, Opportunity, and Order Objects.
Where:
-
Contact is the Object type in CampusNexus CRM.
-
Properties is the Tab created for the Contact Object.
-
There is no Group name associated with the first set of Properties such as Actual value, and Language.
-
First name is the Property name under the Full Name Group in the Properties tab.
You can also set or change the Categories for a selected Object. The following examples illustrate this process. The tags must be placed before the ending </object> and </webform> tags.
myArray(40)="<CategorizeList>"
myArray(41)="<Category><Category.Name>"&categories&"</Category.Name>\</Category>"
myArray(42)="</CategorizeList>"
To Remove the Categorization of an Object
myArray(43)="<UnCategorizeList>"
myArray(44)="<Category><Category.Name>"&categories&"</Category.Name></Category>"
myArray(45)="</UnCategorizeList>"
myArray(46)="</Object>"
myArray(47)="</WebForm>"
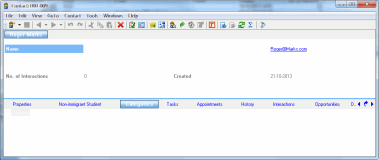
The image below illustrates the Categories associated with the Contact Object. CampusNexus CRM enables you to set Categories for every Object.
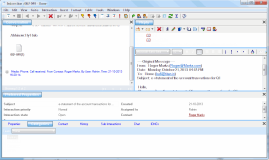
The following image illustrates a Category for the Interaction Object. CampusNexus CRM enables you to set Categories for every Object.
Multilingual Support
The Web Form can contain a tag specifying the Language ID for the Property names in it. For example, <Lang>English</Lang>.
The Web Form may also contain a tag specifying the language of the data in the Web Form. For example, <DLID>1033</DLID>, where ‘1033’ is the Language ID for English (United States).
When the Web Form is being processed by the Webform Sync Service, the language tags are picked up and processed accordingly. If the tags are not specified, the Offline Service assumes the Default Server Language for both (this can be configured using Business Administrator).
The Web Form can be displayed in one language, and the values you enter can be internally mapped to any language when the Web Form is being sent to the Database component. This will enable the same Web Form to be used across language sites.
Test Web Form Integration
-
Create the XML tags for your Web Form in a staging environment. Generate an e-mail and send it to your personal mailbox rather than sending it directly to CampusNexus CRM. The subject line should begin with: CDXDFGVCJVCHGFJHNB30 and the body of the message should contain the XML tags.
-
Copy and paste the XML tags which are in the body of the e-mail into a Notepad file. Save the Notepad file as test.xml.
-
Open the text.xml file. If your XML tags contain errors, the errors are displayed. If the XML tags do not contain errors, each tag in the file is displayed. The Web Form sample also contains a sample for directly generating the XML file.
-
After verifying the XML tags from the Web Form, generate an e-mail to an Alias, which is to be retrieved by CampusNexus CRM.
-
Log on to CampusNexus CRM by obtaining the login details from Business Administrator. Verify whether each of the fields you want to update is filled in appropriately. Also, ensure that the Interaction case history displays an event with the message ‘Web Form interaction created’. Use the figures in this chapter to determine how to verify whether the fields are updated. Contact the Business Administrator User, if it is necessary.
Example of Web Form Integration in ASP
-
ExecuteEnhancementRequest.asp updates Contact Properties and uses the CDONTS Send Mail Component.
-
Interaction.asp and Interaction.htm are samples for creating an Interaction in CampusNexus CRM. This uses the Persits.MailSender AspSendmail Component. You will find additional samples for the Account, Opportunity, Order, and Contact Objects on the CD under \\Explore CD\ Samples\Web
Tips to Use Web Forms
This section provides tips and best practices to remember when using Web Forms.
CampusNexus CRM Properties, which reside in the Tab-Group- <Property> structures, can be integrated as shown in the following code snippet:
Sample for Integrating Properties
Assumption: The Property “Balance Value” needs to be added in the Opportunity Object in a tab named “Custom” and group named “Details”. Check the code below:
myArray(n)=“<Tab><Tab.Name>Custom</Tab.Name>”
myArray(n)=“<Group><Group.Name>tabProperties</Group.Name>”
myArray(n)=“<Property><Property.Name>Balance Value</Property.Name><Value>”&bVal&”</Value></Property>”
myArray(n)=“</Tab></Group>”
Here, bVal => variable, which has the value, that comes from the Web Form user interface.
Tab and group tags should be opened and closed as displayed.
When some Categories need to be integrated with CampusNexus CRM, you should decide which interface elements are to be associated with the Categories.
They can be displayed either as check boxes or as “Yes/No” type of Properties. This is specified in the .htm(l) file of the Web Form as normal Web coding.
Mapping of the values for each of the interface elements is similar as Properties.
Sample for Categorizing an Object
For categorizing a CampusNexus CRM Object using Web Forms, the following code can be used.
Assumption: Category 1 and Category 2 are two sample Categories that will be assigned to an Object.
categorize = Category 1
categorize1 = Category 2
myArray(11)=“<CategorizeList>”
myArray(12)=“<Category><Category.Name>”&categorize&”</Category.Name></Category>”
myArray(13)=“<Category><Category.Name>”&categorize1&”</Category.Name></Category>”
myArray(14)=“</CategorizeList>”
Sample for Removing the Category Associated with an Object
The following code can be used to remove the category associated with a CampusNexus CRM Object using Web Forms.
Assumption: An Object that has been categorized as Category 1 has to be changed.
uncategorize= Category 1
myArray(15)=“<UnCategorizeList>”
myArray(16)=“<Category><Category.Name>“&uncategorize&”</Category.Name></Category>”
myArray(17)=“</UnCategorizeList>”
CampusNexus CRM, by default does not support all special characters in its Web Forms. To enable supporting of all the special characters, the CDATA sections in the Web Form Sample must be used as follows:
Assumption:
Special characters for a Property called “Hobby” need to be supported. The Property will be used in the code array as follows:
myArray(n)=“<Property><Property.Name>Hobby</Property.Name><Value><![CDATA[“&HobbyData&”]]></Value></Property>”
Here, HobbyData => variable which has the value that comes from the Web Form interface, and contains special characters such as &, “, ”, <, ', >, and so on.
Working of Web Forms
Note the following points about the working of Web Forms in CampusNexus CRM:
-
Ensure that the names of the Custom Property, tab, and the group in the Web Form are specified exactly as in CampusNexus CRM. However, they are not case sensitive.
For example, a Property called “balance value” in CampusNexus CRM can be specified as “BALANCE VALUE” in the Web Form to capture its value.
-
If the same e-mail address is used to create an Interaction and a Contact, here is how CampusNexus CRM works:
The e-mail address specified in the request Web Form is used to create a Contact. This Contact is linked to an Interaction in CampusNexus CRM. The e-mail address specified in the Contact Web Form is used to create a new Contact with the specified e-mail address and other details.
-
The Object ID is displayed as –1.
-1 indicates a new Object. It means that a new Object will be created with the details specified.
-
The maximum number of characters allowed in a single line is 76.
This is an SMTP restriction.


