Web Client
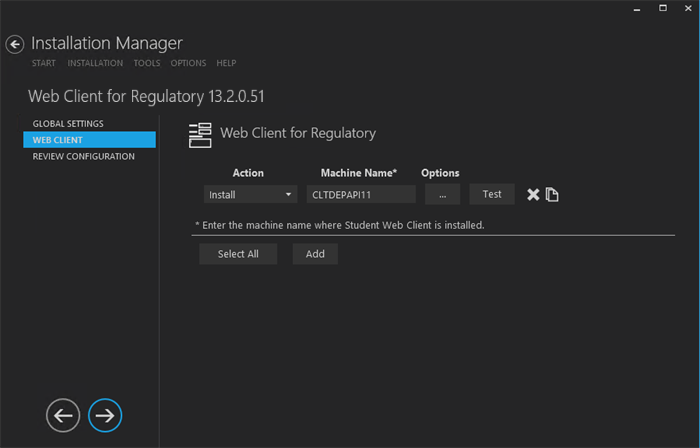
This Settings screen enables you to select the actions to be taken by Installation Manager (e.g., install, uninstall) and to specify the machine name and options of the standard interface (web client) for Regulatory.
Set Up the Web Client
-
In the Installation menu, click Web Client. The Web Client for Regulatory screen is displayed. 
-
Click Add to add a line to the Settings screen.
-
Select an appropriate Action. The following Action values are available:
-
None – Performs no action.
-
Install – Performs a fresh installation or upgrade of a component. You can install or upgrade multiple components at the same time.
-
Uninstall – Removes all subcomponents on that machine and uninstalls the component from Programs and Features.
Optional: Click Select All to set the Action field to Install for all components listed on this screen. Click Unselect All to set the Action field to None.
-
Enter the Machine Name for the component to be installed.
-
Click  to copy a line. Edit the copied line as needed.
-
Click  to view and edit the Options form.
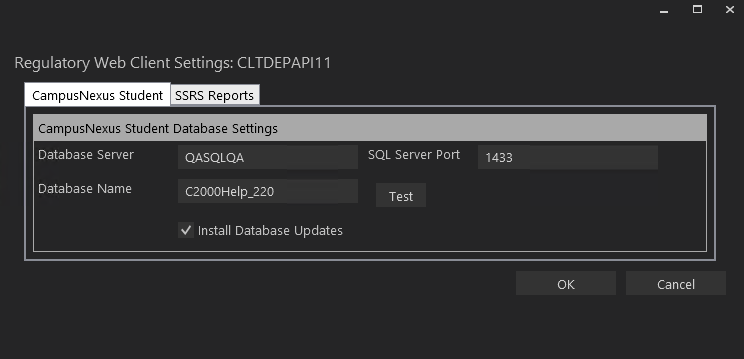
Anthology Student Tab
Use this tab to configure the Anthology Student database connection for use by Regulatory.
Anthology Student Tab Fields
| Anthology Student Database Settings
|
| Database Server |
Name of the SQL server on which the Anthology Student database resides. |
| SQL Server Port |
Specify the port number of the SQL server or accept the default (1433).
|
| Database Name |
Name of the Anthology Student SQL database. |
| Test |
Click Test to verify the database connection. |
| Install Database Updates |
Select this check box to install updates to the Anthology Student database. |
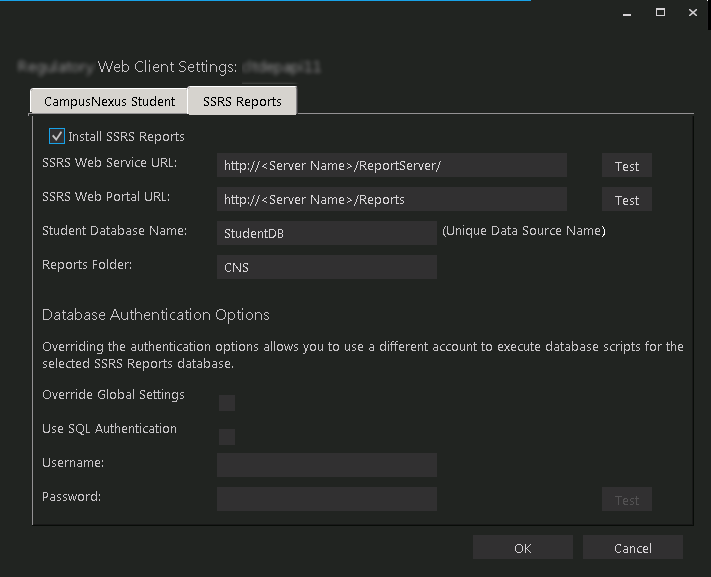
SSRS Reports Tab
Use this tab to integrate SQL Server Reporting Services (SSRS) 2016, the server-based report generating software system, into Regulatory. The SSRS URLs and the Reports Folder Root Path specified on this tab are stored in the web.config file.
SSRS Reports Tab Fields
| Install SSRS Reports |
Select this check box to enable the fields on this tab. |
| SSRS Web Service URL |
Specify the Web Service URL configured to access the Report Server. The specified URL will be stored in the web.config file. This URL is set while configuring the reporting service and can be found in Reporting Services Configuration Manager. 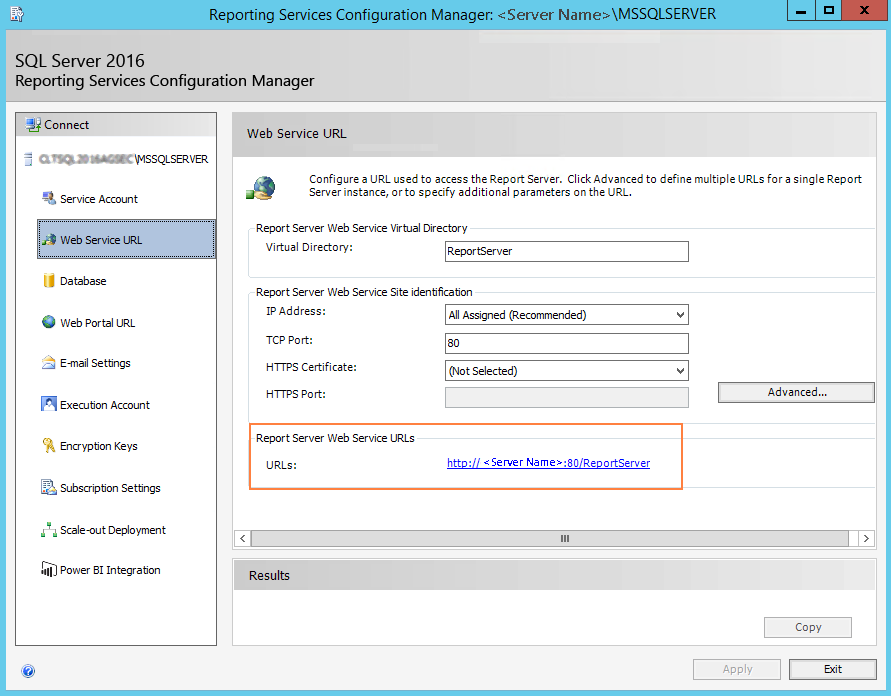
|
| SSRS Web Portal URL |
Specify the Web Portal URL configured to access the Web Portal. The specified URL will be stored in the web.config file. This URL is set while configuring the reporting service and can be found in Reporting Services Configuration Manager page. 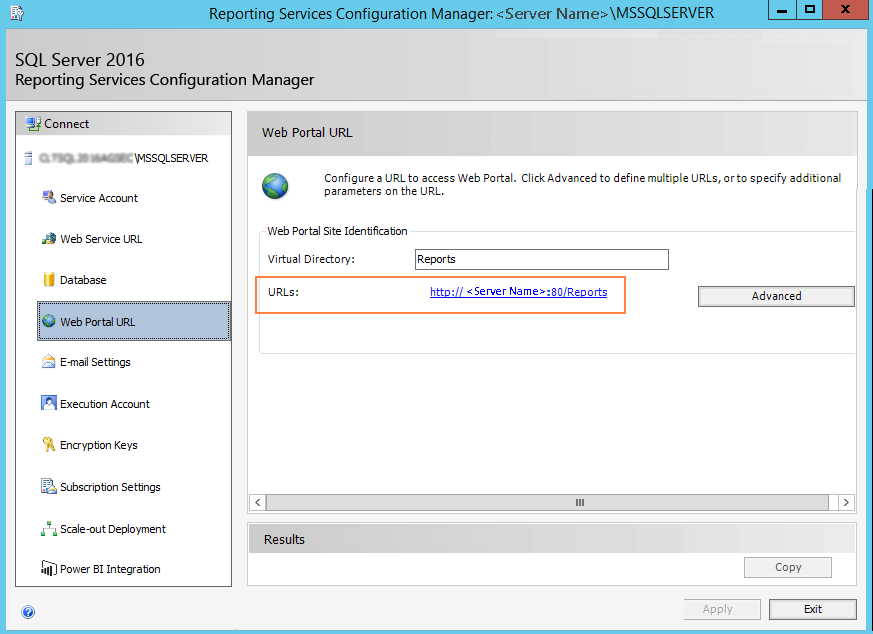
|
| Data Source Name |
Specify the name of the Anthology Student database that is the source for the reports. |
| Reports Folder |
Specify the path for the reports folder on the Report Server. A folder will be created if one does not exist. The folder name can be unique to the environment. The reports folder root path will be stored in the web.config file. Example QA/CNS where QA is one folder and Student_Test is a folder under QA.
|
| Database Authentication Options
|
| Override Global Settings |
Optional: Select this check box to enable the database authentication options.
|
| Use SQL Authentication |
Optional: Select this check box if SQL authentication is applied. |
| Username |
Enter the user name of the account that is given override permissions for the SSRS reports database. |
| Password |
Enter the password of the account that is given override permissions for the SSRS reports database. |
| Test |
Click Test to ensure the user authentication settings are correct. A confirmation message is displayed. |
In addition to the settings on the SSRS Reports tab in Installation Manager, the setup of reporting services requires configurations in the SQL Server Reporting Services Configuration Manager (see Configure Access to Reports).
You also need to create folders in the Anthology Student and assign permissions using the Security Console. Refer to the Administration and Configuration Help for Anthology Student at the Product Information site.
Configure Access to Reports
To enable access to the “Reports” menu item in Anthology Student, perform the following steps in the Reporting Services Configuration Manager on the report server:
-
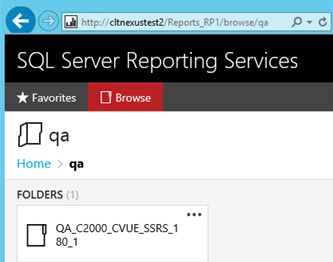
Navigate to the /Reports folder path.
In the example below the reports folder path is http://cltnexustest2/Reports_RP1/browse/qa.
-
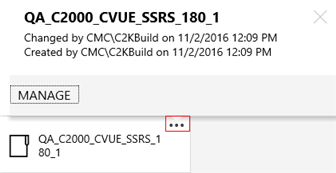
Right-click on the ellipsis of the reports folder root and select Manage.
-
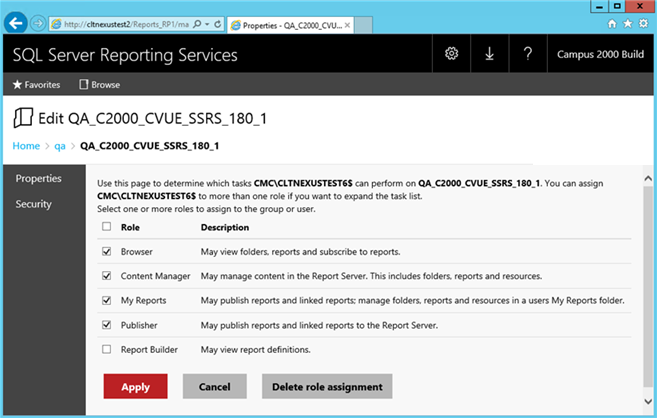
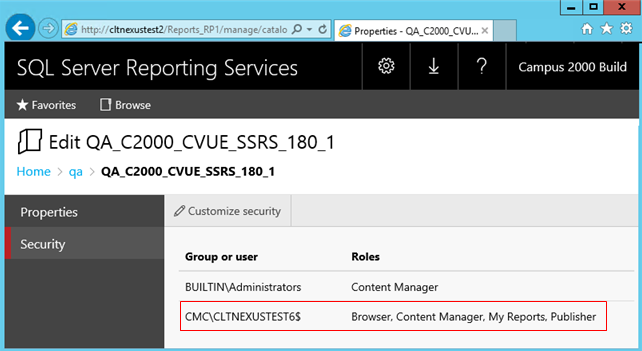
Select the Security tab, click Customize security, and click Add group or user.
-
Add the domain\<machine name$> of Anthology Student and select the following Roles:
- Browser
- Content Manager
- My Reports
- Publisher
-
Click Apply.
Security for the Reporting Service should be set up as shown below, where CMC\CLTNEXUSTEST6 is the domain\machine name of Anthology Student from which the reports are accessed.
Configure SSRS for HTTPS
Once the reporting services are installed and configured, test access to the reports in Anthology Student. Select the Reports tile and navigate to any report listed in the menu.
If Anthology Student displays only the title of the report (without any data selection fields), use the browser developer tools (F12) and check the Console tab. If an error similar to the following is displayed, configure SSRS for secure access with an SSL certificate. For detailed instructions, see https://docs.microsoft.com/en-us/sql/reporting-services/security/configure-ssl-connections-on-a-native-mode-report-server

-
Click OK to save changes on the Options form. The form is closed.
-
Click  to delete a selected line.
-
Click Test to ensure the setup for the corresponding line is correct. If a test on a particular line fails, check all associated fields and click Test again.
The Test button checks the connectivity of the Admin user to the machine specified in the Server name field.
-
If all tests pass, click  .
.
Last Updated: 8/3/2024 | Installation Manager 2.0 | © 2024 Anthology Inc. and its affiliates. All rights reserved. | www.anthology.com