The Installation Manager application is a single user interface for installing and managing CampusNexus products. Its integrated Package Manager enables users to download installation packages for the products to be installed. Access to the installation packages is controlled via a unique customer identification key.
|
|
The machine where Installation Manager is installed must have Internet connectivity so that the installation packages for the products to be installed can be downloaded. |
Note: Installing to a target machine located in a DMZ (demilitarized zone) is not supported from a machine outside the DMZ (if the required ports are not open on the DMZ machine). If you are going to install to a machine in the DMZ, you must run Installation Manager on that machine.
Prerequisites
-
Make sure that the local and/or target machines use .NET Framework 4.5.
-
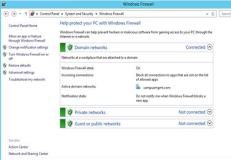
The Windows Firewall service (see Administrator Tools > Services) needs to be set to enabled, but the Windows Firewall must be turned off. This step must be executed on all systems except for a dedicated SQL Database Server.
To turn off the Windows Firewall
-
Navigate to Control Panel > System and Security > Windows Firewall.
-
Click the Turn Windows Firewall on or off link in the left-hand menu.
-
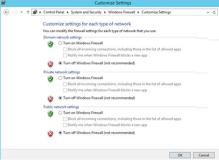
In the Customize Settings window, select the Turn off Windows Firewall option in the following sections:
- Domain network location settings
- Home or work (private) network location settings
-
Click OK.
-
Close the Control Panel > Windows Firewall window.
-
-
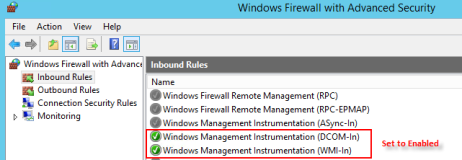
In cases where the firewall cannot be turned off, the following ports must be open and Windows Management Instrumentation (WMI) predefined rules must be enabled on any target machine to which you are installing components:
Ports Used by Installation Manager Port Definition Port Number Comments TCP 139 These ports are used by Windows File Sharing.
For more information, see "Understanding Shared Folders and the Windows Firewall" at https://technet.microsoft.com/en-us/library/cc731402.aspx.
Note: The WF.msc has a predefined rule for Windows File Sharing.
TCP 445 UDP 137 UDP 138 TCP 8889-8890 Installation Manager Agent MSSQL 1433 Port 1433 (default SQL port) or any custom port that is configured for SQL communications must be open if the target machine is an SQL Server. The pre-defined rules (Windows Management Instrumentation (DCOM-In) and Windows Management Instrumentation (WMI-In)) in Windows Firewall Configuration have to be enabled.
-
Disable the “User Account Control: run all Administrators in admin approval mode” Security Policy in Local Security Policy under Local Policies, Security Options.
-
Reboot the appropriate machines.
-
Installation Manager requires unique keys tied to the installation packages available to particular customers to ensure that incorrect, outdated, or inappropriate packages are not installed. To obtain a customer key, call Anthology Inc. Customer Support at 1-800-483-9106.
Install Installation Manager
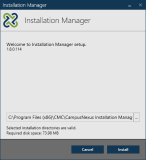
Start the installation of Installation Manager (on the machine where the installer is running).
-
Click on the Installation Manager icon
 in the folder containing the
 Setup.exefile. The Installation Manager Welcome screen is displayed. -
Accept the default installation directory or click
 to browse to a different directory.
 -
Click Install. The installation progress is displayed.
-
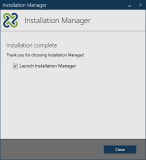
On the Installation Complete screen, the option to Launch Installation Manager is selected by default.
-
Click Close. The Start screen of Installation Manager is displayed.
Important: When a new version or build becomes available, you do not have to delete any files or folders before installing a new version of Installation Manager.
Note: The Installation Manager log file provides information on the current configuration status.
