Configuring the Launch of the Schedule Appointment Page From Success Networks
The following steps describe how to configure the Schedule Appointment page to be launched when applicants click the Book Appointment button.
-
Launch the Sitefinity URL and expand the My Dashboard group.
-
Select the Success Network page.
-
In the List View section, click
 to view the List View dialog.
 -
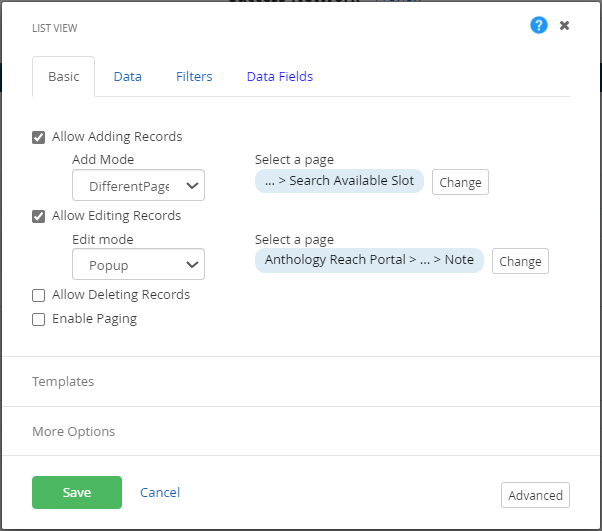
Click the Allow Adding Records option.
-
In the Select a page field, click the Change button and select Search Available Slot.
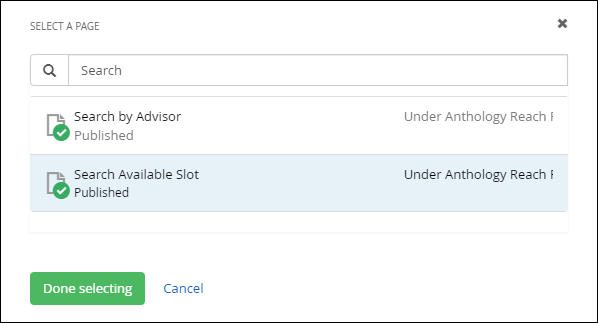 Note:The Search Available Slot is the new book appointment page. Selecting the Search By Advisor page will redirect the user to the old book appointment page.
 -
Clear the Allow Adding Records option.
-
Click Save and then click Publish.
