You can send e-mail Messages to a single or multiple Leads using the New Message window. The New Message window can be accessed using any of the following steps:
To Send an E-mail Message to a Single Lead
• Click on the predefined or custom E-mail Property of the Lead to whom you want to send a Message.
- OR -
• Select the Lead in the Lead Table View, and click New, Message from the File menu.
- OR -
• Right-click on the Lead in the Lead Table View, and select New Message from the shortcut menu.
- OR -
• From the Lead Item View of the Lead, select New, Message from the File menu.
The To: field in the New Message window is automatically updated with the name of the selected Lead. Double-click the To field to view the Lead name and its e-mail address that is specified in the predefined E-mail Property of the Lead Object. The following options are available in the Link to field:
◦ Campaign
◦ Enrollment
◦ Opportunity
◦ Order
The New Message Window for a Lead
To Send an E-Mail Message to Multiple Leads
• Select multiple Leads in the Lead Table View and click the New Message option from the shortcut menu or the File menu.
The New Message window is displayed and the To: field displays <Multiple Recipients. Choose File->Recipients to see details>. To view the Leads that are included in the To: list, select Recipients from the File menu in the New Message window.
The New Message Window for Multiple Leads
In the New Message window, if the Log as New Interaction option is selected, an Interaction is created for the Lead and the Regarding Lead Property is automatically populated with the Lead name. Additionally, the Contact Property in the Interaction is set to the Contact that is associated with the Lead. If the Message is sent to multiple Leads, a separate Interaction is created for each Lead and the Interaction created for the Lead is listed in the Interactions tab of the Lead Object.
|
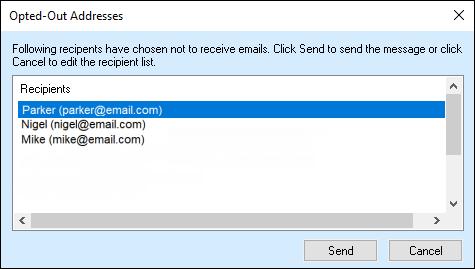
Note • When you click Send to send the email, the Email Opt-out dialog is displayed if ◦ The Send Email property of any leads is No. AND Opt-out functionality is enabled for the alias.
Click Send. The email is sent even though specific leads opted out of receiving email messages. OR Click Cancel. The dialog is closed. Close the message, select only those leads who opted to receive messages, and then send the message. • The maximum number of Leads to whom an e-mail Message can be sent using a single New Message window is based on the value specified in the Maximum number of Leads to whom an e-mail message can be sent system option in Talisma Business Administrator. For more information, see Talisma Business Administrator Help. • In the New Message window for a Lead, you can insert only those Canned Responses that are based on the Lead Object. • By default, Log as New Interaction option is selected in the New Message window. However, if a Message is sent to a Lead without selecting the Log as New Interaction option, an Interaction is not created for the Message. If the Lead replies to this Message, an Interaction is created for the incoming e-mail message in Talisma and the e-mail address of the Lead is resolved against a Contact in Talisma. • If the View related Object items based on the set Object item global option is set to No and the Contact of an Interaction is changed, the value in the Regarding Lead Property of that Interaction will not change. However, if the View related Object items based on the set Object item global option is set to Yes, and the Contact of an Interaction is changed, the value in the Regarding Lead Property for that Interaction will become blank. For more information, see Display of the Lead Object in Different Windows. • Messages cannot be sent to a Lead in the following scenarios: ◦ An e-mail address is not available for the Lead. ◦ The Lead is archived. ◦ There is no Contact associated with the Lead or the Contact associated with the Lead is deleted. ◦ The Lead is deleted. • In the Select Names dialog box that is opened by clicking the |
 icon from the toolbar or by clicking the Address Book option from the Tools menu in the New Message window for the Lead, the To field will be disabled. This prevents a Talisma Client User from changing the Lead name in the To field of the New Message window.