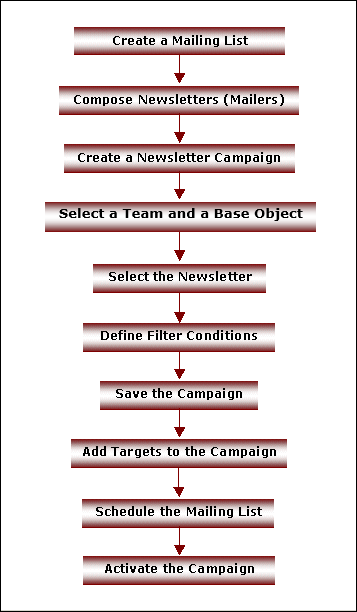
The process of creating a Newsletter Campaign is depicted in the following figure. See the table below the graphic for more information.

Process Flow for Newsletter Campaigns
|
Step |
Description |
|
Creating a Mailing List |
To launch a Newsletter Campaign, you must create a distribution list that contains e-mail addresses of your base Object items and potential customers. In Talisma, a distribution list is called a Mailing List. |
|
Composing Newsletters (Mailers) |
You must compose the newsletter to be sent as soon as the Newsletter Campaign in launched. You can create several newsletters and schedule their dispatch sequentially. In Talisma, a newsletter is known as a Mailer. |
|
Creating a Newsletter Campaign |
When you have the newsletter and the distribution list ready, you can proceed to create the Newsletter Campaign. To do so, click File > New > Object > Campaign > Newsletter. |
|
Selecting a Team and Base Object |
Select the Team and Base Object for which Campaign must be created. When you select a Team, the Templates and Mailing Lists created in that Team are available for use in the Campaign. |
|
Selecting the Newsletter |
Next, you need to select the newsletter to be sent when you launch the Campaign. To do so, you must select the required newsletter from the list of Mailers displayed in the right pane. |
|
Defining Filter Conditions |
You need to define appropriate Filter conditions for the Connector joining the Action Nodes. A Connector acts as a conduit or pipe through which Targets flow between Nodes in the Campaign Workflow. When you define a Filter condition, it filters the Targets that progress to the next Node. The value of a Connector without a condition defined on it will always be TRUE, and all Targets from the previous Node progress to the next Node through it. |
|
Saving the Campaign |
You must save the Campaign before proceeding to the next step. In order to save the Campaign, you must specify a unique Campaign name. |
|
Adding Targets to the Campaign |
A Target is a base Object item who is part of the Campaign. You can add Targets to a Campaign using Filters or Mailing Lists. |
|
Scheduling the Mailing List |
You can schedule the dispatch of the newsletters (Mailers) for specific dates. You can also schedule the dispatch for a regular frequency. |
|
Activating the Campaign |
By default, Campaigns are set to be in the Inactive state when created. No Mailers are sent and Targets do not progress through the Workflow of an Inactive Campaign. Inactive Campaigns will not be processed, and the Targets in the Campaign become inert. A Campaign has to be activated manually. If a Mailing List has been scheduled to run, and the Campaign has not been activated, Targets will not be added to the Campaign at the scheduled time. To activate the Campaign, select Activate Campaign from the Campaign menu. |