Generating Log Files for Print Templates
Log files for Print Templates can be generated for diagnostic reasons. By default, log files are generated in the Logs\Error folder in the path <system drive>:\Program Files\Common Files\Talisma Shared where the service is available.
The Logs and Error folders and log files are automatically generated only when errors are encountered when you work with Print Templates in Campaigns. The folders are not available by default.
|
Note The log files are specific to Campaign-related Print Template activities on the Database Administrator computer. They do not include activities of Print Templates on the Desktop Client computer. For information about generating log files for Print Template-specific operations on Desktop Client, see Desktop Client Help. |
Log files can also be generated in the Info and Trace folders. The following image depicts the layout of the Logs folder and its subfolders:
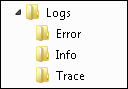
The Logs Folder and its Subfolders
By default, the Info and Trace folders are not displayed. To enable the display of these folders, perform the following steps:
1. In the navigation pane, expand the Services - Job Services node. Create a service or work with the default service on the Main database computer.
2. Using a text editor, open the Nlog.config file that is available in the path <system drive>:\Program Files\Common Files\Talisma Shared.
3. Uncomment the following code:
<!--logger name="*" minLevel="Trace" writeTo="trace" /-->
<!--logger name="*" minLevel="Info" writeTo="info" /-->
Alternatively, overwrite the above code with the following code:
<logger name="*" minLevel="Trace" writeTo="trace" />
<logger name="*" minLevel="Info" writeTo="info" />
4. Save and close the Nlog.config file.
5. Add a print job to the default service or the service that you created in step 1.
6. In Desktop Client, activate the relevant Campaign and then select Process All Campaigns Now.
7. Run the service and then start the print job.
When you work with Campaign-specific Print Templates, log files are automatically generated in the appropriate folder and are named in the following format:
|
Folder |
Log File Name |
|
| Error | PrintTemplateDotNetErrorLog_<YYYYMMDD>.txt | |
| Info | PrintTemplateDotNetInfoLog_<YYYYMMDD>.txt | |
| Trace | PrintTemplateDotNetTraceLog_<YYYYMMDD>.txt | |
Individual log files are generated on a daily basis when Campaigns are processed. If the size of a log file exceeds 10 MB, a new file is generated in the same path. The maximum size of log files (in Bytes) is set in the archiveAboveSize attribute of the Nlog.config file. To change the maximum size, perform the following steps:
1. Using a text editor, open the Nlog.config file.
2. Based on the folder in which you want to change the size of the log file, navigate to the applicable code snippet and change the value that is indicated in red in the following table:
|
Folder |
Code Snippet |
|
| Error |
archiveFileName="${basedir}Logs\Error\PrintTemplateDotNetErrorLog_${date:format=yyyyMMdd}.{##}.txt" archiveAboveSize="10485760" archiveNumbering="Rolling" maxArchiveFiles="99" |
|
| Info |
archiveFileName="${basedir}Logs\Info\PrintTemplateDotNetInfoLog_${date:format=yyyyMMdd}.{##}.txt" archiveAboveSize="10485760" archiveNumbering="Rolling" maxArchiveFiles="99" |
|
| Trace |
archiveFileName="${basedir}Logs\Trace\PrintTemplateDotNetTraceLog_${date:format=yyyyMMdd}.{##}.txt" archiveAboveSize="10485760" archiveNumbering="Rolling" maxArchiveFiles="99" |
|
3. Save and close the Nlog.config file.
|
Note • In the Logs folder, a scenario can occur where the Info and Trace folders are displayed whereas the Error folder is not displayed because no errors are encountered. • Log files in the Trace folder are a combination of log files in the Error and Info folders. |