Creating a Campaign Dispatcher
You would create a campaign dispatcher to enable Campaign users to send SMS and Email type of Mailers.
Before creating a campaign dispatcher, ensure that you have the necessary administrative permissions on the computer on which you will create the campaign dispatcher.
You can create multiple campaign dispatchers on the same campaign dispatcher server or across several campaign dispatcher servers. A campaign dispatcher configured to send Email type of Mailers has an e-mail address associated with it on the mail server used to send Mailers.
To Create a Campaign Dispatcher
1. From the navigation pane, right-click the Services - Campaign Dispatchers node and select Create Campaign Dispatcher.
2. In the Dispatcher Name field, type a name for the campaign dispatcher.
3. From the Dispatcher Server Name field, type or select the name of the server where the campaign dispatcher will be installed. The campaign dispatcher can be installed on the same computer as Main database or on another computer.
|
Note The name of the server must be the computer name, and not its fully qualified domain name. |
4. In the Dispatcher type list, perform one of the following steps:
◦ Select EMAIL if you want to use the campaign dispatcher to send Email type of Mailers
◦ Select SMS if you want to use the campaign dispatcher to send SMS type of Mailers.
If you selected EMAIL, carry out the following steps.
If you selected SMS, go to step 8.
5. In the Mail Server Name field, type the name of the SMTP mail server from which Mailers are to be dispatched.
6. In the Messages Dispatched per Hour field, specify the number of Mailers to be dispatched per hour.
7. If you selected EMAIL in step 5, in the Volume of mails per batch field, specify the number of Email type of Mailers that a batch must contain. A batch comprises a certain number of Mailers that the campaign dispatcher will select at a time from Main database.
- OR -
If you selected SMS in step 5, in the Message batch size field, specify the number of SMS type of Mailers that a batch must contain.
8. For EMAIL type of Mailers, in the SMTP Port field, specify the port for the SMTP Server. The default port is 25. Contact your mail server administrator for more information.
9. In the Type of Encryption Connection list, select one of the following options:
◦ None - Communication between the dispatcher job and the mail server is not encrypted.
◦ SSL - Communication between the dispatcher job and the mail server occurs through implicit TLS or SSL on a dedicated SSL port that is configured on the mail server for the IMAP or POP3 protocols. The connection is attempted using TLS encryption. If the mail server does not support TLS, the connection occurs through SSL 3.0.
◦ TLS - Communication between the dispatcher job and the mail server occurs through explicit TLS.
|
Note The encryption connection type that you select can also depend on the type of encrypted connections supported by your email server. For example, Exchange server allows configuration of SMTP only through explicit TLS or the connection is unencrypted. |
10. Select Enable Dispatcher. This specification is essential to start dispatching Mailers using the newly created campaign dispatcher. By default, the campaign dispatcher is enabled.
Carry out the following steps if you selected EMAIL in step 5.
11. Select the Login Information tab.
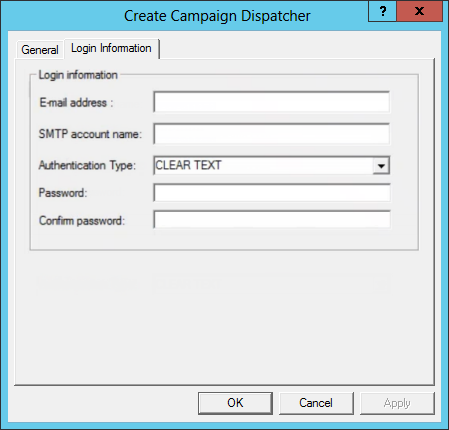
12. In the E-mail Address field, specify a valid e-mail address of the SMTP mail server through which Mailers are sent. This e-mail address is used to authenticate the SMTP mail server.
Read receipts and notifications about undelivered messages for a Mailer will be received by this e-mail address.
|
Note To receive read receipts, configure the campaign dispatcher. |
13. In the SMTP Account Name field, type the SMTP account name that can be used by the campaign dispatcher to log on to the SMTP mail server.
This is the mail server defined in the Mail Server Name field of the General tab. This information is required if the SMTP mail server supports SMTP authentication.
If your institution is associated with SendGrid, type the value apikey.
14. In the Authentication Type field, select the authentication type to log on to the server on which the campaign dispatcher will be created. The following options are available:
◦ CLEAR TEXT
◦ NTLM
◦ OAUTH 2.0 - Before selecting this option, ensure that values are set in the Modern Authentication Options area (Business Administrator > Global Options page). For more information, see Business Administrator Help.
15. (For CLEAR TEXT and NTLM only) In the Password field, specify the password. For security reasons, asterisks (*) are displayed as you type.
If your institution is integrating with SendGrid, copy the API key generated from the SendGrid website.
16. (For CLEAR TEXT and NTLM only) In the Confirm Password field, confirm the password. For institutions integrated with SendGrid, confirm the password typed above.
17. (For OAUTH 2.0 only) In the Mail server field, select Office 365 or Gmail.
18. (For OAUTH 2.0 only) Click the Generate Tokens button. After typing your login credentials and password in the displayed web page, values will be updated in the Access token and Refresh token fields.
19. Click OK. The campaign dispatcher is created at the specified location.
|
Note • To validate the connection from the created campaign dispatcher and the mail server, in the case of: ◦ CLEAR TEXT and NTLM - the typed password will be considered. ◦ OAUTH 2.0 - the access token will be considered. • If you attempt to create a new campaign dispatcher on a server where a campaign dispatcher previously exists, the new dispatcher will be linked to the mail service already configured on the server. • A notification will be displayed in Desktop Client or Web Client if login to the mail server fails in the dispatch of emails from a campaign dispatcher created with OAUTH 2.0 settings. |