Create Custom Reports and Other Printable Documents
You have a variety of options for creating custom reports and printable documents.
You can:
-
Create custom reports in custom folders
-
Create custom reports in the existing folders
-
Override pre-defined reports and printable documents with custom reports and documents
The custom reports will be visible within the Anthology Student Reports menu suffixed with an asterisk.
You can also specify that the custom reports and printable documents are only available for a specific campus.
Create Custom Reports in Custom Folder
If you create a folder in the same directory as the folders for the Anthology Student reports, the folder and any reports that it contains are displayed in the Reports tree when you select Reports on the Home page for Anthology Student.
For example, if you create an Annual reports folder that contains custom reports, then Anthology Student displays the Annual Reports folder between Admissions and Career Services.
Create Custom Reports in Existing Folder
If you add a report to any of the existing folders for modules, it is displayed below the pre-defined reports in the respective folder.
Override Pre-defined Reports and Documents
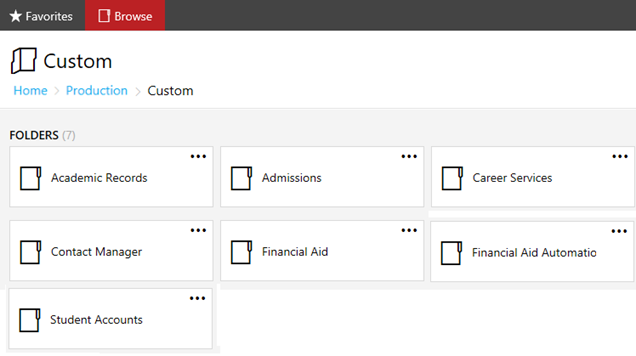
A Custom folder is also there in addition to the folders for each module in the Anthology Student directory. The Custom folder contains a folder for each module similar to the structure in the Anthology Student directory. You can override the pre-defined reports or folders by placing the reports and documents in the appropriate module in this Custom folder.
If you want to override a pre-defined report or printable document, you can:
-
Create a new report or document or copy a pre-defined one from the appropriate folder. The name of the report or document must be the same as the pre-defined report name.
- Place it in the corresponding folder located in the Custom folder.
For example, if you have copied ReportA from the Academic Records folder, then you must place the copied ReportA in the Academic Records folder located in the Custom folder.
Anthology Student searches the module folders in the Custom folder for custom reports and documents first. If it does not find a custom report or document with the same name, it uses the document from the folder in the Anthology Student directory.
Do not modify the pre-defined reports or printable documents installed with Anthology Student. They will be overwritten when you upgrade Anthology Student.
Filter Reports and Printable Documents by Campus
If you create a custom report or printable document and you want the option to generate the report to only be available for a specific campus, you must suffix the report name or document with the campus code in parenthesis. Anthology Student displays the custom reports and documents for a specific campus if users currently have that campus selected as their default campus.
For example, if you have a report with the name Attendance Summary (CampusA), you must be signed in to Anthology Student with CampusA as the default campus to access the report in the Reports menu.
For reports, the suffix only specifies the campus where the report can be generated. The selections in the report still determine the campuses that Anthology Student includes in the report. If more than one campus is selected in the report, the report will contain information for all the selected campuses where you are authorized.
For example, if the report has the name Attendance Summary (CampusA) and CampusA and CampusB are selected in the report, you can only generate the report if CampusA is selected as your default campus when you log into Anthology Student, but it will contain the information for both CampusA and CampusB if you are authorized for both the campuses.
Anthology Student searches the Custom folder on the reports server for customized versions of each report. This includes filtering the custom reports by campus for those reports ending with a campus code in parenthesis.
For example, if you are trying to print the ledger card from the Student Profile and you are signed into a campus with the code CMI:
-
Anthology Student first tries to locate Custom/Student Accounts/sub_Student_LedgerCard (CMI)
-
If Anthology Student cannot locate it, it tries to locate Custom/Student Accounts/sub_Student_LedgerCard
-
If it cannot locate it, Anthology Student prints Student Accounts/sub_Student_LedgerCard
This logic applies to all the reports and documents.
Add Custom Reports to the Security Console
To allow users to add and access new custom reports in the Security Console:
-
Add the custom report to the SQL Server Reporting Services (SSRS).
- Log into Anthology Student as an Administrator.
-
Navigate and open the custom report you created.
-
Log into the Security Console. You can view the custom report here.
If the custom report is still not displayed in the Security Console, then:
- Log into Anthology Student as an Administrator.
-
Select the Processes tile > locate System Administrator > select Job History.
-
Check if Sync Reports to NetSqlAzman have been completed successfully.
Guidelines for Report Names
The following prefixes are used for printable documents. If you create a report name prefixed with these, the report is not displayed in the Reports menu:
- sub_
- lst_
- cst_
For example, if you have a report with the name sub_POCReport, it will not be displayed.
Guidelines for Custom Award Letters
Follow these guidelines when you create custom award letters.
When you configured financial aid in the legacy interface, you specified whether you want to report by academic year or award year. If you want the Student Web App to filter the reports so that only the award letters for an academic year or award year are displayed, make a copy and modify the appropriate template in the Custom folder for award letters by:
-
Academic year, copy and modify FA Award Letter By Academic Year
-
Award year, copy and modify FA Award Letter By Year
Prefix the name of the award letter with sub_cst_.
If you want to create a custom letter for each campus and the Student Web App to only show letters for that campus, you must suffix the document with the campus code in parenthesis.
The following examples show the names of award letters created from a template for a campus configured with the campus code.
-
sub_cst_FA Award Letter By Academic Year_2017 (CMC)
-
sub_cst_FA Award Letter By Academic Year_2018 (CMC)
The letters will only be displayed when the campus is CMC and financial aid was configured in the legacy interface to report by academic year.
Guidelines for Custom Two-Column Transcripts
You can create custom two-column transcripts for student-based and enrollment-based.
By default, Anthology Student Processes can create two-column transcripts for:
- Transcripts (Select the Processes tile > expand Academic Records > select Transcripts.)
-
Transcripts Request Outbound (Select Processes tile > locate Contact Manager > select Transcript Request Outbound.)
You can use the .rdl file of the processes to create custom two-column transcripts for the reports.
Follow the guidelines below to create custom two-column transcripts.
-
Log into the report server.
- Navigate and open the Academic Records folder.
-
Locate and copy the respective .rdl file for the appropriate report.
Report/Sub-Report Name (2-Column/Newsletter Style) Report Type .rdl File Name Student Based Transcript Main sub_Transcript - Student Based_landscape.rdl Official/Enrollment Based Transcript Main sub_Transcript - Official_landscape.rdl Enrollment Transcript Honors Sub-report sub_AdTranscriptEnrollment_landscape.rdl Degrees Awarded Sub-report sub_AdDegreesAwarded_for_Transcripts_landscape.rdl Additional GPA Sub-report sub_AdAdditionalGPA_landscape.rdl -
In the Custom folder, place the copied .rdl file in the Academic Records folder. You can also modify them to create custom transcripts as per your requirement using Microsoft ReportBuilder or any tool in which you can edit XML.
If you want to have single-column transcripts, you have to copy the single-column transcript .rdl files to the Custom > Academic Records folder and then rename them to the file names used for the two-column transcripts.
Guidelines for Custom Housing Lease Template
You can create acustom housing lease template and populate the Lease Template drop-down in Anthology Student (Select the Settings tile > locate System > select Campuses> select the New button and specify the general information or select an existing campus in the list > select the Student Services tile.).
Follow the guidelines below to populate the lease template drop-down with a custom housing lease template.
-
Create a custom SSRS report for the housing lease template with naming conversion as _HousingLeaseTemplate(CampusCode).
Campus code is the code of the campus in the SyCampus table. For each campus, there should be a separate report. For example, the campus code is 00670 the report name should be cst__HousingLeaseTemplate(00670). Remove all the spaces before and after the campus code.
You can use any prefix in the custom report name but it is recommended to use cst for custom reports.
-
Log into the report server.
- Navigate and open the Student Services folder.
-
In the Custom folder, place the created custom housing report.
How Security for Custom Reports and Documents is Integrated in Anthology Student
If you create custom reports and printable documents in Anthology Student directories, Anthology Student also creates a corresponding task for the:
- Folder
- Report or printable document in that folder
You then authorize staff members to view or use it using the Security Console. The custom report also gets added to the All Operations built-in task, so that the System Administrators and others with equivalent access can generate and display the report.
For example, if you create a folder with the name Your Custom Reports and a report with the title Employers, the Security Console includes tasks with the following names.
-
Your Custom Reports - All Reports (Authorizes a user to view all the reports in the folder.)
-
Reports - Your Custom Reports - Employers (Authorizes users to access only this report in the folder.)
You must then use the Security Console to authorize users or groups to generate and view them. For more information, refer to Authorize Staff Members to Use Anthology Student Features.