Configure DocuSign Using Custom Connector
You can use the information on this page to configure the DocuSign custom connector required to automate the process of eSignature in Anthology Student for Faculty Workload contract management.
Prerequisites
You must have:
-
An account for DocuSign
-
Downloaded sample Microsoft Power Automate DocuSign solution for eSignature from GitHub (https://github.com/anthology-inc/faculty-workload-mgmt-flows) > 1.8/DocuSign folder > Power Automate Flows)
DocuSign Flows for eSignature
The following flows are required to automate the approval process in Anthology Student:
| Flow Name | Description |
|---|---|
|
Faculty eSignature Invite With DocuSign |
This flow will be triggered when you select the Send to Faculty button on the Faculty Contract Assignment & eSignature page. (Select the Processes tile > locate Faculty Workload > select Faculty Contract Assignment & eSignature.) The flow integrates with DocuSign to send the eSignature invite to the faculty member. |
|
Faculty eSignature Response With DocuSign |
This flow will be triggered automatically based on the faculty member’s eSignature response. |
Procedure to Configure DocuSign using Custom Connector
-
Log in as an authorized user to Power Automate environment.
-
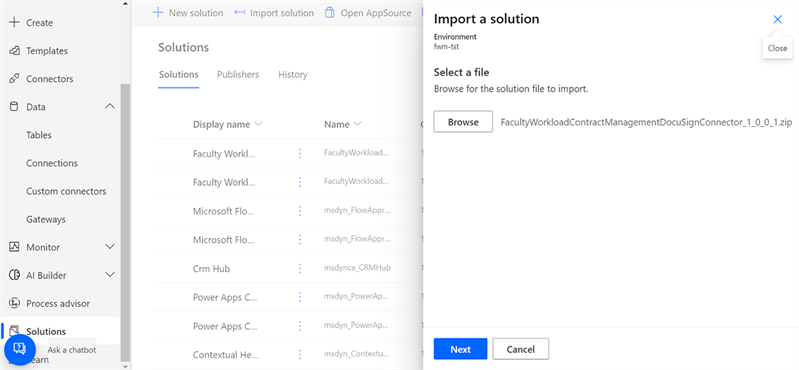
Navigate to Solutions and select Import Solution.
-
Browse and select the DocuSign Connector zip file and select Next.
-
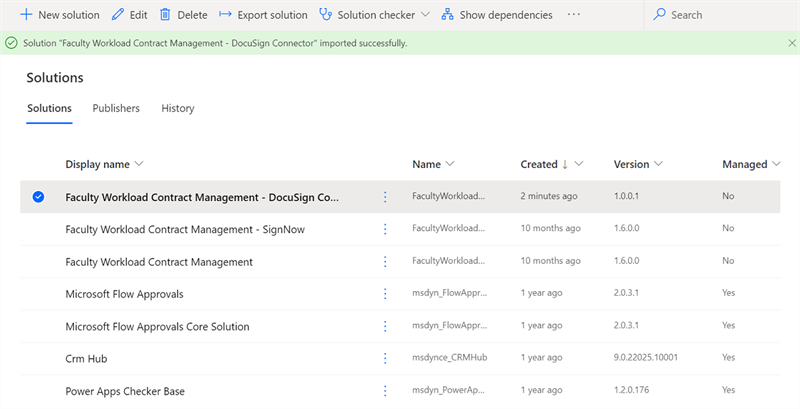
Upon successful import, the solution is listed in Faculty Workload Contract Management - DocuSign Connector
-
Select the solution to view the DocuSign Connector in the solution folder.

-
Select DocuSign Connector to view it under the Custom Connectors menu and select Edit.

-
Configure the DocuSign custom connector information in 5 tabs.
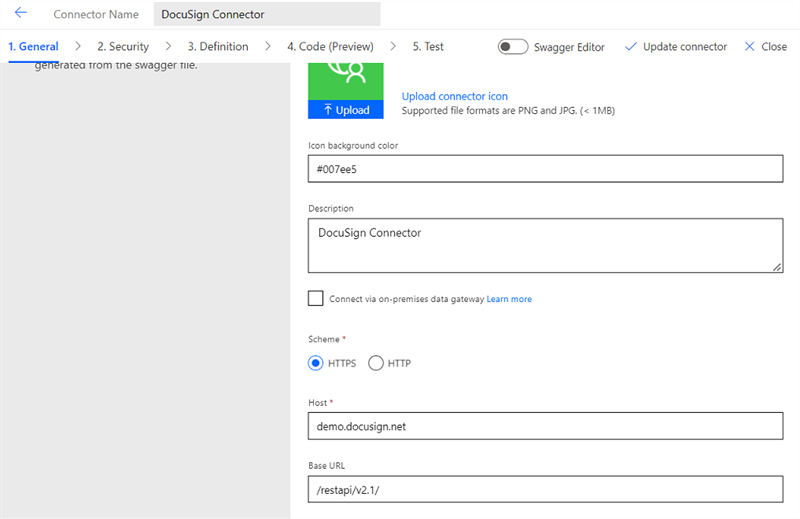
The DocuSign Host URL is specific to the user and region. Log in to the DocuSign admin panel and navigate to the Apps and Key page to view the user-specific Host and Base URL.
For more information, refer to https://developers.docusign.com/docs/esign-rest-api/go-live/after-go-live/
-
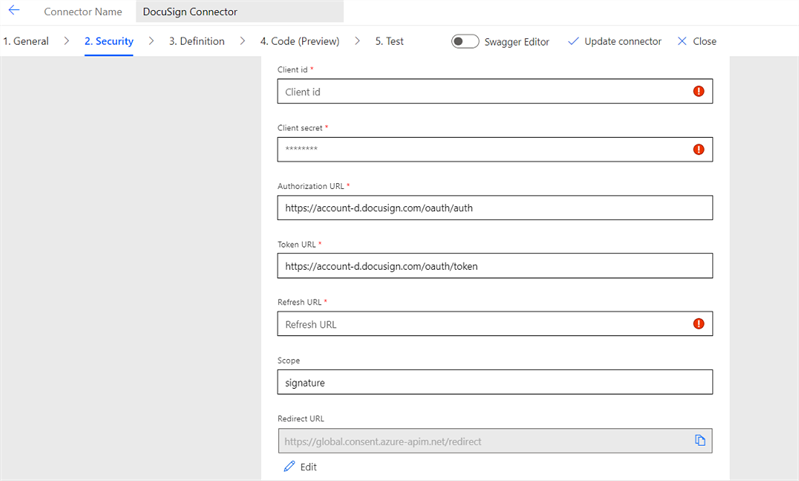
Navigate to the Security tab and complete the information:
-
Select Edit at the bottom of the OAuth 2.0 section. Enter the Client Id (DocuSign Integration Key) and Client Secret (DocuSign Secret Key), and select Update Connector to verify the:
-
Authorization URL: https://account.docusign.com/oauth/auth
-
Token URL: https://account.docusign.com/oauth/token
-
Refresh URL (Same as token URL): https://account.docusign.com/oauth/token
-
Scope: Signature

-
-
-
Copy the Redirect URL.
-
Open a DocuSign Developer account and navigate to apps and keys.
-
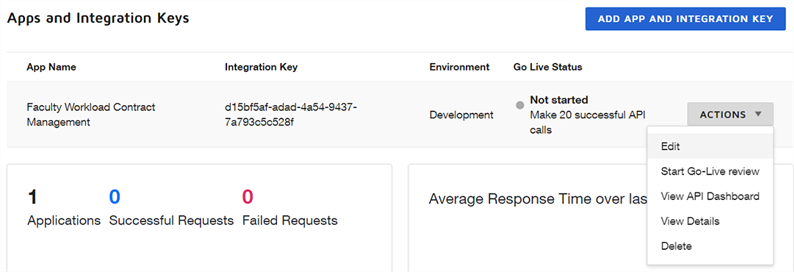
Under the Apps and Integration Keys section:
-
Select the App Name
-
Select the Actions button
-
Select the Edit Button
-
-
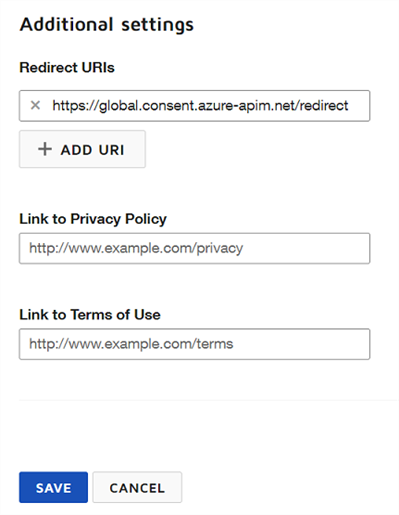
Under the Additional Settings section:
-
Select the Add URL button for Redirect URIs and paste the URI copied from Step 10 and select Save.
-
-
Navigate to the Power Automate application and complete the information in the:
-
Details and Code (Preview) tabs — Fill the details without modifying them.
-
Test tab — Select New Connection.
-
Select Allow Access.
If the DocuSign developer account is open in the same browser, the application prompts for login permission, else enter the DocuSign credentials to log in.
-
-
-
The connection is successfully created.
-
Select Update Connector to save the settings.