Run the Query
Once you have specified or modified the query and saved it, you can run the query to display the view.
When you create or edit a View in Anthology Student, the system generates an OData query using the selected entity properties/columns. The system limits the number of properties in the OData query to 90. Views will not be displayed and OData queries will not succeed when the limit is exceeded. Opening an existing View that exceeds 90 properties will redirect you back to the grid, where you must select Show Query and edit the properties. If necessary, contact Anthology Support for assistance to modify your custom Views or queries.
Access Method
Select the Views tile > Explore Views tile > select a View in the Views Explorer window.
Procedure to Run the Query
Select Run on the toolbar. If you:
-
Created a new view, the screen splits so that you can access both the query and the view. (The default format for a new view is grid.)
-
Modified an existing view, the screen is already split and the view type is updated with the changes you made to the query.
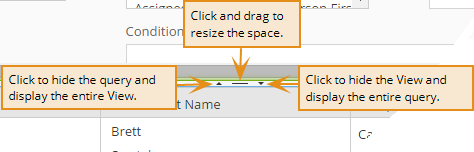
Additional Tasks for Working With Modules for the Query and View
The illustration shows options for working with the splitter.
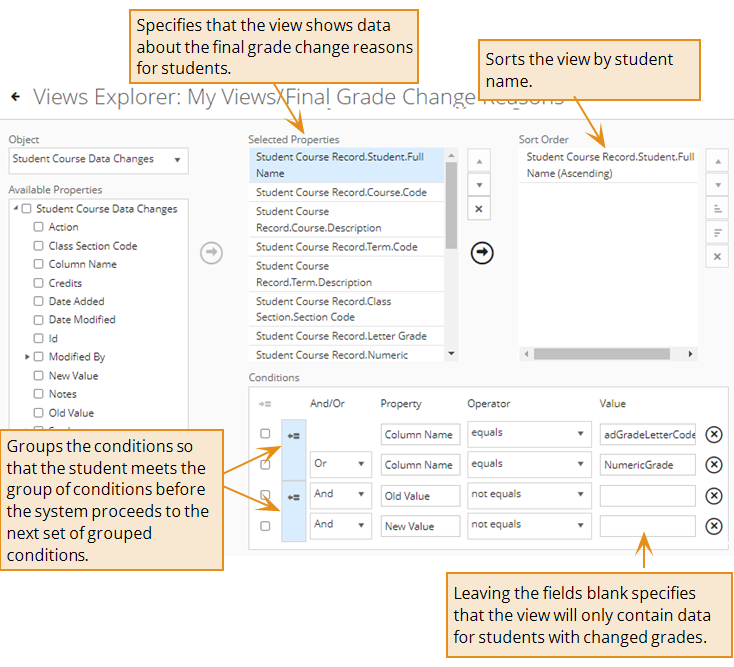
Example Queries for Custom Views
The following example shows a query used to view data for final grade change reasons.
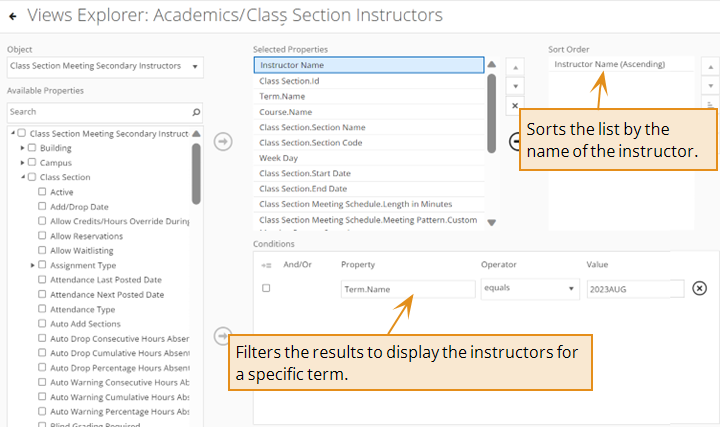
The following example shows a custom view that uses the Academics > Class Section Meeting Secondary Instructors object to provide details about the instructors assigned to the periods for class sections. It includes which day the instructors is teaching, the start and end dates, the meeting pattern, and meeting length.
If you create a view for class sections, filter the data in the query to the improve performance. For example, you can filter by term.
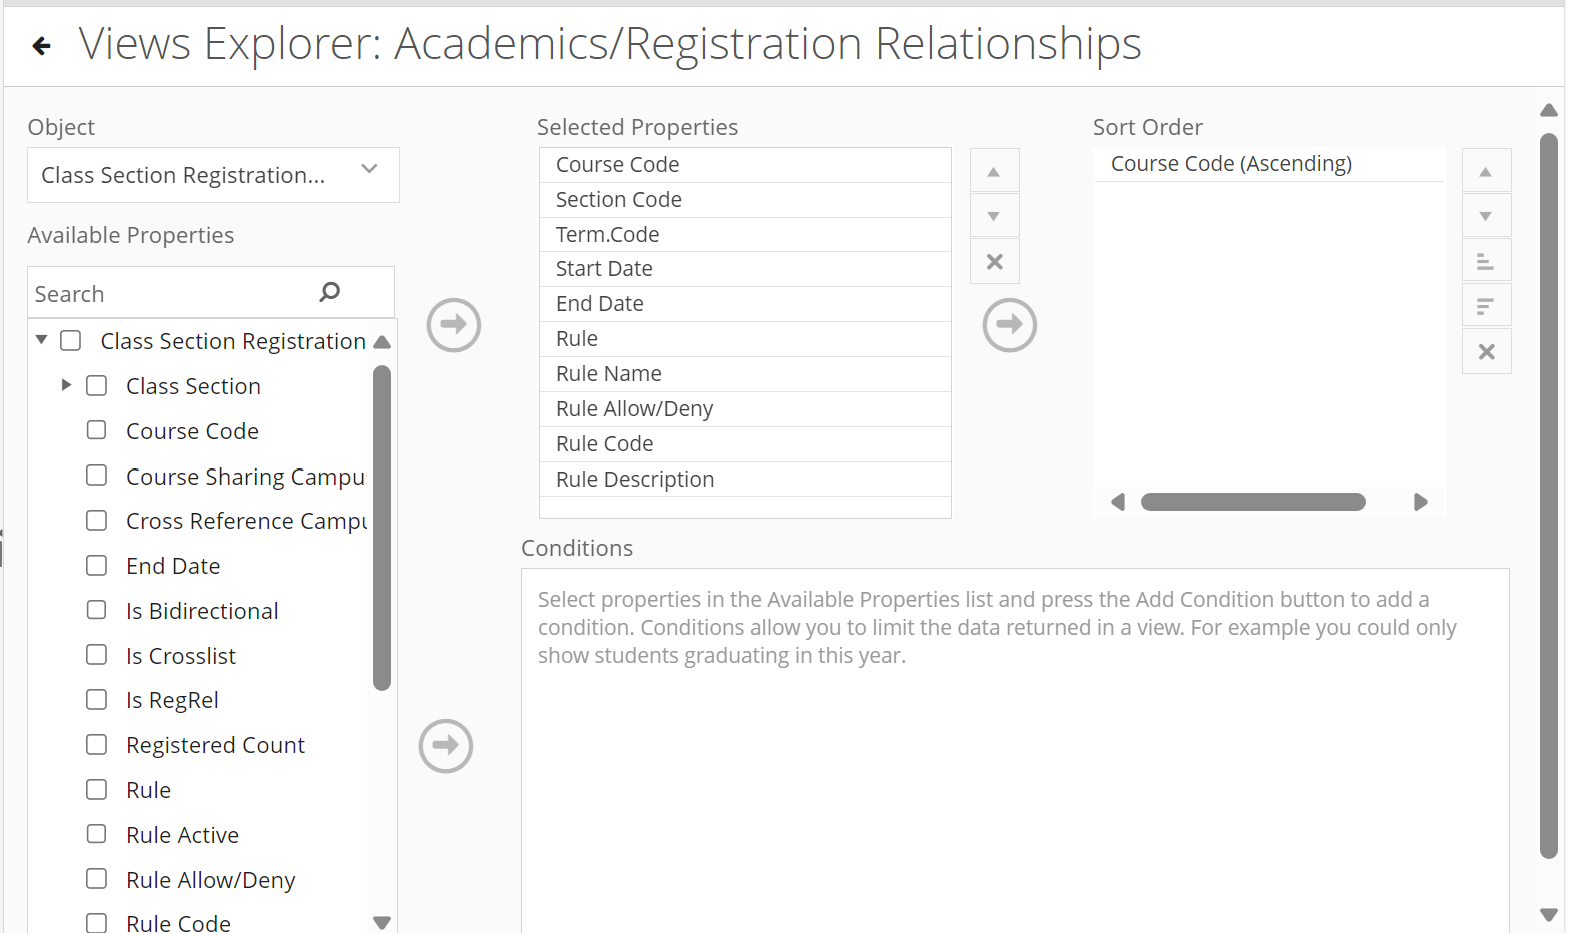
The following example shows a custom view that uses the Academics > Class Section Registration Relationships object to provide the registration relationships for class sections. It includes:
-
Basic information about the class section (such as the codes, terms, and start and end dates)
-
Information about the registration relationship rule (such as the name of the rule, whether it allows or denies registration, and the conditions specified in the rule)
You can export the view to Excel and PDF. In the exported files, the rule shows on one line.
To make the rule more readable in an Excel file, follow these steps.
-
In the Excel sheet, select Enable Editing.
-
Select the current sheet using the Ctrl + A keys.
-
In the toolbar, select Align Left and Wrap Text.
The rule will be shown on multiple lines with indentation. The numbering for the nested condition groups does not reflect the numbering shown in the interface. You should use the indentation to determine how the groups of conditions are nested.
PDF files cannot be modified.