Import the Faculty Workload Contract Management Solution
You can use the information on this page to understand how to import Faculty Workload Contract Management Microsoft Power Automate sample solution version 1.6.0 or later in Anthology Student for Faculty Workload contract management. This solution consists of only approval flows.
Prerequisites
You must have downloaded the sample Microsoft Power Automate solution for contract management from GitHub (https://github.com/anthology-inc/faculty-workload-mgmt-flows) > 1.6 folder > FacultyWorkloadContractManagement_1_6_0_0.zip.
Procedure to Import the Faculty Workload Contract Management Solution
-
In Office 365, open Power Automate at https://www.office.com/.
-
Select the Environments menu on the top right and choose the desired environment where the sample Power Automate flows need to be imported.
-
In the left pane, select Solutions.
-
In the top menu, select the Import button. Microsoft Power Automate displays the Import a solution pane. Select the Browse button and select the Faculty Workload Contract Management sample solution file from the appropriate location, which was downloaded from GitHub, and select the Next button.
-
Verify the solution details displayed and select the Next button.
-
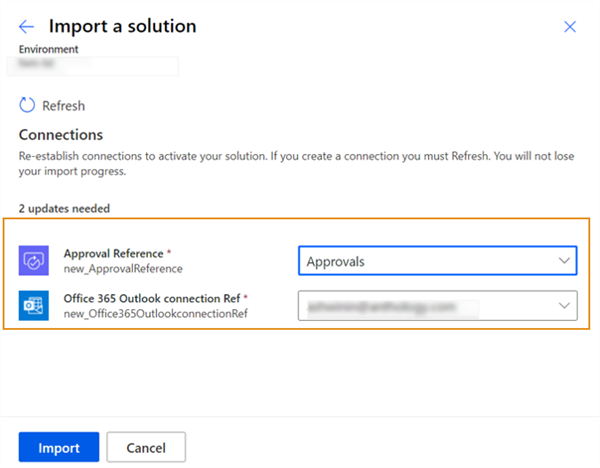
In Connections > Office 365 Outlook connection Ref, select New Connection. Microsoft Power Automate opens a new browser window.
-
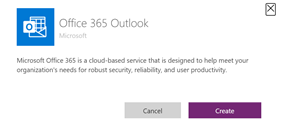
In the Office 365 Outlook pop-up, select the Create button.
-
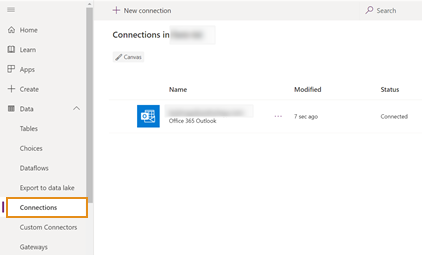
Select or add an account to login. This account will be used to send emails from the flow. In the Connections pane, the dashboard displays an Office 365 Outlook pop-up, which it closes automatically and displays the connection information.
-
In the previous browser window, select the Refresh button in the Apply Changes pop-up. Microsoft Power Automate updates your new connection information in the Office 365 connection Refs drop-down list.
-
In Connections > Approval Reference, select New Connection. Microsoft Power Automate opens a new browser window with a dialog.
-
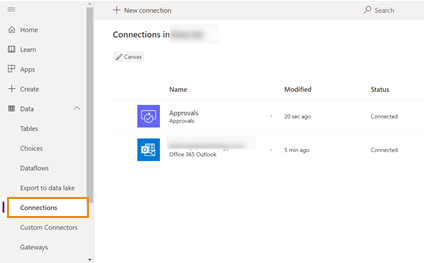
In the Approval dialog, select the Create button. In the Connections pane, the dashboard displays an Approvals pop-up that closes automatically and displays the connection information.
-
In the previous browser window, select the Refresh button in the Apply Changes pop-up. Microsoft Power Automate updates your new connection information in the Approval Reference drop-down list.
-
Select the Import button. Microsoft Power Automate successfully imports the solution.
-
Verify the content of the Faculty Workload Contract Management solution.
Contents of the Solution Must Be Faculty Contract Approval flow Faculty Contract Template Approval flow Approval reference Outlook connection references