Configure Adobe Sign Flows Using Microsoft Power Automate
You can use the information on this page to configure the Adobe Sign flows required to automate the process of eSignature in Anthology Student for Faculty Workload contract management.
Prerequisites
You must have:
-
Account for Adobe Sign
-
Downloaded sample Microsoft Power Automate Adobe Sign solution for eSignature from GitHub (https://github.com/anthology-inc/faculty-workload-mgmt-flows) > 1.6 folder > FacultyWorkloadContractwithAdobeSign_1_6_0_0.zip.
Adobe Sign Flows for eSignature
The following flows are required to automate the approval process in Anthology Student:
| Flow Name | Description |
|---|---|
|
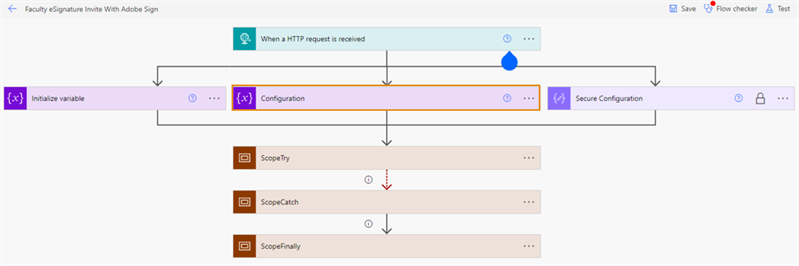
Faculty eSignature invite with Adobe Sign |
This flow will be triggered when you select the Send to Faculty button on the Faculty Contract Assignment & eSignature page. (Select the Processes tile > locate Faculty Workload > select Faculty Contract Assignment & eSignature.) The flow integrates with Adobe Sign to send the eSignature invite to the faculty member. |
|
Faculty eSignature Response with Adobe Sign |
This flow will be triggered automatically based on the faculty member’s eSignature response. |
Procedure to Configure eSignature Adobe Sign Flows
-
Under Faculty Workload Management solution, select either:
-
Faculty eSignature invite with Adobe Sign, or
-
Faculty eSignature Response with Adobe Sign
Microsoft Power Automate opens the selected flow in a new tab/ browser window.
-
-
Select the Edit (
 ) button. Microsoft Power Automate opens the selected flow in edit mode.
 -
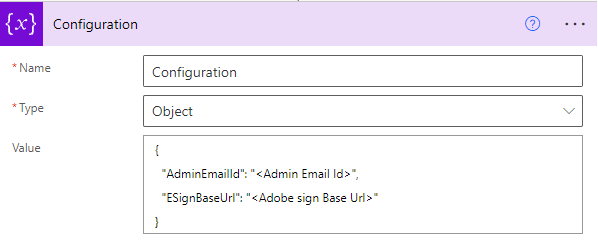
Expand the Configuration action box.
-
In the Value field, replace the placeholder value with an appropriate value. You can also add multiple email IDs separated with semicolons.
For example:
{"AdminEmailId": "YouremailId-1@yourdomain.com; YouremailId-2@yourdomain.com","EsignBaseUrl": "https://api.in1.adobesign.com"}Fields Actions AdminEmailIdSpecify the email IDs of the administrators who would receive flow success and failure notifications. EsignBaseUrlSpecify the Adobe Sign production URL. For example, https://api.in1.adobesign.com. -
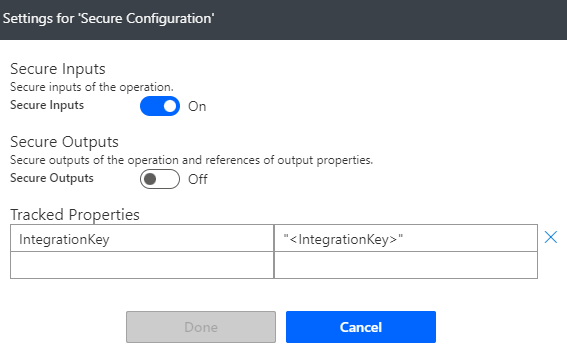
Expand the Secure Configuration action box. Select … and select Settings.

-
In Tracked Properties, configure the Integration Key. For more information, refer to https://helpx.adobe.com/sign/kb/how-to-create-an-integration-key.html.
- Select the Save button. Microsoft Power Automate saves the flow changes.