Document and Report Parameters
You can create custom reports using the following methods.
-
Using the SSRS Parameter Pane and datasets
-
Using the Anthology Parameter Pane and OData entities and OData queries that use the Query Model for Anthology Student
Important: When you create or edit a View in Anthology Student, the system generates an OData query using the selected entity properties/columns. The system limits the number of properties in the OData query to 90. Views will not be displayed and OData queries will not succeed when the limit is exceeded. Opening an existing View that exceeds 90 properties will redirect you back to the grid, where you must select Show Query and edit the properties. If necessary, contact Anthology Support for assistance to modify your custom Views or queries.
Similar to the predefined reports in Anthology Student, you can also easily include a list of the selection criteria at the end of the report.
Determining the Method to Use
Benefits of the method that uses the Anthology Parameter Pane and OData include:
-
Better performance
-
Lists can be searched and are paginated
-
Values in lists are displayed based on the login for the staff member (For example, the Campus list will automatically be filtered to show the campuses where the staff member is authorized.)
We recommend you use the Anthology Parameter Pane for parameters that require queries such as:
- Campuses
- Program Versions
You can continue to use datasets for parameters that have specific values and that do not require OData queries (such as parameters that have Yes or No values or a static list of values). For example, you can continue to use data sets for:
- Include Transcripts on hold
- Date of Birth Month
Process to Use the Anthology Parameter Pane
To use the Anthology Parameter Pane, you:
-
Must first add the report parameter for the Anthology Parameter Pane to the report
-
Can then add report parameters that specify the OData entity or query that populates the field in the selection criteria for the report
Add the Report Parameter for the Anthology Parameter Pane
To use OData and the Anthology Parameter Pane, you must create a hidden report parameter with the following name and prompt for each report. This parameter name is case-sensitive.
• useCmcSelectionPane
The table shows the values you must select in the Report Parameter Properties dialog.
| Tab | Value You Must Select or Specify |
|---|---|
| General |
• Boolean in the Data Type list • Hidden radio button |
| Available Values |
None (The tab is for datasets and is not used for the Anthology Parameter Pane.) |
| Default Values |
• Specify values • True in the first Value field |
Anthology Student ignores the datasets for parameters that are configured with the Get value from a query radio button selected. For example, if you select the radio button for Campuses or Program Versions. If there is a matching OData entity, Anthology Student will use OData queries to show the drop-down list.
If you also specify the datasets, they are still executed when the report is generated. This can negatively affect performance. It is recommended that you do not select the radio button or specify datasets for parameters that have OData queries.
To pass the user context (ID of the User executing the report – SyStaff.SyStaffId), you must create a hidden report parameter with the following name and prompt in the required report.
• UserId
The parameter name is case-sensitive and therefore should be in the same case as specified above.
The table shows the values you must select in the Report Parameter Properties dialog.
| Tab | Value You Must Select or Specify |
|---|---|
| General |
• Text in the Data Type list • Hidden radio button |
| Available Values | None |
| Default Values | None |
Guidelines for Report Parameters for OData Entities for Lists
Once you have created the useCmcSelectionPane parameter, you can add report parameters for entities in the Query Model for Anthology Student. For example, you can add a drop-down that displays all the campuses for the Campus entity.
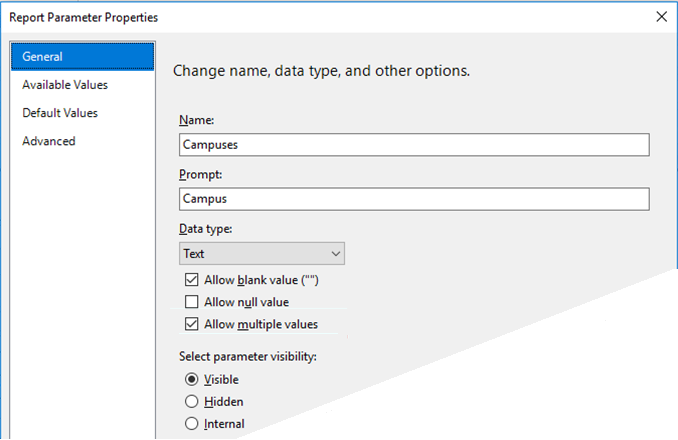
When you add the report parameter, you must specify the name of the OData entity in plural. For example, for the Campus entity, you must specify Campuses as the name.
The remaining values can vary and will depend on your report. For example, you can decide whether or not to make the parameter mandatory in the Anthology parameter pane based on the Allow blank value selection. If you enable the Allow blank value check box, the parameter is not made mandatory, which is otherwise treated as mandatory in the Anthology parameter pane.
The illustration shows an example for the Campus entity.
Guidelines for Report Parameters for OData Queries for Lists
In some cases, you might need to add report parameters that are not mapped directly to an entity or will display a list that needs to be filtered. For example, you might want to filter the Campus list so that it only contains active campuses, or you might want to filter Terms based on the campuses selected in the Campus list. In those cases, you can specify an OData query.
To add a list that is populated using a query, you must create 2 report parameters.
-
The first report parameter specifies the name and properties for the list that is displayed in the Anthology Parameter Pane
-
The second report parameter specifies the OData query and its properties linked to the first parameter
The second parameter must:
-
Follow the report parameter that is displayed
-
Be prefixed with the name of the report parameter it populates and have a suffix of Query
For example, for the Campus entity, you would create:
-
The first report parameter with the name Campuses and a prompt of Campus
-
A second report parameter with the name CampusesQuery
The table shows the remaining requirements for the parameters on the Report Parameter Properties dialog.
| Type of Parameter | Tab | Action to Take |
|---|---|---|
| First parameter that is displayed and populated using the query | General |
Select the: • Allow multiple values check box • Visible radio button |
| Available Values | None (The tab is for datasets and is not used for the Anthology Parameter Pane.) | |
| Default Values | None | |
| Second report parameter for the query | General |
Select the: • Allow multiple values check box • Internal radio button |
| Available Values |
None (The tab is for datasets and is not used for the Anthology Parameter Pane.) |
|
| Default Values |
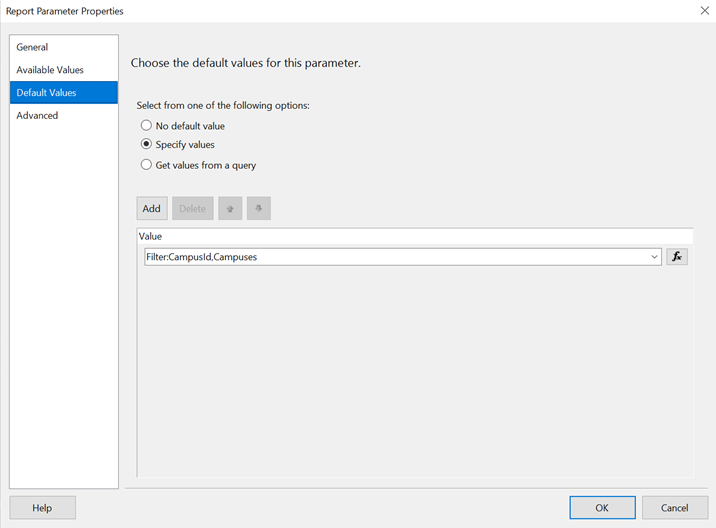
• Select the Specify values option • In the first Value field, specify the OData query.
• In the second Value field, specify the prompt you want displayed. • In the last Value field, specify the property in the entity that you want to be selectable in the list. |
The example shows the query and values specified for the TermQuery parameter in Report Designer in Microsoft Visual Studio.
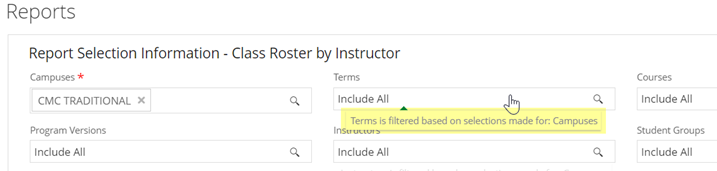
In this case, a tooltip is also shown in the Anthology Parameter pane to explain that the Term list is filtered based on the selections in the Campus parameter.
In case you create a custom report that has the user Session defaults parameter of the report in Anthology Student using the Anthology Parameter Pane. We have several filter criteria where you can select multiple values from the multi-select control, such as Campus, Term, and so on. These multi-select controls have at least three properties (ID, Code, and Name). Based on the selected values, the name or code is displayed in the control. For Campus, the default display option is Name, whereas for Term, the default display option is Code.
The report selection criteria dynamically builds the controls, based on the parameters defined in the SSRS report. If we need to automatically select values for any filter (control in the selection criteria), the values for that filter must be configured in the SSRS report.
For example, Term filter; if you select multiple Terms from the Term selection criteria, the Term filter control displays the selected Term codes based on the selected Term IDs. You must bind the Term IDs to display the selected Term Codes, and the SSRS report must use the ID of the term. If you bind the Term filter by Code and Name, Anthology Student displays a blank value in the selection criteria.
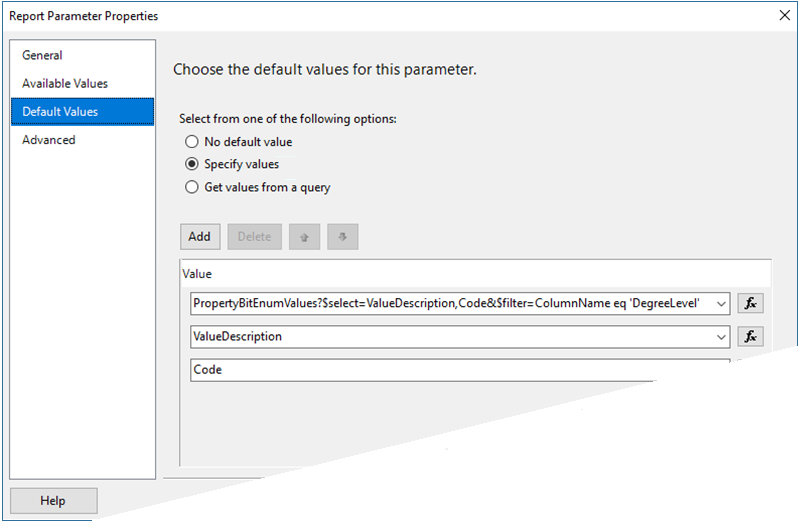
The example shows the query and values specified for the DegreeLevelQuery parameter in Report Designer in Microsoft Visual Studio.
Additional Information for the Query Model
For additional information about the Query Model for Anthology Student, see https://help.anthology.com/Content/DocSets/CNSDocSet.htm and select Object Library.
Enable Save Student Group and Export to Excel Options in the Parameter Pane for Custom Reports
In some cases, you might want to :
-
Create a Student Group based on the filter criteria used in the report
-
Provide an option to export the report data to Excel for additional analysis
You can enable the Save Student Group and/or Export to Excel buttons on the Anthology Parameter Pane to perform the above operations for the custom reports.
Save Student Group Option
The Save Student Group option in the Anthology Parameter Pane only allows you to create a Static Student Group.
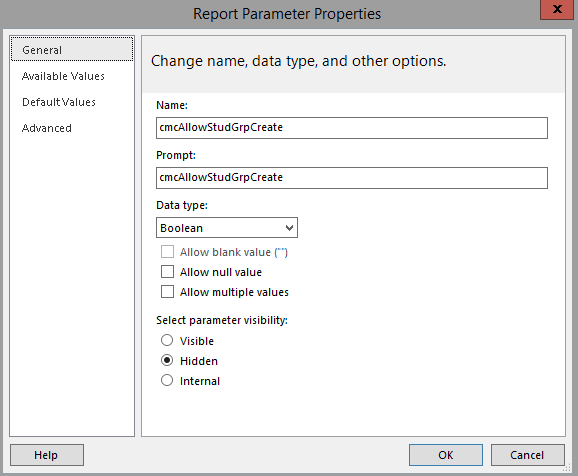
To enable the Save Student Group button, you must create a hidden report parameter with the following name and prompt for each report. This parameter name is case-sensitive.
cmcAllowStudGrpCreate
The table shows the values you must select in the Report Parameter Properties dialog.
| Tab | Value You Must Select or Specify |
|---|---|
| General |
• Boolean in the Data Type list • Hidden radio button |
| Available Values | None |
| Default Values |
• Specify values • True in the first Value field |
The illustration shows the General tab settings for the cmcAllowStudGrpCreate parameter.
Create Export to Excel Option
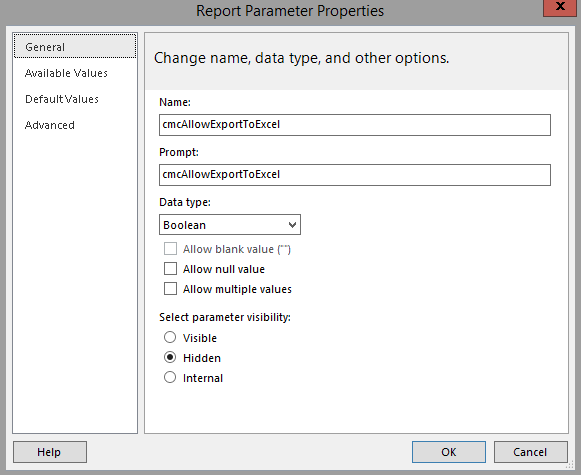
To enable the Export to Excel button, you must create a hidden report parameter with the following name and prompt for each report. This parameter name is case-sensitive.
cmcAllowExportToExcel
The table shows the values you must select in the Report Parameter Properties dialog.
| Tab | Value You Must Select or Specify |
|---|---|
| General |
• Boolean in the Data Type list • Hidden radio button |
| Available Values | None |
| Default Values |
• Specify values • True in the first Value field |
The illustration shows the General tab settings for the cmcAllowExportToExcel parameter.
Additional Guidelines
Once you have created the above parameters, follow these guidelines:
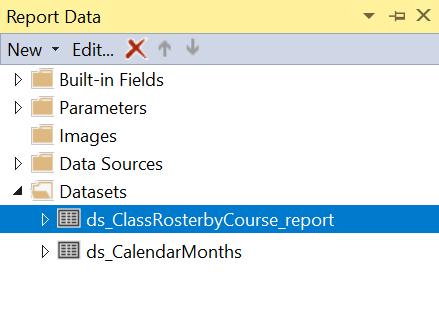
-
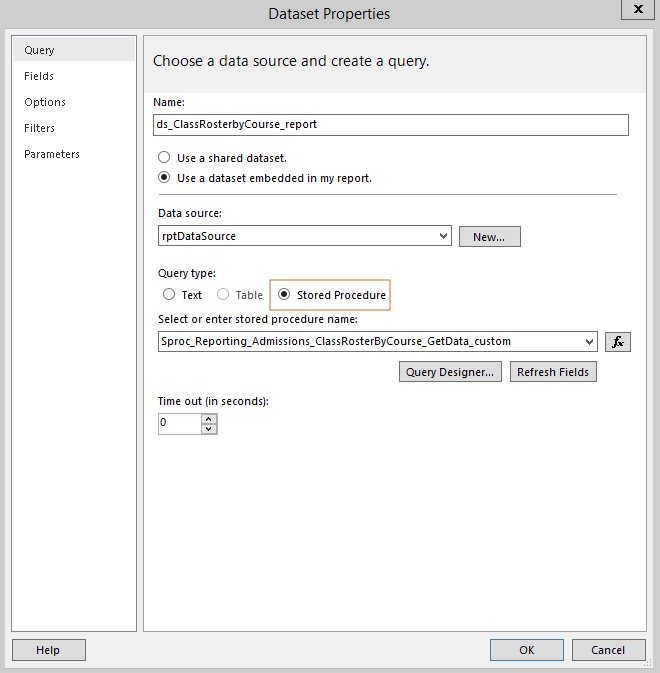
The first dataset in the SSRS report (.rdl file) should be the main dataset for the report. The Anthology Parameter pane looks for the details of the first dataset. For example, Query, Fields and the Parameters section.
-
In the Query section, select the Stored Procedure option for Query Type.
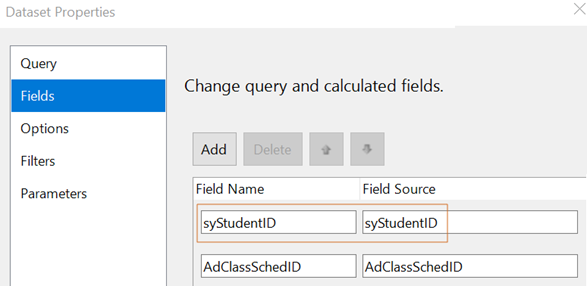
- In the Fields section, for the Save Student Group option, the fields of the dataset output should contain a field SyStudentID.
The SyStudentID field values must contain the Student IDs from the SyStudent table and these Student IDs will be added to the Student Group created using the Save Student Group option.
-
In the Parameters section, the dataset’s stored procedure parameter names should match the SSRS report parameter names.
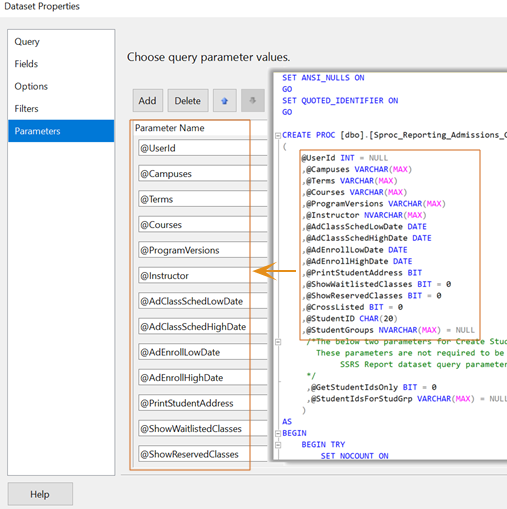
For the Save Student Group option, the stored procedure must contain two additional parameters:
Parameter Name Datatype Input/Output type Initialized Value @GetStudentIdsOnly BIT Input 0 @StudentIdsForStudGrp VARCHAR(MAX) Output NULL 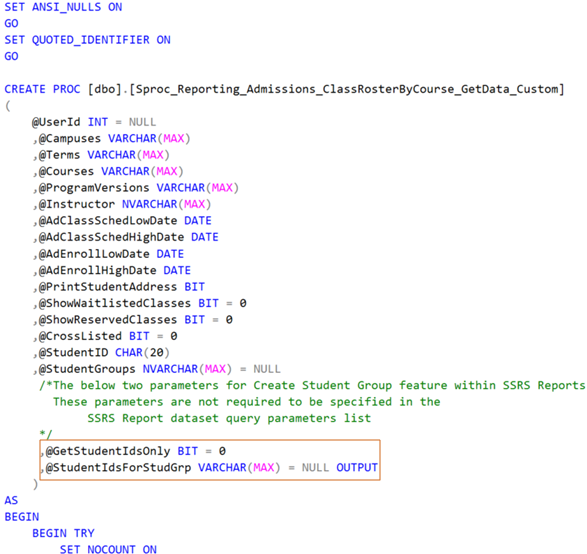
Add the List of Selection Criteria
You can automatically generate a list of the selection criteria in the report similar to the list included in the predefined reports in Anthology Student. If you want to add the list, create a hidden report parameter with the following name and prompt for each report.
filterDescription
The table shows the remaining values that you must select in the Report Parameter Properties dialog.
| Tab | Options You Must Select |
|---|---|
| General |
• Text in the Data Type list • Allow blank value ("") text box • Allow null value check box • Hidden radio button |
| Available Values | None |
| Default Values | None |
You must also add the following expression to the report at the location in the report where you want the list to be displayed.
=Replace(Replace(Parameters!filterDescription.Value, ";", vbCrLf),"-: ", vbTab & ": ")
Additional Information About SSRS
If you are new to SSRS or need additional information, see https://msdn.microsoft.com/en-us/library/ms159106.aspx.