Extended Properties
You can use the Extended Properties page to manage the custom properties that your institution chooses to include in the entities.
You must open an individual record to add or edit an extended property for each entity in following table.
| Module or Category | Entity Type | Location |
|---|---|---|
| Academic Records | Area of Study | Select the Configuration tile > expand Academic Records > select Area of Study > select the New button and specify the general information or select an existing area of study name in the list. |
| Buildings |
Select the Configuration tile > locate Academic Records > select Buildings. |
|
| Course Book |
Select the Configuration tile > expand Academic Records > select Courses. |
|
| Course Book List | Select the Configuration tile > expand Academic Records > select Courses. | |
| Location | Select the Configuration tile > expand Academic Records > select Locations. | |
| Program | Select the Configuration tile > expand Academic Records > select Programs. | |
| Program Version | Select the Configuration tile > expand Academic Records > select Programs > select the name of the program in the list > select the New button and specify the general information or select an existing program version in the list. | |
| Student Academic Status History | Select the Students tile > select the name in the Students list > expand Academic Records > select the Student Status History tile. | |
| Student Course | Select the Students tile > select the name in the Students list > expand Academic Records > select the Student Courses tile. | |
| Student Enrollment Period | Select the Students tile > select the name in the Students list > expand Academic Records > select the Enrollments tile. | |
| Admissions | College |
Select the Configuration tile > expand Admissions > select Colleges. |
| High School | Select the Configuration tile > expand Admissions > select High Schools. | |
| Applicant | Select the Students tile > select the name in the Students list > expand Admissions > select the Student Applications tile. | |
| Student Previous Education | Select the Students tile > select the name in the Students list > expand Admissions > select the Previous Education tile. | |
| Career Services | Skill | Select the Configuration tile > expand Career Services > select Skills. |
| Certification | Select the Configuration tile > expand Career Services > select Certifications. | |
| Contact Manager | Student Agency Branch | Select the Students tile > select the name in the Students list > expand Contact Manager > select the Agency Affiliations tile. |
| Student Groups Membership | Select the Students tile > select the name in the Students list > expand Contact Manager > select the Group Memberships tile. | |
| Document Type | Select the Configuration tile > expand Contact Manager > select Documents. | |
| Document | Select the Students tile > select the name in the Students list > expand Contact Manager > select the Documents tile. | |
| Financial Aid | Student Award | Select the Students tile > select the name in the Students list > expand Financial Aid > select the Awarding tile > Awards tab. |
| Fund Source | Select the Configuration tile > expand Financial Aid > select Fund Sources. | |
| Student Accounts | Student Ledger Card Transaction | Select the Students tile > select the name in the Students list > expand Student Accounts > select the Ledger Card tile. |
| Student Subsidiary Account Transaction | Select the Students tile > select the name in the Students list > expand Student Accounts > select the Subsidiary tile. | |
| Student Bank Account | Select the Students tile > select the name in the Students list > expand Student Accounts > select the Payment Information tile. | |
| Student Credit Card | Select the Students tile > select the name in the Students list > expand Student Accounts > select the Payment Information tile. | |
| Transaction Code | Select the Configuration tile > expand Student Accounts > select Transaction Codes. | |
| System | Campus | Select the Settings tile > expand System > select Campuses. |
| Staff | Select the Settings tile > expand System > select Staff. | |
| Scheduling | Class Section | Select the Class Scheduling tile. |
| Student Services | Student Indicators | Select the Students tile > select the name in the Students list > expand Student Services > select the Indicators tile. |
There are two options for creating custom fields in Anthology Student. The method you select depends on the type of custom field and the level of security you want to define for the custom field.
| Option in Settings > System | Type of Custom Field | Where Used | How Field is Secured |
|---|---|---|---|
| School Defined Fields | Fields for student information | School Fields tiles from the Student Profile |
View and edit authorizations are configured for modules when the field is added. For example, if only View is specified for Academic Records, the field can only be viewed on the School Fields tile under Academic Records. For a staff member to view and edit, the staff member must also have view or edit authorization for the School Fields page. |
| Extended Properties | Fields for properties for specific entities (such as fields for student enrollments, staff, program versions, and document types) | Varies by entity type. For example, a property for student enrollment is displayed when you add or edit a student enrollment from the Enrollments tile. |
If the property is configured to require authorization, the view and edit authorizations are specified for the groups of staff members defined in the Anthology Student Security Console. For a staff member to view and edit, the staff member must: • Have view and edit authorization for the page • Be in one or more groups with view or edit authorization |
You can also use the page to display the records for the entities where an extended property is specified along with the value.
Prerequisites
To view the page, you must have System - Settings - Extended Properties - View authorization.
Access Method
Select the Settings tile > expand System > select Extended Properties.
Actions Available
Columns
Display Records That Use Extended Properties
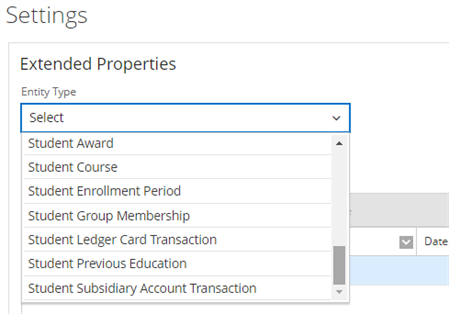
-
Select an Entity Type
 .
. 
-
Select a record in the list.
-
Select the Field Usage button on the toolbar.
If there are values specified for the field, Anthology Student displays a dialog with the details where the value is specified.
-
Review the following values.
-
Select the OK button.