Filter the Data in Lists and Grids
You can filter lists and grids. For example, in the Tasks list you can filter the list so that only the tasks due in the next week are displayed.
The data in views and lists is automatically filtered so that the data displayed is for the campuses (CampusIds) that are associated with your user ID. For example, if your user ID is associated with three campuses, the views and lists will contain data for those three campuses.
If you make modifications to a list or grid, Anthology Student retains the modification or change made to the column width, column visibility, sorting, filtering, grouping and paging (persistence). Anthology Student supports persistence even after you have signed out of Anthology Student.
To remove persistence, select the ![]() icon in the toolbar > click Clear All option.
icon in the toolbar > click Clear All option.
Methods for Filtering Data in Lists
There is more than one method for filtering lists.
| Where Available | Method | Benefits and Limitations | When You Have to Reapply the Filter |
|---|---|---|---|
| Almost all lists and grids | Use the Filter command on a column |
• You can select a maximum of two. You must select OR instead of AND. • Filters you specify in the Filters box override and remove the column filters. |
If you remove the filter or click the Settings icon on the toolbar and select either: • Clear All • Clear Filters |
Use the Show|Hide Filters icon ( ) on the toolbar ) on the toolbar |
|||
| Some lists |
Use the Filters box displayed by default when you access the list |
• Properties that you can filter are predefined, but frequently used. • You can select multiple values in the list (such as four or eight values). |
If you: • Remove the filter • Sign out of Anthology Student and sign in again (Your filters are saved if you leave and return to the list in the same session.) |
Procedure for the Method That Uses the Filter Command on a Column
-
In the column heading, click the down arrow (
 ).
). 
-
Select the Filter command.
-
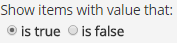
Complete the dialog and click the Filter button. For columns that contain True or False, the dialog contains options for filtering on one of the two values. For all other columns, the dialog is similar to the one shown in the illustration.

The grid is filtered and the down arrow is highlighted to indicate there is filtering on the column.
Procedure for the Method That Uses the Show|Hide Filters Icon on the Toolbar
-
Select the Show|Hide Filters icon (
) on the toolbar. -
Click the
 under the column heading and select the operator.
 -
In the field, specify the value.
-
Press Enter.
Procedure for the Method That Uses the Filters Box on the List
-
Specify or select the values in the Filters box.
-
Click the Apply Filters button.
-
To close the Filters box, either click the:
-
X in the top, left corner of the box
-
Hide Filters button on the toolbar
The Show Filters command is displayed on the toolbar so that you can redisplay the box if you need to remove or modify the filters.
-
Details About Specifying the Filter Values for Both Methods
The table shows the actions you can take for the different fields for values.
| Field for the Value |
Action to Take |
Where Available | ||
|---|---|---|---|---|
| Filters Box | Filter Command on Column |
Show|Hide Filters Icon on the Toolbar |
||
|
|
Specify a name or string. Some columns contain names or strings with a comma separating the 2 strings (such as Lastname, Firstname). If the column contains names or stings separated by a comma and you: • Know the full name or string, specify the name or sting with the comma and the Is equal to operator • Only know part of the name, specify the part of the name and the Contains operator |
X |
X |
X |

|
Either: • Specify a date in the format MM/DD/YYYY • Click the calendar icon and select a date |
X |
X |
X |
|
|
Either: • Specify a value • Click the up and down arrows and select a value from the list |
X |
|
|
|
Select the option. To display both options in the grid: 1. Select is false and the Filter button. 2. Then, return to click the Clear button. |
|
X |
X |

Additional Tasks for Filtering
| Where Available | Method | Task | Action to Take |
|---|---|---|---|
| All lists | Filter command on a column | Display and hide the filters above the columns |
Click the Show|Hide Filters icon ( When you show and then hide filters, any customizations you made to the columns shown in the list are removed and the default columns are redisplayed. |
| Remove the filter for a specific column |
1. In the column heading, click the down arrow ( 2. Select the Filter command and click the Clear button on the dialog. |
||
| Reset the filters to their defaults on all columns |
1. Click the Settings icon ( 2. Select the Clear Filters command. |
||
| Reset the filters to their defaults on all columns and remove all the groupings from the list |
1. Click the Settings icon ( 2. Select the Clear All command. |
||
| Some lists | Filters box displayed by default when you access the list | Display and hide the Filters box | Click the Show Filters | Hide Filters button on the left side of the toolbar. |
| Remove all filters specified in the Filters box | In the Filters box, click the Clear Filter button. |
 ) on the toolbar.
 You cannot filter or sort properties that contain free-form text (such as notes). For example, you cannot filter or sort on:
- Building.Note
- ClassSectionLesson.Note
- Course.Note
- FundSource.Note
- HighSchool.Note
- HighSchool.DrivingDirections
- Lender.Note
- StudentAward.Note
You cannot filter or sort on properties that are calculated from information in database fields.